
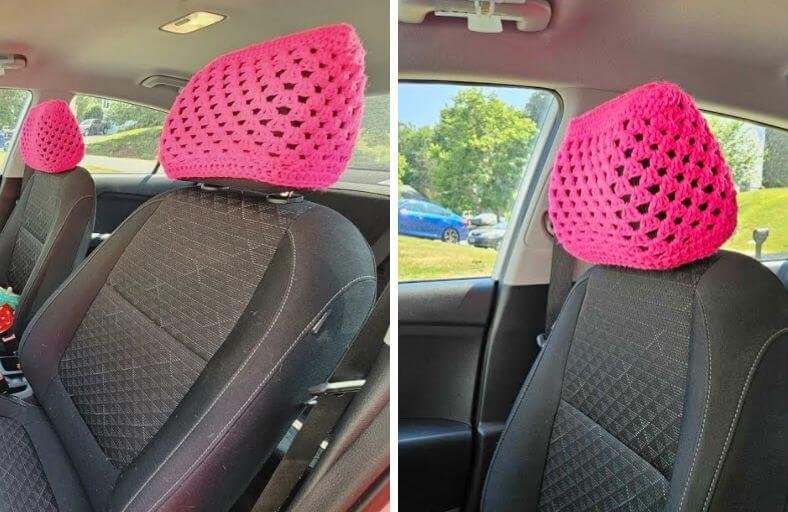
Is your car interior feeling a little plain, or are you tired of hair products and everyday friction wearing down your vehicle’s headrests?
Adding a splash of handmade charm to your ride is easier than you think!
These bright, textured headrest covers are the ultimate weekend project: quick to work up, incredibly practical, and instant eye candy for your front seats or even a wheelchair backrest.
Materials and Preparation
Materials:
- Yarn: Premier Yarns Everyday Anti-Pilling Acrylic (100% Anti-Pilling Acrylic, Worsted Weight, 3.5 oz / 100 g) in the shade Lemon (or any color of your choice). You will need about 2 skeins if you plan to make a matching pair for both front seats.
- Note on Fiber: Anti-pilling acrylic is highly recommended over basic acrylic or cotton. Constant rubbing from hair clips and movement won’t cause fuzzy pills, and if fuzzies form, they wash off easily in the laundry without fading under harsh sun rays.
Tools:
- Crochet Hook: Size 5.5 mm (US I-9) crochet hook (or any hook between 5.0 mm to 6.5 mm that achieves your desired stitch texture).
- Yarn Needle: Tapestry needle for weaving in ends.
- Scissors: Standard craft scissors.
- Measuring Tape: To measure your headrest dimensions prior to starting.
Preparation Notes:
- Measure the top width of your headrest (facing the ceiling) as well as the height from top to bottom before chaining.
- Keep your tension slightly snug so the finished cover fits firmly over the headrest without slipping off.
Abbreviations and Notes
Abbreviations:
- ch: chain
- sc: single crochet
- hdc: half double crochet
- dc: double crochet
- hdc2tog: half double crochet two together (hdc decrease)
- sl st: slip stitch
- st(s): stitch(es)
- sp: space
Pattern Notes:
- The main body of the cover uses a classic Granny Cluster stitch worked in continuous oval rounds around the initial foundation chain.
- Rows are joined with a slip stitch, and each new granny round begins by slip-stitching back into the space between clusters.
- No chain spaces are worked between granny clusters (
3 dc) to keep the fabric dense, sturdy, and less gappy.
Gauge, Approximate Size, and Pattern Notes
Gauge:
Gauge is not critical for this pattern because it is fully customized to your specific vehicle measurements.
Finished Size:
- Fits standard car seat headrests measuring approximately 9 in x 9 in (22.8 cm x 22.8 cm).
- Easily adjustable for larger headrests or wheelchair backs.
Special Techniques:
- Oval Foundation Setup: Working along both sides of the foundation chain to create a seamless crown for the top of the headrest.
- Granny Cluster Shaping: Transitioning from solid double crochet to 3-dc clusters worked directly into spaces.
- Cinched Edging: Incorporating subtle hdc decreases around the bottom rim to hug the underside of the headrest securely.
Step-by-Step Pattern
Part 1: Top Crown Foundation
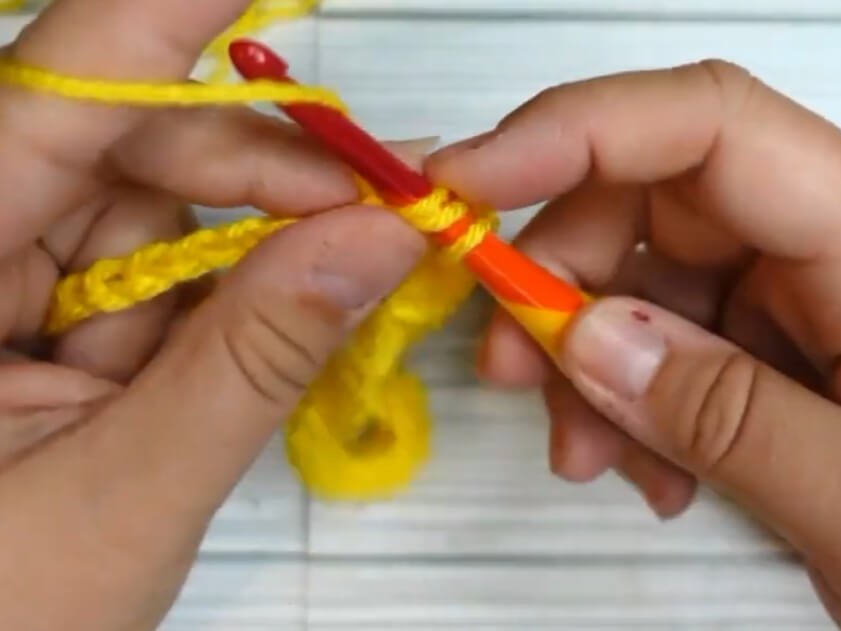
Ch 30 (or a chain length measuring approximately 8 to 9 inches / 20–23 cm to match your headrest top width):
- R1: Pinch the 30th ch, ch 3 (counts as 1 dc), work 2 dc in the 30th ch. Dc in each ch across to the last ch (the slip knot). Work 3 dc in the last ch to turn the corner. Rotate work to crochet along the opposite side of the foundation chain, work 1 dc in each ch across. Sl st to the top of the starting ch-3.
Part 2: Granny Cluster Main Body
- R2: Sl st backward into the space between clusters, ch 3 (counts as 1 dc), work 2 dc in the same space. *Skip 2 sts, work 3 dc (Granny Shell) in the next st; repeat from * all the way around. Sl st to the top of the starting ch-3 to join.
- R3–R14: Sl st backward into the space before the cluster, ch 3, 2 dc in the same space. Work 3 dc into every space between granny clusters around. Sl st to join. (Repeat until the length reaches approximately 9 inches / 23 cm or matches the total height of your headrest).
Part 3: Cinched Bottom Rim
- R15: Ch 1, work 1 hdc in each st around the entire opening. Sl st to the first hdc to join.
- R16: Ch 1, *hdc in next 8 sts, hdc2tog; repeat from * around (work approximately 4 to 5 hdc decreases evenly spaced around the row to cinch the bottom rim). Sl st to join.
- Fasten off leaving a long tail, weave in all loose ends securely.
Part 4: Edging, Assembly & Finishing
- Turn the piece right-side out.
- Stretch the cover firmly over the top of your seat’s headrest, pulling it downwards until the cinched hdc edging cups snugly under the bottom base.
- Optional: Add appliqués such as crocheted hearts or flowers onto the front or back of the cover for extra flair.
Detailed Pattern Breakdown
1. Top Crown Foundation Breakdown:
- The base begins by crocheting a straight line of double crochets along a foundation chain.
- Working 3 dc into both the starting ch-3 space and the final chain creates smooth curved ends. This creates a rounded 2D oval cap that sits perfectly flat across the top ceiling-facing edge of the car headrest.
2. Granny Cluster Main Body Breakdown:
- Switching to granny clusters (
3 dcgroups) without intermediatech-1spaces forms a textured, flexible grid. - Slanted stitches naturally wrap downwards around the front and back of the headrest, creating a 3D sleeve without needing side seams.
- Slipping backwards into the previous space at the start of each round ensures seamless transitions without noticeable diagonal seam lines.
3. Cinched Bottom Rim Breakdown:
- Transitioning from open double crochet clusters to dense half double crochet (
hdc) stitches stiffens the lower edge. - Evenly distribution of
hdc2togdecreases gently reduces the circumference. This subtle tapering grips the bottom corners of the headrest, preventing the cover from sliding off when leaned on.
Pattern Question:
Question: How do I adjust this pattern if my car headrest is wider or if I want to make a backrest cover for a wheelchair?
Answer: Customizing the size is very simple! For a wider car headrest, simply increase your starting foundation chain until it matches the top width of your seat.
If you are making a larger wheelchair backrest cover, you can add an increase round on R2 by working an extra 3-dc granny cluster directly into adjacent stitches along the ends rather than skipping 2 stitches.
This flares the width out immediately. Continue adding rounds until the length covers your seat back, then finish with 2 rows of single or half double crochet to cinch the bottom.