

Ever feel like your ears are staging a chilly protest the second you step outside, yet a full beanie threatens to ruin your carefully styled hair?
Meet your new cold-weather best friend: the Arbor Ear Warmers!
Combining the cozy squish of super bulky yarn with a chic front crossover twist and rich lemon-peel texture, this quick-to-stitch headband keeps you toasty while letting your locks shine.
Best of all, you can whip one up in under an hour using just one skein of yarn, making it an ideal last-minute gift or craft market bestseller.
Materials and Preparation
Materials:
- Yarn: 1 skein of Super Bulky (Category 6) yarn. The sample shown uses Lion Brand Wool-Ease Thick & Quick in a crisp snowy white (or light gray/white marled tones) for maximum stitch definition and warmth.
- Optional Tag: A faux leather or wooden handmade tag for a boutique finishing touch.
Tools:
- Crochet Hook: 8.0 mm (US L-11) crochet hook.
- Yarn Needle: A tapestry or yarn needle with a large eye suited for super bulky yarn.
- Scissors: Sharp craft scissors for trimming yarn tails.
- Stitch Marker: Optional, helpful for tracking the first stitch of each row.
Preparation Notes:
- Before starting, make sure you are comfortable alternating double crochet (
dc) and single crochet (sc) stitches, as this combination creates the signature textured fabric (often called the lemon-peel or seed stitch). - Keep your tension relaxed and consistent so the headband stays stretchy enough to hug your head comfortably without squeezing.
- Because the twist is built directly into the middle of the headband by splitting and crossing two narrow panels, you do not need to learn complicated origami-style folding seams at the end.
Abbreviations and Notes
Abbreviations:
- ch: Chain
- sc: Single Crochet
- dc: Double Crochet
- st(s): Stitch(es)
- sl st: Slip Stitch
Pattern Notes:
- This pattern is worked flat in back-and-forth rows (
Rows 1–30). - Always
ch 1and turn at the end of every row. The turningch 1does not count as a stitch. - Maintain the alternating
dc, scrhythm throughout the entire piece. Because each row has an even number of stitches (8 stitches for the main sections and 4 stitches for each split panel), you will always work adcinto thescfrom the previous row and ascinto thedcfrom the previous row. - Leave long yarn tails when fastening off the split panel and at the final row so you can easily seam the ends together cleanly.

Gauge, Approximate Size, and Pattern Notes
Gauge:
- Pattern Stitch Gauge: 8 stitches x 6 rows = 4 inches (10 cm) in alternating
dc, scstitch pattern using an 8.0 mm hook and Super Bulky yarn.
Finished Size:
- Adult Size: Approximately 4 inches (10 cm) wide by 19 to 20 inches (48 to 51 cm) in circumference before stretching, comfortably fitting an average adult head circumference of 21 to 23 inches (53 to 58.5 cm).
- Adjusting the Size: To make the ear warmer larger or smaller, simply add or subtract an even number of rows in Part 1 and Part 4 equally (for example, work 12 rows instead of 10 rows on each end for a looser fit).
Special Techniques:
- Lemon-Peel Stitch (Alternating dc/sc): Pairing a tall double crochet next to a short single crochet creates a dense, pebbled texture with zero large gaps, blocking cold wind effectively.
- Split-Panel Crossover Twist: Dividing the 8-stitch width into two separate 4-stitch panels for 10 rows and crossing one over the other creates a flat, comfortable, non-bulky twist right at the forehead.
- Whipstitch Seam: Joining the two short ends together with a neat whipstitch creates a clean, flat seam at the back of the neck.
Step-by-Step Pattern
Part 1: First Main Band Section (Rows 1–10)
Using your 8.0 mm hook and Super Bulky yarn, begin with a slip knot:
- Foundation: ch 9
- R1: Starting in the 2nd ch from the hook, (dc, sc) repeat 4 times across, ch 1, turn (8)
- R2: (dc, sc) repeat 4 times across, ch 1, turn (8)
- R3: (dc, sc) repeat 4 times across, ch 1, turn (8)
- R4: (dc, sc) repeat 4 times across, ch 1, turn (8)
- R5: (dc, sc) repeat 4 times across, ch 1, turn (8)
- R6: (dc, sc) repeat 4 times across, ch 1, turn (8)
- R7: (dc, sc) repeat 4 times across, ch 1, turn (8)
- R8: (dc, sc) repeat 4 times across, ch 1, turn (8)
- R9: (dc, sc) repeat 4 times across, ch 1, turn (8)
- R10: (dc, sc) repeat 4 times across, ch 1, turn (8)
Part 2: First Twist Panel (Rows 11–20)
You will now work across only the first 4 stitches to create the first half of the front twist, leaving the remaining 4 stitches unworked for now:
- R11: dc, sc, dc, sc, ch 1, turn (4)
- R12: dc, sc, dc, sc, ch 1, turn (4)
- R13: dc, sc, dc, sc, ch 1, turn (4)
- R14: dc, sc, dc, sc, ch 1, turn (4)
- R15: dc, sc, dc, sc, ch 1, turn (4)
- R16: dc, sc, dc, sc, ch 1, turn (4)
- R17: dc, sc, dc, sc, ch 1, turn (4)
- R18: dc, sc, dc, sc, ch 1, turn (4)
- R19: dc, sc, dc, sc, ch 1, turn (4)
- R20: dc, sc, dc, sc (4)
- Fasten off, cut yarn leaving a 6-inch (15 cm) tail to weave in later, and pull yarn through to secure.
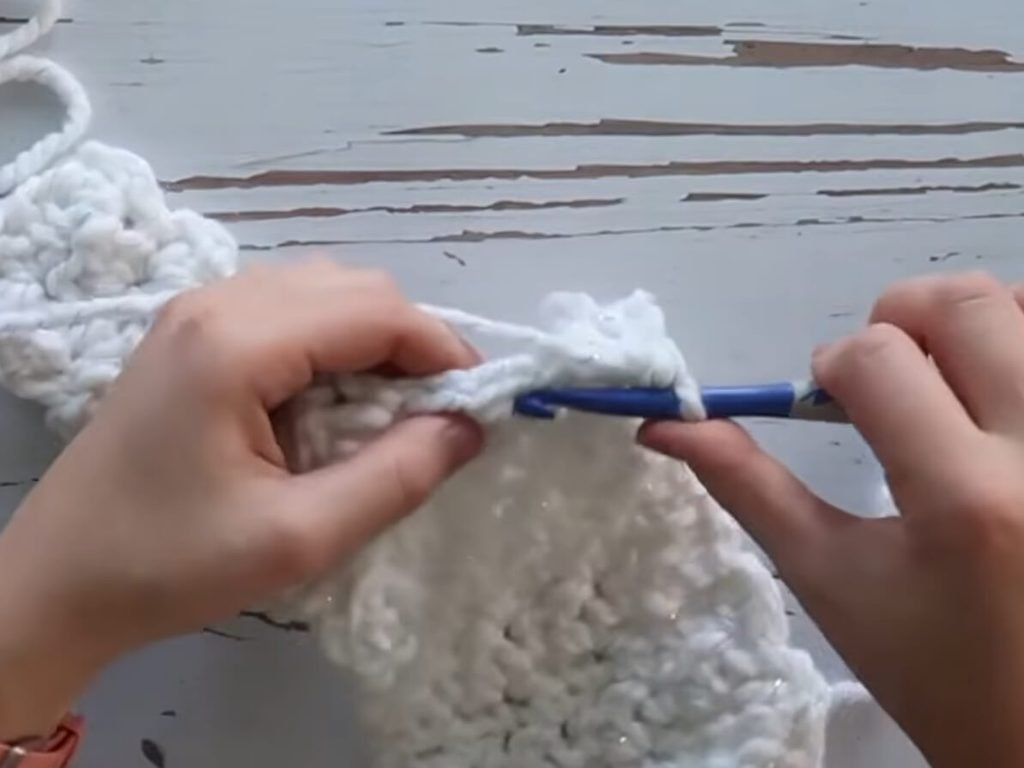
Part 3: Second Twist Panel (Rows 11–20)
Return to Row 10 where the 4 unworked stitches remain:
Panel Setup:
- Insert your hook into the first unworked stitch of Row 10 (the 5th stitch of that row, which was a
dc), pull up a loop of new yarn, andch 1to attach. Note that because you are attaching onto adcstitch, you will begin this panel with ascso the alternating texture stays aligned.
Panel Rows:
- R11: sc, dc, sc, dc, ch 1, turn (4)
- R12: sc, dc, sc, dc, ch 1, turn (4)
- R13: sc, dc, sc, dc, ch 1, turn (4)
- R14: sc, dc, sc, dc, ch 1, turn (4)
- R15: sc, dc, sc, dc, ch 1, turn (4)
- R16: sc, dc, sc, dc, ch 1, turn (4)
- R17: sc, dc, sc, dc, ch 1, turn (4)
- R18: sc, dc, sc, dc, ch 1, turn (4)
- R19: sc, dc, sc, dc, ch 1, turn (4)
- R20: sc, dc, sc, dc, ch 1, turn (4)
- Do not fasten off. Keep your working loop on the hook to rejoin the panels in Part 4.
Part 4: Rejoining & Second Main Band Section (Rows 21–30)
Crossing the Panels:
- Lay your work flat with the attached working yarn on your active panel (Second Twist Panel).
- Take the fastened-off panel (First Twist Panel) and cross it directly over the front of your active panel so the two strips form an X shape.
- Align the top edge of the crossed-over panel right next to the top edge of your active panel so all 8 stitches sit side by side in a single row.
Main Band Rows:
- R21: Work (sc, dc, sc, dc) across the 4 stitches of the active panel, then immediately continue working (sc, dc, sc, dc) across the 4 stitches of the crossed-over panel to reconnect them into one solid strip, ch 1, turn (8)
- R22: (sc, dc) repeat 4 times across, ch 1, turn (8)
- R23: (sc, dc) repeat 4 times across, ch 1, turn (8)
- R24: (sc, dc) repeat 4 times across, ch 1, turn (8)
- R25: (sc, dc) repeat 4 times across, ch 1, turn (8)
- R26: (sc, dc) repeat 4 times across, ch 1, turn (8)
- R27: (sc, dc) repeat 4 times across, ch 1, turn (8)
- R28: (sc, dc) repeat 4 times across, ch 1, turn (8)
- R29: (sc, dc) repeat 4 times across, ch 1, turn (8)
- R30: (sc, dc) repeat 4 times across (8)
Seaming & Finishing:
- Cut your yarn leaving an extra-long tail of about 16 to 18 inches (40 to 45 cm) for seaming, and pull the tail through the final loop to fasten off.
- Fold the ear warmer in half so the foundation edge (
R1) and final edge (R30) meet evenly, with the right side of the front twist facing inward. - Thread the long tail onto your large-eye yarn needle and whipstitch through both layers across all 8 stitches.
- Tie a secure knot using the seaming tail and the starting slip-knot tail, then weave the needle back through the seam and inside the stitches for extra durability.
- Weave in the remaining yarn tails from the center twist panel, flip the headband right-side out, and your Arbor Ear Warmers are ready to wear!
Detailed Pattern Breakdown
1. Foundation & First Band Section Breakdown (Rows 1–10):
- Starting Width: Chaining 9 and working into the 2nd chain from the hook yields exactly 8 active stitches, which creates a generous 4-inch (10 cm) band width that completely covers the ears without sliding upward.
- Textural Locking: By pairing
dcandscside by side on every row, each double crochet leans slightly over the neighboring single crochet. On the return row, placing adcinto the shorterscand ascinto the tallerdclevels out the row height while producing a plush, reversible cobblestone texture.
2. Split Twist Construction Breakdown (Rows 11–20):
- Halving the Stitch Count: Instead of crocheting one long rectangle and folding the ends together (which can create a thick, rigid lump on your forehead), this construction divides the 8 stitches cleanly into two 4-stitch strips (
Panel 1andPanel 2). - Stitch Alignment Across Panels: Notice how
Panel 1starts each row withdc, sc, dc, sc, whereasPanel 2starts each row withsc, dc, sc, dc. This happens naturally because stitches 5 through 8 of Row 10 ended withdc, sc, dc, sc, meaning the first unworked stitch is adc. StartingPanel 2with ascpreserves the exact alternating rhythm across the entire width of the headband.
3. Crossover Rejoining & Seaming Breakdown (Rows 21–30):
- Seamless Reconnection: Crossing
Panel 1overPanel 2before workingR21locks the twist permanently into the fabric. BecausePanel 2ends withsc, dc, sc, dcandPanel 1also featuressc, dc, sc, dcalong its top edge once crossed over, crocheting straight across all 8 stitches seamlessly fuses the two halves back together without needing any extra sewing at the front. - Reinforced Back Seam: Leaving an 18-inch (45 cm) tail at
R30ensures you have plenty of yarn to whipstitch across all 8 bulky stitches and double back through the seam, preventing the join from stretching open over years of winter wear.
Pattern Question:
Question 1: Why does Part 2 start rows with dc, sc while Part 3 and Part 4 start rows with sc, dc?
Answer: In an alternating dc, sc stitch pattern, the rule is always to place a dc into a sc from the previous row and a sc into a dc from the previous row.
When you split Row 10 in half, the first 4 stitches start with a sc below them (so you start with dc), while the second 4 stitches start with a dc below them (so you start with sc). Following what the stitches beneath your hook tell you keeps the bumpy lemon-peel texture completely uninterrupted!
Question 2: My twist looks a little loose in the middle before I seam the back. Is that normal?
Answer: Yes, completely normal! Until you join Row 1 and Row 30 together into a closed circle, the two crossed strips can shift slightly when laid flat. Once you whipstitch the back seam and put the ear warmer on your head, gentle tension pulls the crossover snug and flat against your forehead.
Question 3: Can I use worsted weight (Category 4) yarn instead of super bulky yarn?
Answer: You can, though you will need to adjust your hook size and stitch/row counts to match the finished measurements.
With Category 4 yarn and a 5.0 mm (US H-8) hook, try chaining an odd number around 17 chains (for 16 stitches wide, splitting into two 8-stitch panels) and working extra rows in Parts 1, 2, 3, and 4 until the band measures 19 to 20 inches (48 to 51 cm) around.