
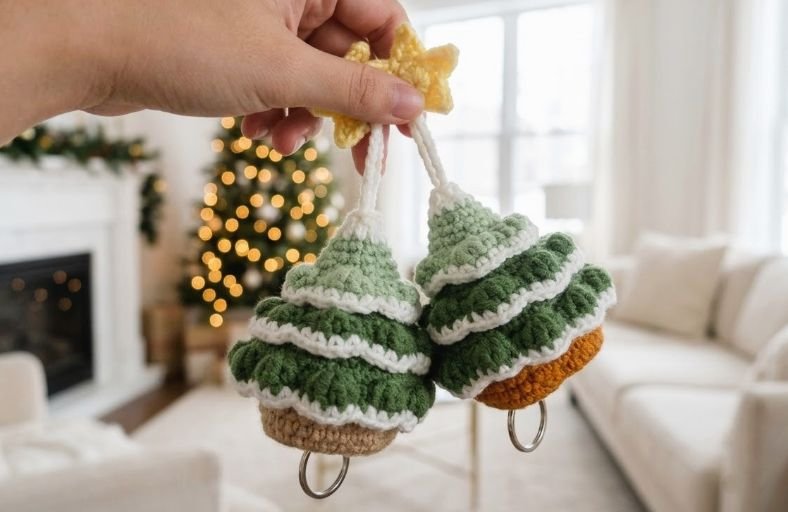
Ever wished you could keep the holiday cheer alive without sweeping up dried pine needles for three months straight?
Say hello to your next favorite festive project, an adorable, textured crochet Christmas Tree that brings all the merry vibes with zero mess!
Featuring plush puff stitch branches, snowy white edges, and a bright yellow star topper, this project is absolute holiday magic in yarn form.
Materials and Preparation
Materials:
- Yarn:
- Dark Green Yarn (for the bottom branch layers)
- Medium/Light Green Yarn (for the upper branch layers)
- Brown Yarn (for the tree base trunk)
- White Yarn (for snow edging accent)
- Yellow Yarn (for the star topper)
- Stuffing: Fiberfill / Polyfill stuffing to give the tree a firm, upright shape.
Tools:
- Crochet Hook: 2.5 mm – 3.0 mm crochet hook (adjust to fit your yarn weight).
- Yarn Needle: Tapestry needle for weaving in ends and securing parts.
- Stitch Marker: To keep track of spiraling rounds.
- Scissors: Sharp craft scissors.
Preparation Notes:
- Maintain tight, even tension throughout the project so the stuffing remains completely hidden.
- Make sure you are comfortable working in front loops only (FLO) and back loops only (BLO), as these loops create the foundation for multi-tiered 3D branches.
Abbreviations and Notes
Abbreviations:
- MR: Magic Ring
- ch: Chain
- sl st: Slip Stitch
- sc: Single Crochet
- inc: Single Crochet Increase (2 sc in same st)
- dec: Single Crochet Decrease (sc2tog)
- hdc: Half Double Crochet
- dc: Double Crochet
- Puff St: Puff Stitch (yarn over, insert hook, pull up loop 3 to 4 times into the same st, yarn over, pull through all loops, ch 1 to lock)
- FLO: Front Loop Only
- BLO: Back Loop Only
- st(s): Stitch(es)
Pattern Notes:
- The main body and base are worked in continuous rounds.
- The branch layers use alternating front loop and back loop rows to allow the puff stitch foliage to sit in tiered layers over the cone core.
Gauge, Approximate Size, and Pattern Notes
Gauge:
Gauge is not critical for this project, but your stitches should be firm enough to prevent stuffing from showing.
Finished Size:
Approximately 4 inches to 5 inches (10 cm to 13 cm) in height, including the star topper.
Special Techniques:
- Puff Stitch Foliage: Creates a fluffy, realistic 3D evergreen branch texture.
- Tiered Layering (BLO/FLO Separation): Working into the front loops creates outer branch ruffles, while the back loops continue building the inner support cone.
Step-by-Step Pattern
Part 1: Tree Trunk & Base Cone Core
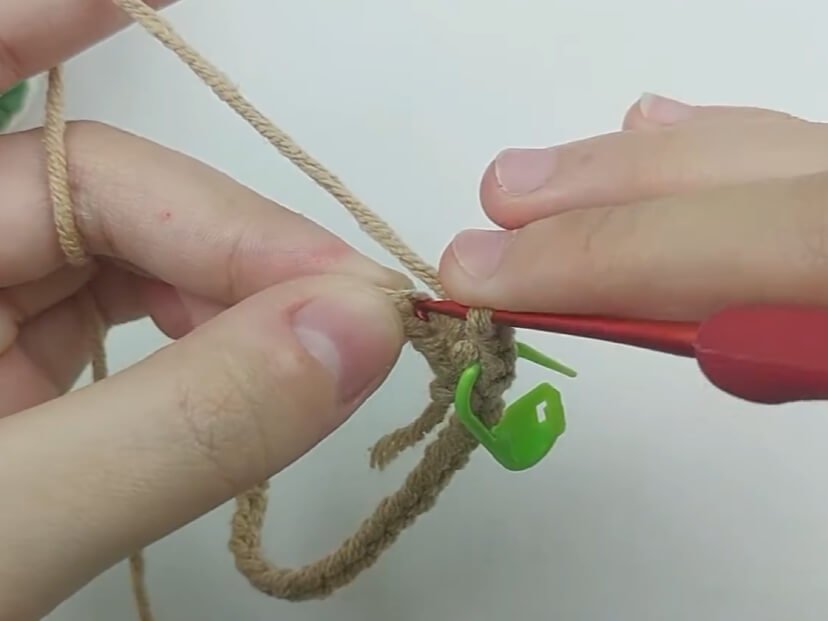
Start with Brown Yarn:
- R1: MR 6 sc (6)
- R2: 6 inc (12)
- R3: (1 sc, inc)*6 (18)
- R4: (2 sc, inc)*6 (24)
- R5: (3 sc, inc)*6 (30)
- R6: (4 sc, inc)*6 (36)
- R7: BLO 36 sc (36)
- R8–R10: 36 sc (36)
Change to Dark Green Yarn:
- R11: BLO 36 sc (36)
- R12: (4 sc, dec)*6 (30)
- R13: 30 sc (30)
- R14: BLO 30 sc (30)
- R15: (3 sc, dec)*6 (24)
Change to Medium/Light Green Yarn:
- R16: BLO 24 sc (24)
- R17: (2 sc, dec)*6 (18)
- R18: BLO 18 sc (18)
- R19: (1 sc, dec)*6 (12)
- R20: BLO 12 sc (12)
- R21: 6 dec (6) Fasten off and stuff the tree firmly.
Part 2: Textured Puff Stitch Branch Layers
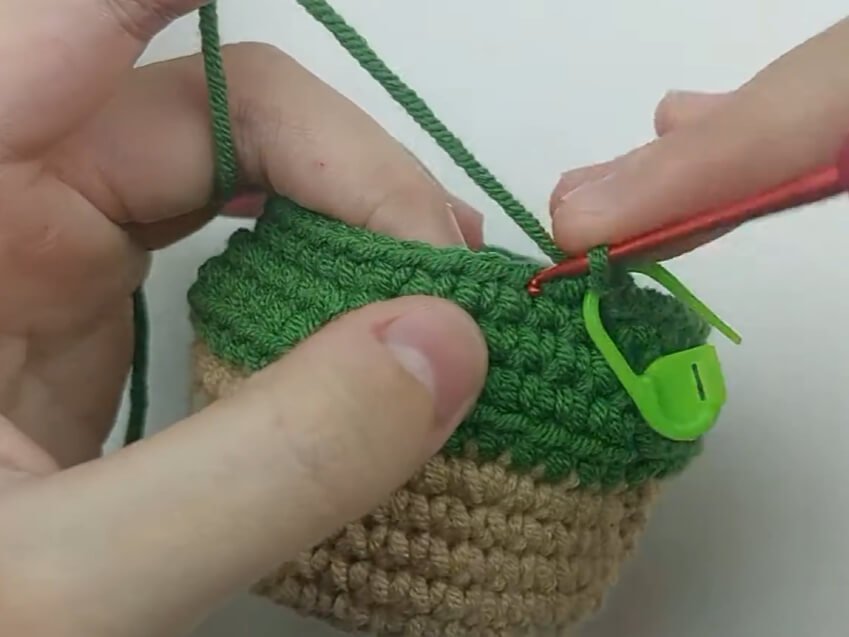
Attach Green Yarn to the unworked Front Loops (FLO) left from R11, R14, R16, and R18:
- Layer 1 (Bottom Tier – Dark Green on R11 FLO):
- Join yarn, (Puff St, ch 1, skip 1 st) repeat around (18 Puff stitches).
- Fasten off. Attach White Yarn to the top of the puff stitches, (ch 2, sl st into next st) around to create snowy edging.
- Layer 2 (Middle Tier – Dark Green on R14 FLO):
- Join yarn, (Puff St, ch 1, skip 1 st) repeat around (15 Puff stitches).
- Fasten off. Attach White Yarn, (ch 2, sl st into next st) around.
- Layer 3 (Upper Middle Tier – Light Green on R16 FLO):
- Join yarn, (Puff St, ch 1, skip 1 st) repeat around (12 Puff stitches).
- Fasten off. Attach White Yarn, (ch 2, sl st into next st) around.
- Layer 4 (Top Tier – Light Green on R18 FLO):
- Join yarn, (Puff St, ch 1, skip 1 st) repeat around (9 Puff stitches).
- Fasten off. Attach White Yarn, (ch 2, sl st into next st) around.
Part 3: Star Topper
Star Topper:
Work using Yellow Yarn:
- R1: MR 5 sc, sl st to first sc to join (5)
- R2: (ch 3, starting in 2nd ch from hook: sl st, hdc, then sl st into next sc on the ring) repeat 5 times to form 5 points. Fasten off, leaving a tail for sewing.
Part 4: Assembly & Finishing
- Tree Shaping: Adjust and fluff out all 4 tiers of puff stitch branches so they overlay each other neatly.
- Topper Attachment: Sew the yellow star firmly onto the peak of the tree (R21).
- Snow Accents: Weave in all white yarn tails underneath the branch layers to conceal every seam.
Detailed Pattern Breakdown
1. Trunk & Core Structure Breakdown:
- The base begins as a flat round disc in brown yarn (R1–R6) to form the foundation of the trunk.
- Working R7 in BLO sets up a sharp 90-degree ridge that allows the tree to stand completely upright on flat surfaces.
- As you switch to green yarn, decrease rounds (R12, R15, R17, R19, R21) taper the inner core into a sturdy conical shape.
2. Puff Stitch Branch Mechanics:
- By leaving front loops unworked at regular intervals (R11, R14, R16, R18), the core creates exposed ridges.
- Working puff stitches directly into these front loops creates lush, dimensional foliage without adding bulk to the internal core.
- Shifting from dark green at the bottom to lighter green near the top mimics natural sunlit pine needles.
3. Snow Edging & Star Detailing:
- The white edging added to the tips of each puff stitch tier uses simple chain loops to create a frosted, snow-dusted effect.
- The 5-point star uses short chain points worked back toward the magic center ring, giving it crisp, well-defined points despite its tiny scale.
Pattern Questions
Question: How do I ensure my Christmas tree stands flat and doesn’t tip over?
Answer: The key is in Round 7! Make sure you crochet Round 7 strictly into the Back Loops Only (BLO). This forms a clean, right-angled edge for the bottom disc. Additionally, stuff the bottom half firmly and evenly without over-stuffing the middle, ensuring the base remains flat rather than rounded at the bottom.
Question: Why do my puff stitches look uneven or loose?
Answer: Puff stitches require consistent hook height! When pulling up loops for each yarn over, pull them all up to the exact same height as a standard half double crochet or double crochet before pulling yarn through all loops. Locking each puff stitch with a tight chain 1 immediately after completing it secures the tension permanently.
Question: Can I make this tree bigger using the same pattern?
Answer: Yes! You can easily scale up the tree by using blanket/chenille yarn or a thicker worsted weight yarn paired with a larger hook (such as 4.0 mm or 5.0 mm). The pattern count remains identical, but the final piece will turn out significantly larger and even plushier!