
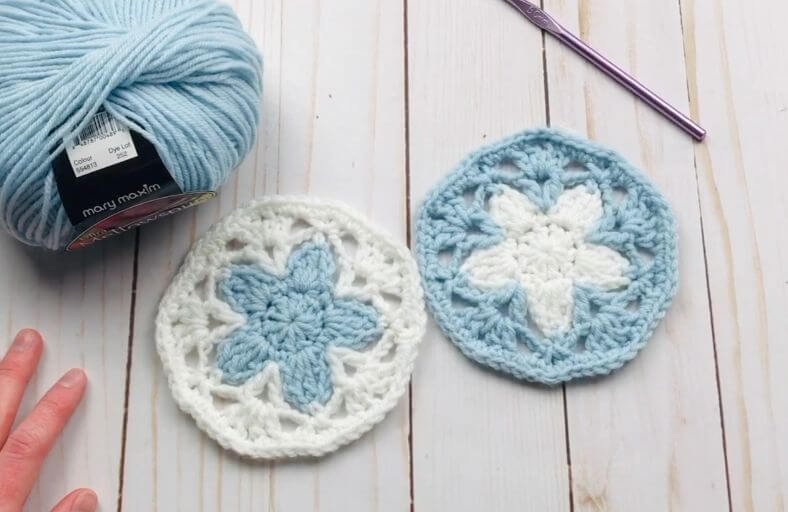
Ever noticed how car cupholders somehow turn into a mysterious abyss of condensation, sticky rings, and stray coins?
Why settle for boring rubber inserts when you can dress up your ride with a splash of handmade charm?
Today, we are stitching up the delightful Forget-Me-Not lace car coaster: a fast, stash-busting project that features a sweet 5-petal flower centerpiece wrapped in airy, elegant lace.
Materials and Preparation
Materials:
- Yarn: DK weight yarn in 2 contrasting colors (Mary Maxim Mellow Spun or similar soft acrylic work wonderfully).
- Color A: Blue or contrasting flower color (approx. 10–15 yards).
- Color B: White or neutral lace color (approx. 15–20 yards).
- Note on Yarn Weight: You can also use worsted weight yarn, though your finished coaster will turn out slightly larger.
Tools:
- Crochet Hook: Size H/8 (5.0 mm) crochet hook (or size matching your chosen yarn).
- Yarn Needle: Tapestry needle for weaving in loose ends.
- Scissors: Standard craft scissors.
Preparation Notes:
- Practice your fundamental stitches: chain, single crochet, double crochet, and treble crochet.
- Maintain a steady, relaxed tension throughout the rounds to allow the delicate lace stitches to lay flat without curling.
Abbreviations and Notes
Abbreviations:
- ch: Chain
- sc: Single Crochet
- dc: Double Crochet
- tr: Treble Crochet
- sl st: Slip Stitch
- tr: Treble Crochet (2 yarn overs)
- st(s): Stitch(es)
- sp: Space
- Color A: Main flower color
- Color B: Lace border color
Pattern Notes:
- The coaster is worked in 5 joined rounds from the center outward.
- The starting ch 3 in Round 1 does not count as a stitch. Joining is done in the top of the first double crochet to keep the center loop seamless and hole-free.
- Standing Single Crochet: Round 3 begins with a standing single crochet directly into the top of the treble crochet stitch without an initial slip stitch join.

Gauge, Approximate Size, and Pattern Notes
Gauge:
Gauge is not critical for this decorative item. However, maintaining consistent stitch size ensures the flower petals flare out evenly.
Finished Size:
Approximately 4.0 inches to 4.25 inches (10.16 cm to 10.80 cm) in diameter when using DK weight yarn and a 5.0 mm hook.
Special Techniques:
- Petal Construction: Petals are built progressively inside a single stitch by working
sc, ch 1, dc, ch 1, tr, ch 1, dc, ch 1, scto form a contoured petal shape. - V-Stitch: Worked as
(dc, ch 2, dc)into a single stitch to create structural anchors between flower petals. - Steam Blocking: Highly recommended for acrylic fibers. Lightly steam the finished piece to lay the lace motifs flat and crisp.
Step-by-Step Pattern
Part 1: Flower Core (Color A)
- Round 1: With Color A, make a slip knot and ch 4. Work 10 dc into the 4th ch from hook. Join with a sl st to the very first dc (not the ch 3). (10 dc)
- Round 2: Ch 1 (does not count as a st). Sc in the next dc. In the same st, work the first petal:
ch 1, dc, ch 1, tr, ch 1, dc, ch 1, sc. Sc in the next dc. In the next dc, work petal:(sc, ch 1, dc, ch 1, tr, ch 1, dc, ch 1, sc). Repeat from * to * 3 more times. Sc in the last dc. Join with a sl st to the first sc of the round. (5 petals, 5 intermediate sc)Fasten off Color A.
Part 2: Lace Framework (Color B)
- Round 3: Join Color B with a standing sc into the top tr of any petal. Ch 3. Work a V-stitch
(dc, ch 2, dc)into the single crochet stitch located between the petals from Round 2. Ch 3, sc in the top tr of the next petal, ch 3, work(dc, ch 2, dc)in the sc between petals. Repeat from * around. Ch 3, then sl st to the initial standing sc to join. (5 V-stitches, 5 sc, 10 ch-3 spaces)
Part 3: Shell Expansion & Outer Border (Color B)
Round 4: Shell Expansion
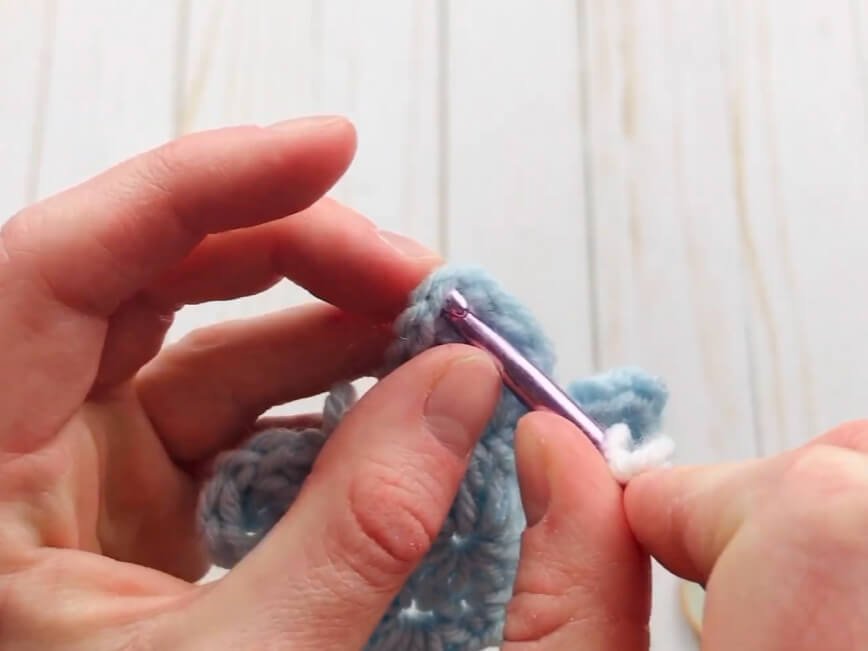
- Ch 1, sc in the same st as sl st. Ch 3, sc in the same st (chain loop made). Ch 1, skip ch-3 space. Work a shell
(2 dc, ch 2, 2 dc)into the ch-2 space of the V-stitch. Ch 1, skip ch-3 space, work(sc, ch 3, sc)into the next sc on top of the petal, ch 1, work(2 dc, ch 2, 2 dc)in the ch-2 space of the V-stitch. Repeat from * around. Ch 1, sl st to the first sc to join.
Round 5: Outer Edging
- Ch 1, sc in the same st as sl st.
- Work 1 sc in the ch-3 loop, 1 sc in the next sc, 2 sc in the ch-1 space.
- Work 1 sc in each of the next 2 dc, 1 sc in the top ch-2 space of the shell, 1 sc in each of the next 2 dc, 2 sc in the ch-1 space.
- ork 1 sc in the sc, 1 sc in the ch-3 loop, 1 sc in the sc, 2 sc in the ch-1 space, 1 sc in each of the next 2 dc, 1 sc in the top ch-2 space, 1 sc in each of the next 2 dc, 2 sc in the ch-1 space.
- Repeat from * around. Sl st to the first sc to join.Fasten off yarn and weave in all loose ends on the corresponding color sections.
Part 4: Edging, Assembly & Finishing
- Inspect all yarn ends and thread them into a tapestry needle.
- Weave Color A ends through the central ring stitches and Color B ends through the white outer boundary.
- Pin the coaster flat onto a blocking board.
- Apply gentle steam with a garment steamer or steam iron (hovering 1-2 inches above the piece without touching the acrylic yarn directly) to open up the lace holes and set the circular shape.
Detailed Pattern Breakdown
1. Central Flower Core Breakdown (Rounds 1–2):
- Round 1 (Foundation Center): The center loop is formed by chaining 4 and working 10 double crochet stitches into the first chain. By joining to the first double crochet instead of the initial chain-3, the central hole closes neatly without leaving a wide gap.
- Round 2 (Petal Geometry): Each of the 5 petals is created inside a single stitch by stepping up stitch heights incrementally: starting with single crochet, building to double crochet, reaching the peak with a treble crochet, and stepping back down through double crochet to single crochet. Single crochets placed between petals serve as structural valleys that separate the flower points.
2. Lace Framework & Shell Breakdown (Rounds 3–4):
- Round 3 (Structural Anchors): Color B attaches to the peak treble crochets of each petal with a standing single crochet. The lace lattice expands outward by placing
(dc, ch 2, dc)V-stitches into the deep valleys between petals, bridged by chain-3 arches. - Round 4 (Shell Contouring): Round 4 builds body over the lace frame. Small chain loops
(sc, ch 3, sc)are placed directly above each petal peak, while fan-like shells(2 dc, ch 2, 2 dc)are worked directly into the ch-2 centers of the V-stitches below.
3. Smooth Rim & Steam Finishing Breakdown (Round 5):
- Round 5 (Edge Smoothing): The final round unifies the openwork stitches into a clean, rounded circular edge. Two single crochets are placed into the ch-1 spaces on either side of each shell to prevent puckering. Working only 1 single crochet into the top of each shell (rather than 2) keeps the perimeter smooth and circular rather than star-shaped.
Pattern Question:
Question 1: Why are my coasters curling up at the edges instead of laying completely flat?
Answer 1: Curling usually happens if your tension is a bit tight during the chain-space rounds (R3 and R4).
If your coaster cups inward, try switching to a hook one size larger (such as a 5.5 mm) for the white lace rounds, or ensure you do not skip any of the 2 sc placements in the ch-1 spaces during Round 5. Steam blocking at the end will also instantly relax the fibers and flatten out mild curling.
Question 2: Can I use 100% cotton yarn instead of acrylic DK yarn for car coasters?
Answer 2: Yes, absolutely! Cotton yarn is highly absorbent and excellent for catching liquid spills. Keep in mind that cotton yarn has less stretch than acrylic, so your stitches will look very defined.
If using worsted weight cotton (like Lily Sugar’n Cream), your finished coaster will measure closer to 4.5–5.0 inches (11.43–12.70 cm), so make sure to check your car cupholder dimensions beforehand.
Question 3: How do I keep the center loop of the flower tight so it doesn’t open up over time?
Answer 3: When starting Round 1 into the 4th chain from your hook, leave a slightly longer tail (about 4–5 inches).
After finishing Round 2, use your tapestry needle to weave that initial yarn tail tightly around the base of the Round 1 double crochets in a circle, pull tight to draw the center closed, and knot it securely on the back.