
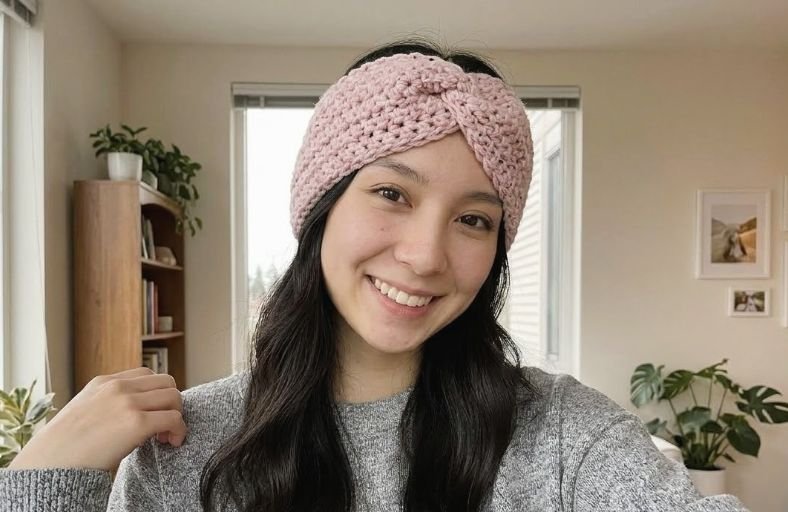
Tired of freezing ears ruining your brisk morning walks, or need a last minute handmade gift that looks way more complicated than it actually is?
Meet your new favorite stash buster: the Easy Crochet Ear Warmer Pattern For Beginners!
Featuring a chic, modern center twist and worked up with just two basic stitches, this cozy headband comes together in no time flat and is guaranteed to keep you toasty all season long.
Tools:
- Crochet Hook: 6.0 mm (US J/10) crochet hook, or the hook size needed to obtain your desired drape and gauge.
- Yarn Needle: Tapestry needle for seaming the center twist and weaving in yarn ends.
- Scissors: Sharp craft scissors for trimming yarn.
- Stitch Markers: Optional, helpful for marking the transition points between stitch sections.
Preparation Notes:
- Before starting, make sure you are comfortable with foundational US crochet stitches: chain (
ch), slip stitch (sl st), and half double crochet (hdc). - Pay close attention to your tension when working slip stitches. Keep your loops relaxed and give your hook plenty of breathing room so the fabric does not pucker or become too tight to insert your hook on the next row.
- Note on sizing: The step by step instructions below are written for an Adult size (starting with 66 chains and worked over 15 rows). You can easily customize this pattern for babies, toddlers, children, or larger adults by adjusting your starting chain count and total row count while keeping the exact same construction method.
Pattern Notes:
- This pattern uses standard US Crochet Terms.
- The ear warmer is worked flat in turned rows, forming a long, shaped strip with tapered ends and a wider center body.
- Row 1 is worked into the back bumps of the foundation chain to create a clean, polished bottom edge that matches the top edge.
- From Row 2 onward, the turning
ch 1at the beginning of each row does not count as a stitch. - All slip stitches from Row 2 onward are worked in the Back Loop Only (BLO) to build a subtle, stretchy ribbed texture at the ends where the twist will sit.
- Foundation: ch 66.
- Row 1: Working into the back bumps of the foundation chain, skip the first chain from the hook, work 1 sl st into the 2nd chain from the hook and into each of the next 9 chains (10 sl st total). Work 1 hdc into each of the next 45 chains (45 hdc). Work 1 sl st into each of the remaining 10 chains (10 sl st). Turn your work. (Total: 65 sts: 10 sl st, 45 hdc, 10 sl st)
- Row 2: ch 1 (does not count as a stitch), work 1 sl st in BLO of each of the first 10 stitches (10 sl st in BLO). Work 1 hdc in both loops of each of the next 45 stitches (45 hdc). Work 1 sl st in BLO of each of the last 10 stitches (10 sl st in BLO). Turn your work. (Total: 65 sts)
- Rows 3 to 15: Repeat Row 2 for a total of 15 rows, or until the widest middle section reaches your desired headband width. (Total: 65 sts per row)
Question: Why are my slip stitch sections curling tightly and getting harder to insert my hook into as I add more rows?
Answer: Slip stitches naturally have very little height and tend to tighten up if you pull the working yarn snugly after completing a stitch. To prevent puckering, relax your grip on the yarn and give your hook a gentle upward tug to open the loop slightly before moving to the next stitch.
If you still find the BLO loops tight, you can temporarily switch to a hook one size larger just for the slip stitch sections, or gently stretch the fabric lengthwise with your fingers after every couple of rows.
Question: How can I adjust this pattern to fit a baby, child, or larger adult head?
Answer: You can easily customize the size by changing your starting chain count and total number of rows while keeping the exact same construction.
Wrap your foundation chain gently around the recipient’s head (stretching it slightly so it will stay snug) to determine your starting chain length, then assign roughly 15% of the stitches at each end to sl st and the remaining 70% in the center to hdc. Work fewer rows for narrower baby and child bands, or add extra rows for a wider, extra cozy adult ear warmer.
Question: Can I use a different yarn weight, such as bulky or DK weight yarn, for this ear warmer?
Answer: Yes, this pattern adapts easily to any yarn weight! Simply choose the hook size recommended on your chosen yarn label (or one size larger for extra drape), make a foundation chain long enough to wrap comfortably around your head, and divide the stitches into matching sl st ends with an hdc center section.
Keep repeating Row 2 until the middle section reaches your preferred ear coverage width before seaming the twist.