
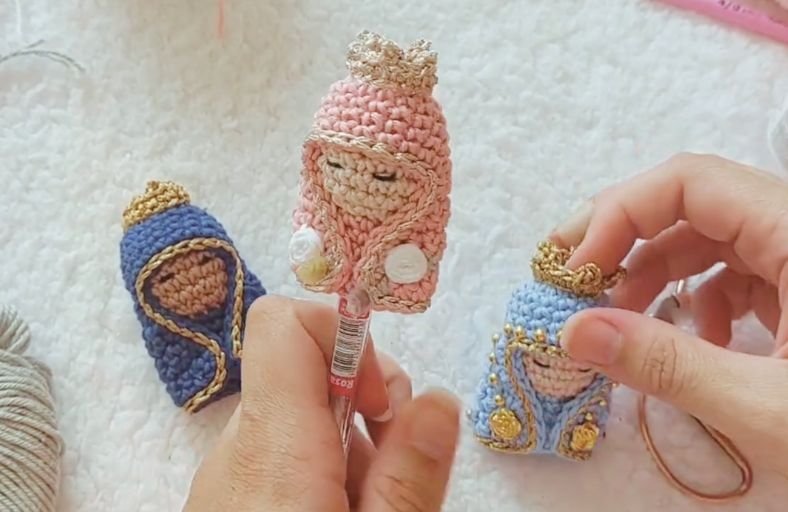
Looking for a holy grail project to dress up your favorite writing tools? Meet the Sacred Heart Virgin Mary Pen Topper!
Whether you want to add a touch of grace to your daily journaling or gift something meaningful to a loved one, this tiny Amigurumi topper is pure crochet magic.
Get your hooks ready, because we are diving straight into this step-by-step pattern!
Materials and Preparation
Materials:
- Yarn:
- Skin color / Chantilly yarn for the head.
- Primary color yarn (e.g., Doçura or color of choice) for the body and mantle.
- Cream or White yarn for embroidery (roses).
- Light green yarn for foliage embroidery.
- Black or dark brown embroidery thread for sleeping eyes.
- Encanto Slim metallic thread (Almond / Gold) for the crown and mantle trim.
- Stuffing: Polyfill stuffing (a small amount for the head).
Tools:
- Crochet Hooks: 2.2 mm hook (for head, body, crown) and 2.5 mm hook (for the mantle to give a softer drape).
- Yarn Needle: For embroidery and assembling.
- Stitch Marker: To keep track of rounds.
- Scissors: For cutting yarn.
- Glue: Craft glue, hot glue, or liquid silicone glue.
- Pen / Pencil: To shape the inner body tube during assembly.
Preparation Notes:
- You should be comfortable with basic Amigurumi techniques in US terms: Magic Ring (
MR), Single Crochet (sc), Increase (inc), Decrease (dec), Slip Stitch (sl st), and Back Loop Only (BLO). - Avoid overstuffing the head piece to prevent gaps between your stitches.
Abbreviations and Notes
Abbreviations:
- MR: Magic Ring
- ch: Chain
- sc: Single Crochet
- inc: Single Crochet Increase (2 sc in the same stitch)
- dec: Single Crochet Decrease (sc2tog)
- sl st: Slip Stitch
- BLO: Back Loop Only
- FLO: Front Loop Only
- picot: Picot Stitch (ch 3, sl st into the first ch)
Pattern Notes:
- The Head is worked in continuous spiral rounds.
- The Body (Pen Holder) is worked directly from the remaining Front Loops (
FLO) left at the base of the head. - The Mantle starts in rounds and transitions into linear back-and-forth rows.
Gauge, Approximate Size, and Pattern Notes
Gauge:
Gauge is not critical for this project; aim for tight, even stitches so stuffing does not peek through.
Finished Size:
Approximately 2.5–3 inches (6–8 cm) long, designed to snuggly fit standard pens and pencils.
Special Techniques:
- Inverted Magic Ring: Closing the bottom of the piece cleanly by weaving a yarn needle through the front loops of the remaining 6 stitches.
- Linear Crochet: Turning rows with a turning chain to construct the flowing mantle.
- Woven Wheel Rose Embroidery: Creating a 5-point star base and weaving yarn over and under to create a 3D rose.
Step-by-Step Pattern
Part 1: Head
Worked in skin color yarn (Chantilly) using a 2.2 mm hook in continuous rounds:
- R1: MR 6 sc (6)
- R2: 6 inc (12)
- R3: (sc, inc)*6 (18)
- R4–R7: 18 sc (18) (4 rounds total)
- R8: (sc, dec)*6 (12)
- Stuff lightly with polyfill.
- R9: BLO 6 dec (6)
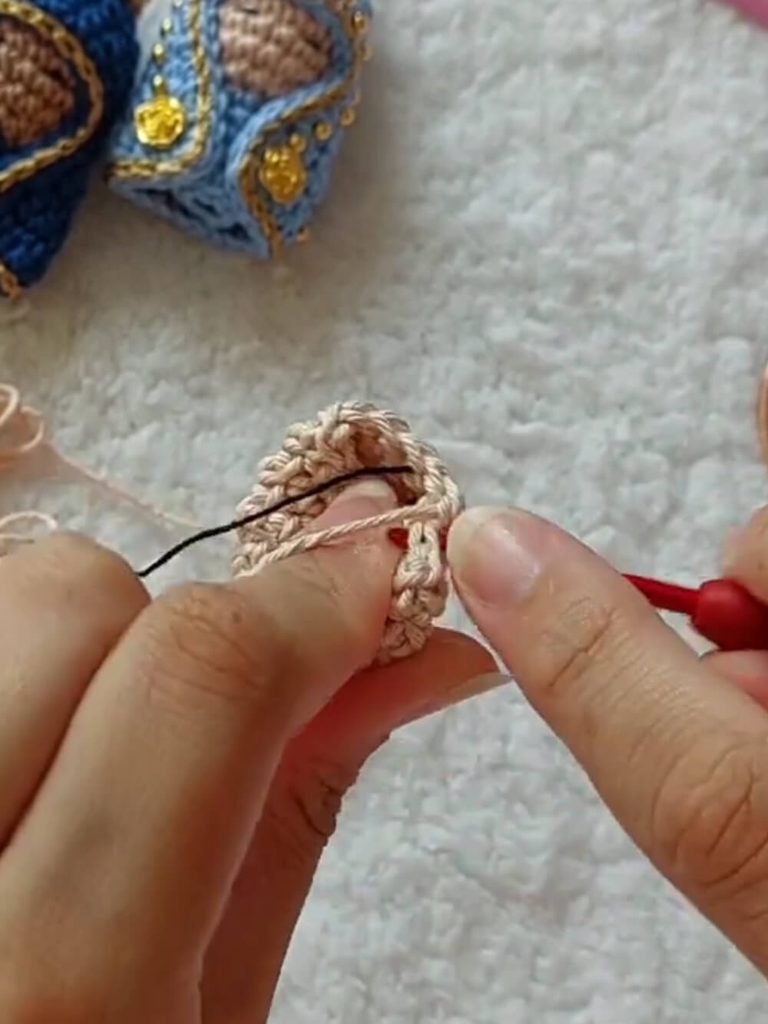
- Fasten off. Use the Inverted Magic Ring technique to weave through the 6 remaining FLO loops to close. Embroider sleeping eyes with black thread between R5 and R6.
Part 2: Body / Pen Holder
Worked in primary yarn color (Doçura) using a 2.2 mm hook, joining yarn to the remaining FLO loops of R8 from the head:
- R1: (2 sc, dec)*3 (9)
- R2–R5: 9 sc (9) (4 rounds total)
- Fasten off invisibly and weave in ends.
Part 3: Mantle & Crown
Head: Crown
Worked in Encanto Slim metallic gold yarn using a 2.2 mm hook:
- Foundation: Ch 15, sl st to the first ch to form a loop.
- R1: (sc, [sc, picot], sc) repeat around the loop.
- Fasten off, leaving a yarn tail to sew or glue onto the top of the mantle.
Body: Mantle / Cloak
Worked in mantle color yarn using a 2.5 mm hook:
- R1: MR 6 sc (6)
- R2: 6 inc (12)
- R3: (sc, inc)*6 (18)
- R4–R6: 18 sc (18) (3 rounds total)
- Switch to linear rows:
- Row 7: 10 sc, ch 1, turn (10)
- Row 8: inc, 8 sc, inc, ch 1, turn (12)
- Row 9: inc, 10 sc, inc, ch 1, turn (14)
- Row 10: 14 sc, ch 1, turn (14)
- Row 11: inc, 12 sc, inc, ch 1, turn (16)
- Row 12: 16 sc, ch 1, turn (16)
- Row 13: inc, 14 sc, inc, ch 1, turn (18)
- Row 14: 18 sc, ch 1, turn (18)
- Row 15: inc, 16 sc, inc, ch 1, turn (20)
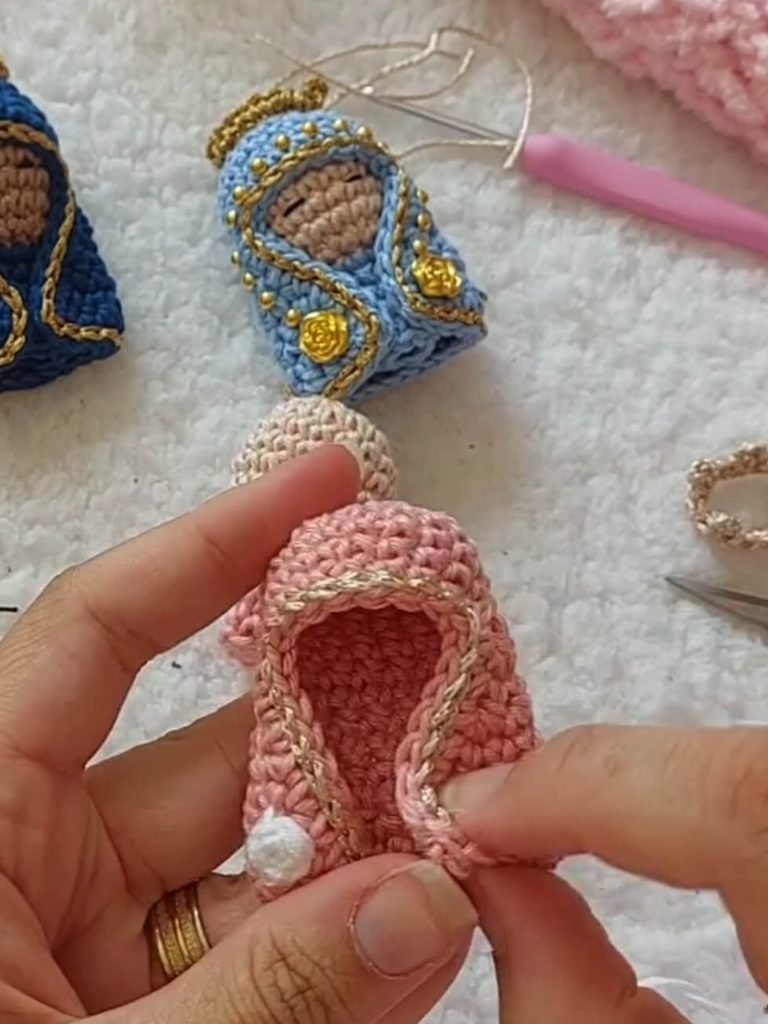
- Edging: Work 1 round of sc evenly around the outer edges of the mantle to give it a clean finish.
- Metallic Trim: Switch to Encanto Slim metallic yarn and work 1 row of sl st along the edge for a touch of shine.
Part 4: Assembly & Finishing
- Embroidery:
- Using white yarn, embroider two woven wheel roses on both sides of the front mantle.
- Using light green yarn, embroider small V-shaped leaf accents next to each rose.
- Assembly:
- Insert a pen or pencil into the holder tube to keep the shape firm while assembling.
- Apply a small amount of glue to the top and back of the head/body, then drape the mantle snugly over the head and body.
- Place the crown on top of the mantle-covered head and secure it with glue.
Step by Step Guide
Pattern Question:
Question 1: How can I make sure the mantle sits neatly on the head without twisting when glued?
Answer: Keep the pen or pencil inside the body tube throughout the assembly process. Apply small dabs of craft glue or hot glue on the back of the head and lower neck, ensuring the embroidered eyes are facing directly forward before pressing the mantle in place.
Question 2: Can I adjust the inner body tube to turn this project into a finger puppet?
Answer: Absolutely! To make a finger puppet, do not decrease down to 9 sc on the body. Instead, maintain 12 sc from the neck and crochet straight down for 5–6 rounds so it fits comfortably on a finger.
Question 3: How do I embroider the Woven Wheel Rose on the mantle?
Answer: Stitch 5 straight spokes radiating from a central point to form a 5-pointed star. Bring your needle up near the center and weave the yarn alternately over and under each spoke in a continuous circle until the star base is completely covered.
Detailed Pattern Breakdown
The saint topper consists of 3 main structural elements: the Head & Pen Holder Assembly, the Draped Mantle, and the Shimmering Crown.
1. Head & Body Breakdown:
- Sphere Shaping (R1–R9): Starts at the top with a
MR 6 sc, expanding steadily up to18 scfor a spherical shape. It reduces to12 sc, where aBLOrow on R9 forms a defined neck indent. The Inverted Magic Ring creates a clean, rounded chin. - Seamless Tube Extension (R1–R5 Body): Utilizing the unused
FLOloops left at the neck,9 scstitches are worked downward for 5 rounds. This 9-stitch diameter provides the perfect snug fit for standard pen shafts.
2. Mantle & Crown Breakdown:
- Cap Hood & Drapery: The top of the cloak starts in rounds (
18 sc) to form a cap shape over the head. It then transitions to 10 flat stitches (10 sc), using increases (inc) at both ends of the rows to flair out naturally into a wide cloak terminating at20 sc. - Hook Sizing Strategy: Switching from a 2.2 mm hook to a 2.5 mm hook for the mantle relaxes the yarn tension, creating a softer drape without adding extra rounds.
3. Decorative Details Breakdown:
- Framing Edges: Single crochet (
sc) along the border smooths out any raw edges from row ends. The slip stitch (sl st) overlay using metallic thread creates an elegant golden trim.