
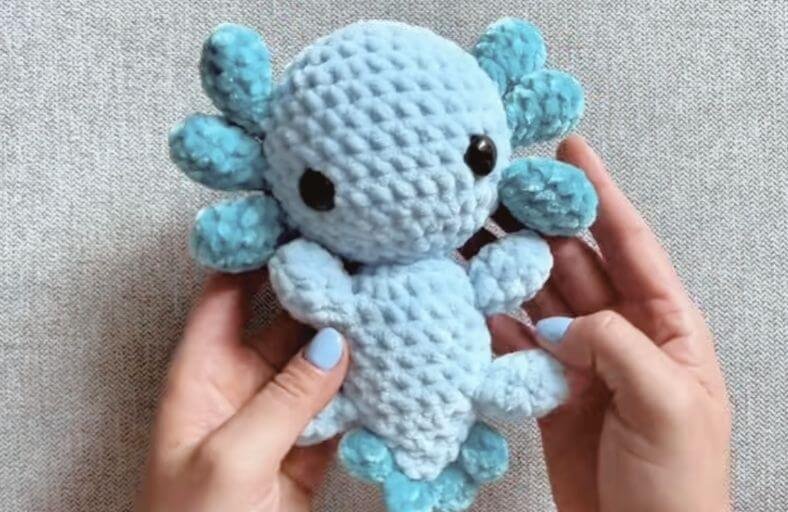
Ever dreamed of having your very own aquatic best friend without the hassle of cleaning an aquarium? Meet our ridiculously plush, super cuddly Crochet No Sew Axolotl!
If you dread the end of an amigurumi project because it means sewing together dozens of tiny arms, legs, and gills, this pattern is your ultimate dream come true.
Everything, from those adorable feathery gills to the tiny swimming feet, is joined seamlessly as you work!
Materials and Preparation
Materials:
- Primary Yarn: Loops & Threads Sweet Snuggles Lite (Super Bulky / Plush Chenille Yarn) in Aqua Blue (or your favorite pastel shade).
- Secondary Yarn: Size 4 Velvet Yarn in Teal or Darker Aqua (for the frilly gills and tail fin).
- Stuffing: Premium Polyester Polyfill stuffing.
- Safety Eyes: 16 mm safety eyes with secure plastic back washers.
Tools:
- Crochet Hooks:
- 6.0 mm hook (for the main body, arms, and legs using plush yarn).
- 4.25 mm hook (for the gills and tail fin using velvet yarn).
- Yarn Needle: Tapestry/yarn needle for weaving in ends and closing up the tail.
- Stitch Marker: Essential for tracking rounds (or rely on row slip stitches).
- Scissors: Sharp craft scissors.
Preparation Notes:
- Master basic amigurumi fundamentals including the Magic Ring (
MR), single crochet (sc), increases (inc), and decreases (dec). - Keep your tension firm when working with chenille yarn to avoid gaps where polyfill might peek through.
- When working decreases with plush yarn, pull slightly on the working loop to cinch the stitch snugly and eliminate gaps.
Abbreviations and Notes
Abbreviations:
- MR: Magic Ring
- ch: Chain stitch
- sc: Single crochet
- inc: Single crochet increase (2 sc in the same stitch)
- dec: Single crochet decrease (2 sc joined together)
- hdc: Half double crochet
- dc: Double crochet
- sl st: Slip stitch
- FLO: Front loop only
- BLO: Back loop only
Pattern Notes:
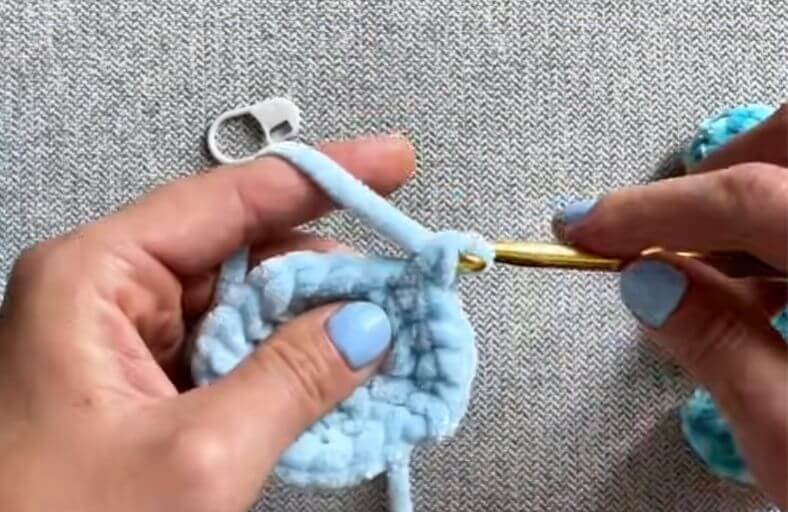
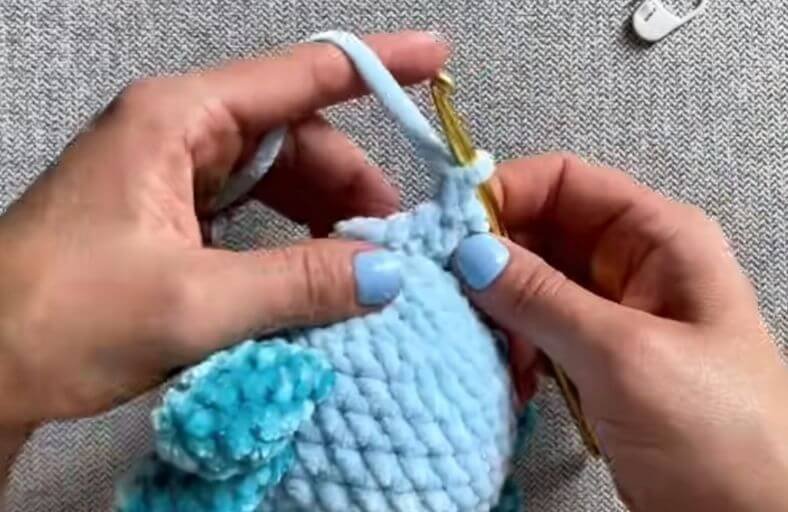
- No-Sew Technique: The gills, arms, and legs are crocheted beforehand and joined directly into the head and body rounds using single crochets through both layers.
- Joined Rounds for Main Body: The head and body are worked in joined rounds (ending each round with a
sl stinto the first stitch and starting with ach 1). - Spiral Rounds for Attached Parts: The gills and limbs are crocheted in continuous spiral rounds without joining.
Gauge, Approximate Size, and Pattern Notes
Gauge:
Exact gauge is not critical for this project. Focus on maintaining a tight tension so the stuffing remains hidden.
Finished Size:
Approximately 9–10 inches (23–25 cm) long from head to tail tip when made with the recommended plush yarns.
Special Techniques:
- No-Sew Attachment: Insert your hook through both stitches of the flattened attachment (gill or arm) and then through the next stitch of the main body, pulling yarn through all layers to complete a single crochet.
- Tail Shell Edging: Made by working multiple stitches (
sc,hdc,dc,hdc,sc) into a single chain stitch to form cute frills along the tail fin.
Step-by-Step Pattern
Part 1: Attached Small Parts (Gills, Arms, and Legs)
Gills (Make 6):
Use 4.25 mm hook and velvet yarn:
- R1: MR 6 sc (6)
- R2: (sc, inc)*3 (9)
- R3–R4: 9 sc (9) (2 rounds)
- R5: (sc, dec)*3 (6)
- R6: 6 sc (6) Fasten off with a sl st. Do NOT stuff. Repeat to create 6 identical gills.
Arms & Legs (Make 4):
Use 6.0 mm hook and plush chenille yarn:
- R1: MR 6 sc (6)
- R2–R4: 6 sc (6) (3 rounds) Fasten off with a sl st. Do NOT stuff. Repeat to create 4 limbs.
Part 2: Head & Body (With Integrated Attachments)
Use 6.0 mm hook and plush chenille yarn. Join each round with a sl st and start with ch 1:
- R1: MR 6 sc, sl st (6)
- R2: ch 1, 6 inc, sl st (12)
- R3: ch 1, (sc, inc)*6, sl st (18)
- R4: ch 1, sc, inc, (2 sc, inc)*5, sc, sl st (24)
- R5: ch 1, (3 sc, inc)*6, sl st (30)
- R6 (Attach Gills 1 & 2): ch 1, (12 sc, attach 1st Gill across 3 sc)*2, sl st (30)
- R7: ch 1, 30 sc, sl st (30)
- R8 (Attach Gills 3 & 4): ch 1, (12 sc, attach 3rd Gill across 3 sc)*2, sl st (30)
- R9: ch 1, 30 sc, sl st (30)
- R10 (Attach Gills 5 & 6): ch 1, (12 sc, attach 5th Gill across 3 sc)*2, sl st (30)
- R11: ch 1, (3 sc, dec)*6, sl st (24)
- R12: ch 1, sc, dec, (2 sc, dec)*5, sc, sl st (18)
- Placement Note: Insert 16 mm safety eyes between R9 and R10, approximately 8 stitches apart.
- R13: ch 1, (sc, dec)*6, sl st (12)
- Stuff the head firmly with polyfill.
- R14: ch 1, 6 dec, sl st (6)
- R15 (Body Start): ch 1, FLO 6 inc, sl st (12)
- R16: ch 1, (sc, inc)*6, sl st (18)
- R17 (Attach Arms): ch 1, attach 1st Arm across 3 sc, 7 sc, attach 2nd Arm across 3 sc, 5 sc, sl st (18)
- R18–R20: ch 1, 18 sc, sl st (18) (3 rounds)
- R21 (Attach Legs): ch 1, attach 1st Leg across 3 sc, 7 sc, attach 2nd Leg across 3 sc, 5 sc, sl st (18)
- Stuff the body with polyfill.
- R22: ch 1, (sc, dec)*6, sl st (12)
- R23: ch 1, (2 sc, dec)*3, sl st (9)
- R24: ch 1, (sc, dec)*3, sl st (6)
- Top up stuffing in the body before the opening closes.
- R25: 3 dec, sl st (3)
- Fasten off, weave tail through FLO of remaining 3 stitches, and pull tight to close.
Part 3: Tail Fin Details
Use 4.25 mm hook and velvet yarn:
- Attach velvet yarn with a
sl stto one side of the lower tail/body area. - Work 9 surface chain stitches along the edge of the tail up and around to the opposite side.
ch 1and turn your work to make the frilled tail fin:- In 1st st: (sc, hdc, dc, hdc, sc) all in one stitch.
- In 2nd st: sl st.
- Repeat: Repeat this 5-stitch shell combo followed by a
sl st4 times total to form 4 cute tail frills.
- Fasten off, knot the yarn tails securely, and hide the ends inside the axolotl body.
Detailed Pattern Breakdown
1. Head & Gill Integration Breakdown:
- Foundational Shaping (R1–R5): Begins with
MR 6 scand expands smoothly via standard amigurumi math up to 30 stitches, creating a rounded dome for the head. - Seamless Gill Attachment (R6, R8, R10): The 6 velvet gills are placed symmetrically in pairs. In each attachment round, 12 central face stitches separate the gills. Each gill is locked into place using 3
scthrough both the gill edge and the head wall, entirely eliminating the need to sew them on later. - Neck Tapering & Eye Placement (R11–R14): Decreases mirror the expansion math to form the chin and neck. Safety eyes are locked between R9 and R10 prior to stuffing and closing the neck opening down to 6 stitches.
2. Body & Limb Placement Breakdown:
- Front Loop Expansion (R15–R16): Working
6 incinto theFLOof R14 transitions seamlessly from head to body while preserving structure. - Arm & Leg Insertion (R17 & R21): Arms and legs are aligned using 3
scno-sew joins on either side of the belly (separated by 7 stitches on the stomach and 5 on the back). - Tail Tapering (R22–R25): Progressive decreases down to 3 stitches form a streamlined aquatic tail shape ready for fin detailing.
3. Surface Shell Tail Fin Breakdown:
- Base Chain Setup: Surface slip stitches create a sturdy foundation trail around the tail tip.
- Scalloped Shell Fins: Working
(sc, hdc, dc, hdc, sc)into individual chain stitches separated by slip stitches creates a ruffled fin that imitates the natural crest of a real axolotl.
Pattern Question:
Question: How do I ensure my gills and limbs point forward correctly instead of twisting backward when attaching them with the no-sew method?
Answer: Orientation depends on how you hold the piece while crocheting into it. Make sure your flattened gill or limb is held flat against the outside of the head/body wall with its right side facing outward.
When you insert your hook through both loops of the attachment and then into the next body stitch, complete the single crochet with normal tension. If you notice an attachment twisting, flip the piece 180 degrees before inserting your hook!