
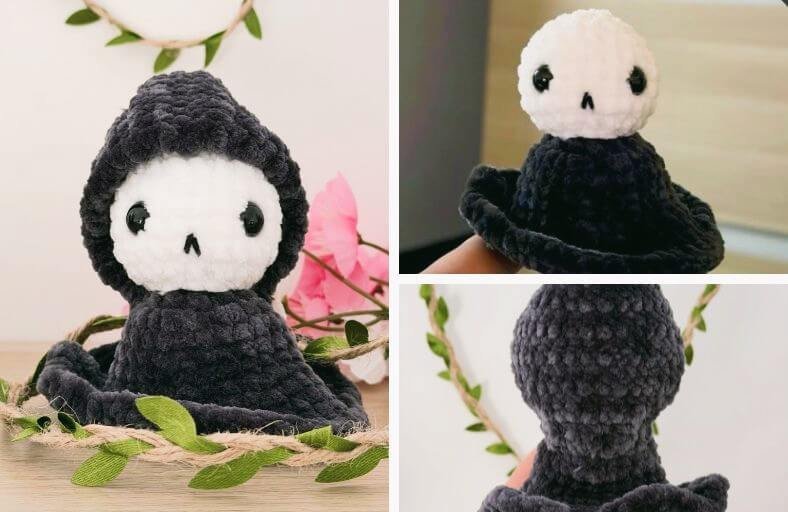
Who said the Grim Reaper has to be frightening when he can be pocket-sized, squishy, and downright adorable?
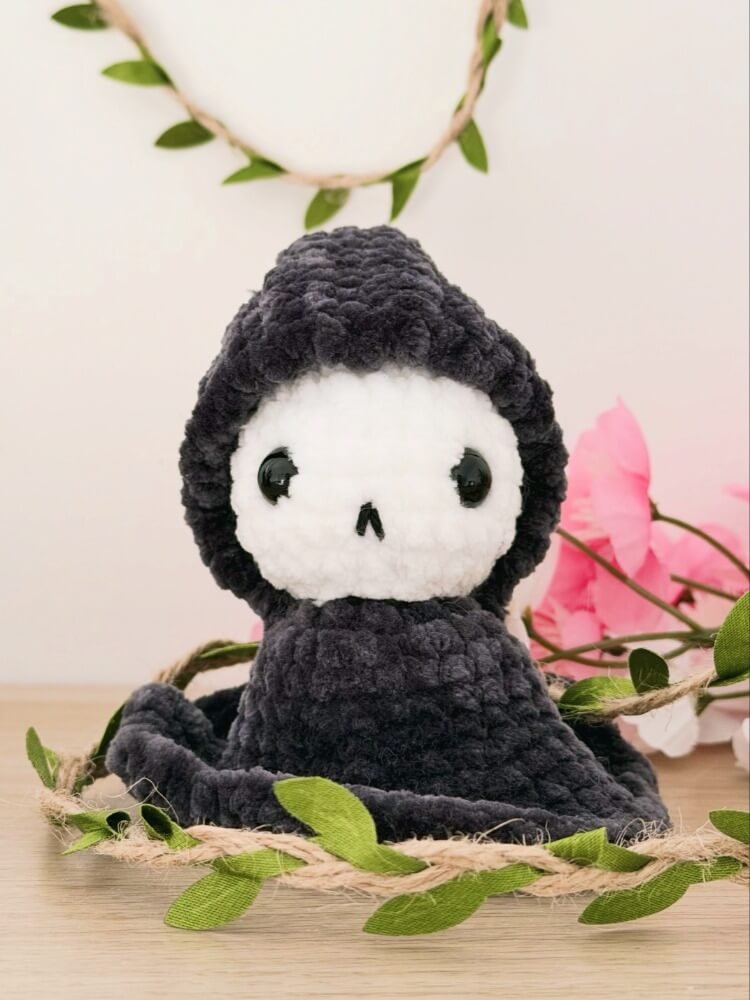
This cute little guardian of souls is worked up using soft chenille plush yarn, featuring a ruffled flowing cloak and a pointy hood that slips right over his tiny skull.
Grab your favorite hook, brew a cozy warm drink, and let us bring this charming spooky companion to life stitch by stitch!
Materials and Preparation
Materials:
- Yarn:
- Super bulky chenille / plush velvet yarn in White (for the skull head).
- Super bulky chenille / plush velvet yarn in Dark Gray or Black (for the body cloak and hood).
- A small scrap of black cotton yarn or embroidery floss for embroidering the nose.
- Safety Eyes: 1 pair of 10 mm black safety eyes.
- Stuffing: Polyester fiberfill stuffing (Polyfill).
Tools:
- Crochet Hook: 4.0 mm to 5.0 mm hook (choose a hook size small enough relative to your plush yarn to keep stitches tight and prevent stuffing from peeking out).
- Yarn Needle: Large-eye tapestry/yarn needle for joining and embroidery.
- Stitch Marker: To keep track of continuous spiral rounds.
- Scissors: Sharp craft scissors.
Preparation Notes:
- When working with chenille or velvet plush yarn, avoid pulling the starting tail too harshly to prevent shedding.
- Be sure to insert safety eyes and stitch the tiny triangular inverted nose securely before closing up the head completely.
Abbreviations and Notes
Abbreviations:
- MR: Magic Ring
- ch: Chain stitch
- sc: Single Crochet
- inc: Single Crochet Increase (2 sc into the same stitch)
- dec: Invisible Single Crochet Decrease (sc2tog through front loops)
- hdc: Half Double Crochet
- dc: Double Crochet
- sl st: Slip Stitch
- BLO: Back Loop Only (work into the back loop of the stitch)
- FLO: Front Loop Only (work into the front loop of the stitch)
Pattern Notes:
- The Head is worked in continuous spiral rounds without joining at the end of each round. Do not chain or slip stitch unless explicitly instructed.
- In R10 of the Head, work into the Back Loop Only (BLO), leaving the unused Front Loops exposed on the exterior.
- The Body Cloak is joined directly into the exposed Front Loops (FLO) of the Head’s Round 10. This creates a seamless transition without needing to sew the head and body separately.
- The Hood is worked in flat rows back and forth with turning chains, then folded in half and seamed across the back to create the signature peaked hood shape.
- Original design and pattern credit belongs to plushyrituals.
Gauge, Approximate Size, and Pattern Notes
Gauge:
Gauge is not critical for this amigurumi project. However, maintaining consistent tension is important so the stitches remain dense enough to conceal the fiberfill completely.
Finished Size:
Approximately 4.5 inches (11.5 cm) in total height including the hood, with a base diameter of about 4.0 inches (10.0 cm) across the ruffled robe hem.
Special Techniques:
- Working into FLO for Seamless Joining: Picking up stitches along the front loops of a previous round creates a clean skirt-like expansion for the cloak while maintaining structural stability underneath.
- Wave Hem Stitch Progression: Transitioning from
sl stthroughsc,hdc, todcand back down forms organic, wavy ripples resembling draped ghostly robes. - Flat-to-3D Hood Fold: Folding a symmetrical trapezoidal piece and slip-stitching or single-crocheting along the top edge forms an instant pointed hood.
Step-by-Step Pattern
Part 1: Head (Skull)
Work in continuous rounds using White plush yarn:
- R1: 6 sc in MR (6)
- R2: 6 inc (12)
- R3: (sc, inc) x6 (18)
- R4: (sc, inc, sc) x6 (24)
- R5–R8: 24 sc (24) (4 rounds total)
- Eye Placement: Insert 10 mm safety eyes between R6 and R7, placed approximately 5 sc apart. Firmly attach the safety backings.
- R9: (sc, dec, sc) x6 (18)
- Embroider Face & Stuff: Using a strand of black cotton yarn, embroider an inverted small triangular nose between the eyes across R8 and R9. Stuff the head firmly with polyfill.
- R10: BLO: (sc, dec) x6 (12)
- R11: 6 dec (6) Fasten off, weave the tail through the remaining front loops of the 6 stitches, pull tight to close the bottom of the skull, and weave in the end.
Part 2: Body (Robe & Cloak)
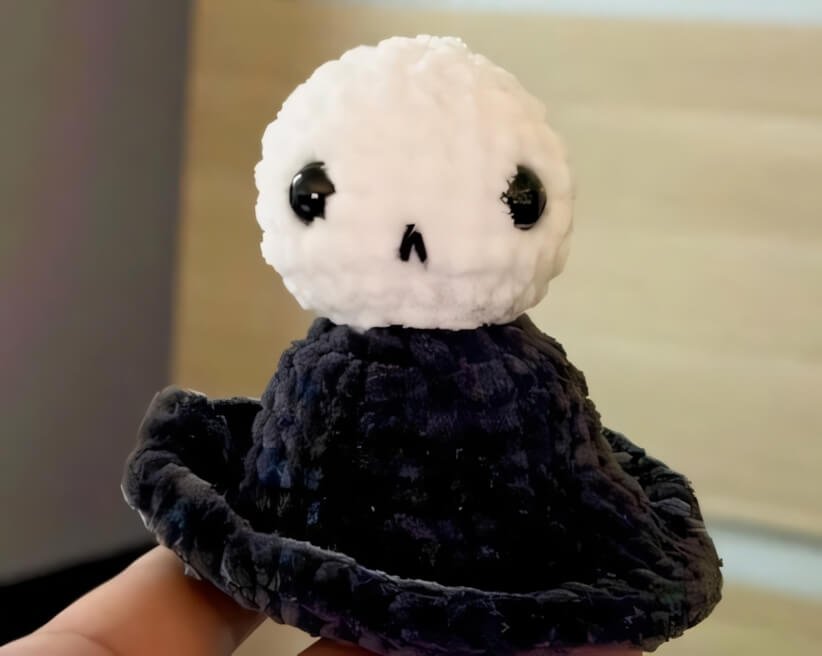
Using Dark Gray or Black plush yarn, attach yarn to the exposed Front Loops of Head’s R10:
- R1: In FLO of head’s R10: join yarn and work 12 sc around (12)
- R2: 12 inc (24)
- R3–R5: 24 sc (24) (3 rounds total)
- R6: (3 sc, inc) x6 (30)
- R7: (4 sc, inc) x6 (36)
- R8: 36 sc (36)
- R9: 18 inc, 18 sc (54)
- R10: (sl st, 2 sc, 3 hdc, 6 dc, 3 hdc, 2 sc, sl st) x3 (54) Fasten off, cut yarn, and neatly weave in all loose ends on the inside.
Part 3: Hood & Accessories
Head: Pointed Hood
Using Dark Gray or Black plush yarn, leaving a long starting tail for sewing to the body later:
- R1: Ch 13, turn, starting from the 2nd chain from hook: 12 sc (12)
- R2–R4: 12 sc, ch 1, turn (12) (3 rows total)
- R5: inc, 10 sc, inc, ch 1, turn (14)
- R6: 14 sc, ch 1, turn (14)
- R7: inc, 12 sc, inc, ch 1, turn (16)
- R8: 16 sc, ch 1, turn (16)
- R9: inc, 14 sc, inc, ch 1, turn (18)
- R10: 18 sc, ch 1, turn (18)
- R11: inc, 16 sc, inc, ch 1, turn (20)
- R12: 20 sc, ch 1, turn (20)
- R13: inc, 18 sc, inc, ch 1, turn (22)
- R14–R16: 22 sc, ch 1, turn (22) (3 rows total)
Assembly of the Hood piece: Fold the finished piece in half along the top edge with wrong sides facing out.
Make 11 sc across both matching top layers to seam them securely together, establishing the pointed tip of the hood. Fasten off, cut yarn, and hide tail. Turn the hood right side out so the seam sits cleanly on the inside.
Body: Robe Collar & Hood Attachment
- Positioning the hood onto the miniature reaper: Place the completed hood over the head, aligning the face opening neatly around the eyes and white skull. Using the long tail left from the foundation chain of the hood, carefully sew the lower inner edge of the hood along Round 3 of the dark body cloak.
Part 4: Edging, Assembly & Finishing
- Shaping the Robe Flare: Gently spread out the lower hem of Round 10 with your fingers to accentuate the dramatic wave folds formed by the alternating
sl st,hdc, anddcsections. - Securing the Hood: Ensure the hood stays in place by placing a couple of hidden tacking stitches along the back of the neck and sides if you want the hood to stay fixed permanently.
- Final Polish: Check that the embroidered triangle nose remains visible and straight. Clip any stray yarn fibers and smooth the velvet pile.
Detailed Pattern Breakdown
1. Head Structure Breakdown:
- Spherical Foundation (R1 to R4): The head begins with a classic 6-stitch magic ring and expands evenly using symmetrical increases up to 24 sc. Staggering increases in Round 4 as
(sc, inc, sc)avoids angular hexagonal shaping, resulting in a smooth circular skull profile. - Facial Field (R5 to R8): Working 4 straight rounds of 24 sc provides ample surface area for wide eye placement and high-contrast facial embroidery.
- Loop Separation (R10): Switching into Back Loop Only (
BLO) while continuing decreases from 18 sc down to 12 sc serves a dual purpose: it tapers the skull downward while leaving the outer front loops entirely accessible for the body’s starting round.
2. Body Flaring Breakdown:
- Zero-Sew Anchor (R1): Joining dark yarn directly into the 12 available front loops of Head Round 10 creates an unbreakable joint that prevents head flopping.
- Cloak Cone Expansion (R2 to R8): Round 2 doubles the stitch count from 12 to 24 sc instantly with 12 inc. The pattern then transitions through gradual expansions
(3 sc, inc)and(4 sc, inc)to establish an elegant bell silhouette. - Cascading Wave Hem (R9 and R10): Round 9 introduces asymmetrical weight by placing 18 inc across the first half and 18 regular sc across the remainder, reaching 54 stitches. Round 10 then converts these stitches into three flowing gothic ruffles using progressive stitch heights: starting low with
sl standsc, escalating up throughhdcto talldcpeaks, and curving smoothly back down.
3. Hood Architecture & Assembly Breakdown:
- Progressive Trapezoid (R1 to R16): Starting from a 12-stitch base, regular expansion rows every other row (
R5, R7, R9, R11, R13) widen the fabric outward to 22 sc. This accommodates the head’s spherical diameter comfortably without bunching up. - Seam Joining Technique: Folding the final 22-stitch edge in half and working 11 sc across pairs of stitches creates a sturdy spine and an authentic pointed witchy hood silhouette.
- Base Integration: Anchoring the hood foundation along Round 3 of the body embeds the hood naturally behind the neck, making the reaper look seamlessly draped in fabric rather than wearing an awkward detached cap.
Pattern Question:
Question: Why do we crochet the body into the Front Loop Only (FLO) of Round 10 instead of sewing the head to the body separately?
Answer: Crocheting directly into the exposed FLO loops of Round 10 eliminates sewing entirely, creating an ultra-sturdy, wobble-free neck connection.
It also provides a clean directional shelf where the dark cloak begins naturally right below the cheekline without any bulky seams showing on the exterior.
Question: My velvet yarn sheds or snaps when I pull the magic ring closed. How can I prevent this?
Answer: Chenille and velvet yarns have delicate fibers wrapped around a core thread that can strip under excessive friction.
To avoid snapping, pull the ring closed gently and slowly with your fingers supporting the base of the stitches. Alternatively, chain 2 and work the initial 6 single crochets directly into the second chain from the hook instead of using an adjustable ring.
Question: How can I make sure the finished mini reaper stands upright on a shelf without tipping over?
Answer: Because the body flares out into a broad 54-stitch ruffled hem, the base naturally provides great balance.
When finishing the piece, avoid stuffing the lower portion of the cloak with polyfill; keep all the stuffing contained firmly inside the white head, letting the dark cloak drape freely like an actual hollow robe.