
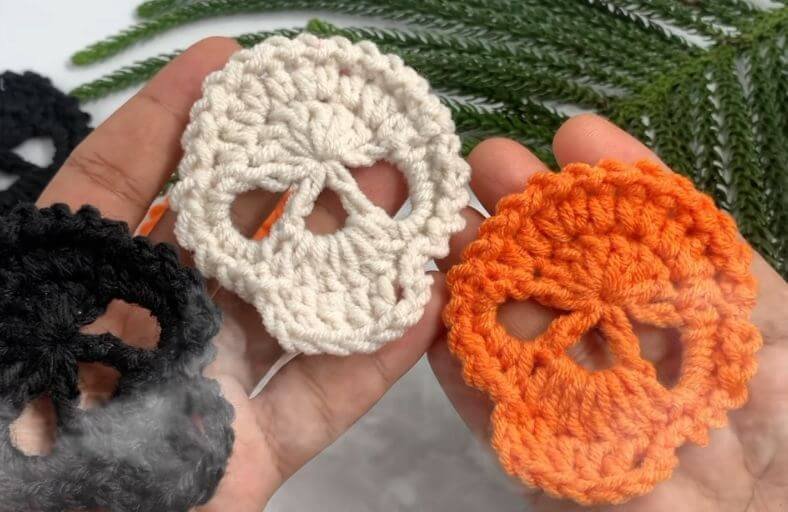
Looking to add a quick splash of spooky charm to your Halloween decor without spending hours on a complex project?
Whether you want to assemble a ghostly garland, embellish a tote bag, or create last-minute party favors, these quick crochet skulls are here to save the day!
Made in just three simple rounds, this pattern combines delicate openwork for the eye sockets and mouth with a decorative Picot-style outline.
Grab your favorite worsted yarn and let us turn a simple skein into something delightfully spooky!
Materials and Preparation
Materials:
- Yarn: Medium weight / Worsted weight yarn (Category 4) in Off-White, Black, Orange, or any vibrant Halloween color.
- Tapestry Needle: Yarn needle for weaving in loose ends cleanly.
Tools:
- Crochet Hook: 3.5 mm – 4.0 mm crochet hook (or size matching your chosen yarn gauge).
- Stitch Marker: Optional, helpful for keeping track of the starting point.
- Scissors: Sharp craft scissors.
Preparation Notes:
- Master basic stitches such as chain (
ch), single crochet (sc), half double crochet (hdc), double crochet (dc), and slip stitch (sl st). - Keep an eye on your tension: maintain relaxed loops during Round 1 so the eye sockets remain open and clear, but pull your magic ring tail tightly to close the top center crown.
Abbreviations and Notes
Abbreviations:
- MR: Magic Ring
- ch: Chain stitch
- sl st: Slip stitch
- sc: Single crochet
- hdc: Half double crochet
- hdc inc: Half double crochet increase (2 hdc in the same stitch)
- dc: Double crochet
Pattern Notes:
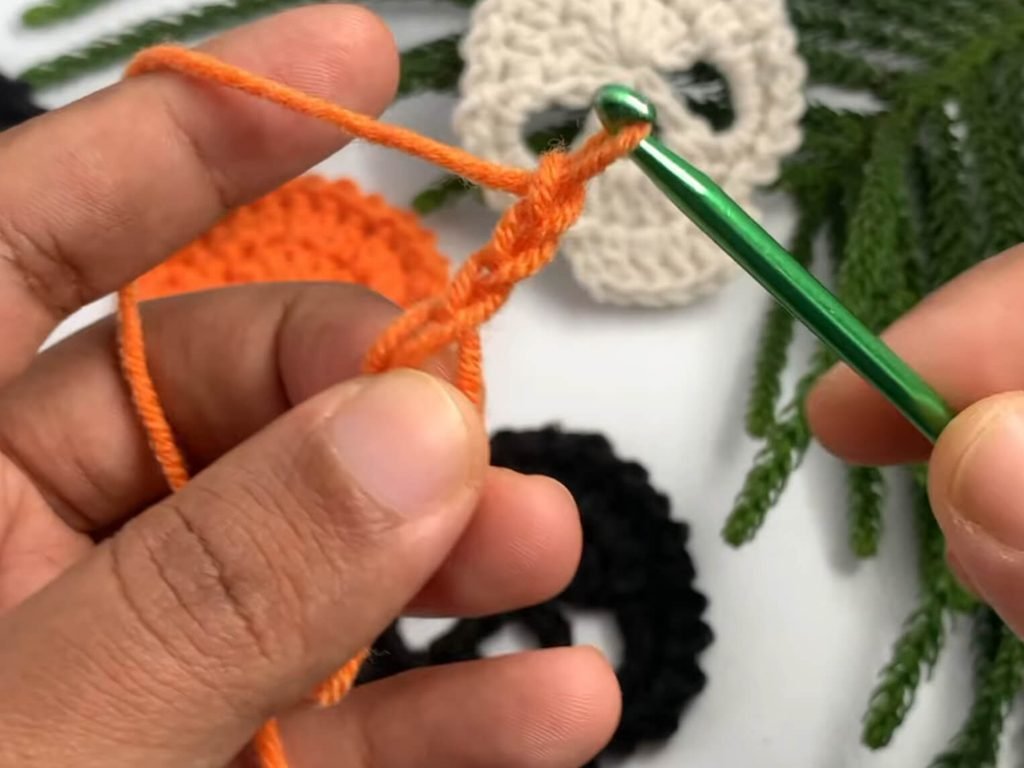
- Round 1 Foundation: The initial
ch 3counts as your first double crochet (dc). - Eye & Mouth Spaces: Round 1 uses explicit chain spaces (
ch 5for eyes,ch 3for the central nasal/mouth cavity) that are worked directly into during Round 2. - Picot Outline: Round 3 creates a beautiful textured scalloped border using repeating
ch 1, sl stsequences along the cranium and a structured jawline block at the base.
Gauge, Approximate Size, and Pattern Notes
Gauge:
Exact gauge is not critical for this motif project. Maintaining consistent tension ensures the eye socket spaces remain defined and symmetrical.
Finished Size:
Approximately 3.0 inches x 3.5 inches (7.6 cm x 8.9 cm) when worked with worsted weight yarn and a 3.5 mm hook.
Special Techniques:
- Magic Ring Closure: Pulling the center strand taut locks in the top dome structure while preserving the hanging openwork loops below.
- Chain-Space Filling: Working stitches directly around chain loops (rather than into individual chain loops) builds the facial features smoothly.
Step-by-Step Pattern
Part 1: Cranium Core & Openwork Feature Spaces
Worked in joined rounds starting from the center Magic Ring:
- R1: Start with a Magic Ring. Ch 3 (counts as 1 dc), work 7 dc into the ring. Pull the magic ring slightly to adjust space. Ch 5 (first eye space), 1 dc into the magic ring, ch 3 (nasal/mouth space), 1 dc into the magic ring, ch 5 (second eye space). Pull the magic ring tail firmly to close the center. Join with a sl st to the 3rd chain of the starting ch-3.
Part 2: Cranium Expansion & Facial Framing
Building the forehead curvature and filling facial cavities:
- R2: Ch 1, 1 hdc into the same base stitch. (1 hdc inc into next st, 1 hdc into next st) repeated 3 times, then 1 hdc inc into next st (8 hdc total across the top crown). Work 5 sc directly into the ch-5 space (first eye). Work 6 dc directly into the ch-3 space (mouth cavity). Work 5 sc directly into the next ch-5 space (second eye). Join with a sl st to the first st of the round.
Part 3: Decorative Edge & Teeth Structure
Part 3: Cranium Scalloped Edging & Jawline Base
Creating the textured outer trim and teeth block:
- R3: (Ch 1, sl st into next st) repeated 16 times along the outer crown edge. Sl st into the next st, ch 3, 1 dc in each of the next 4 stitches (creates 4 teeth / jaw structure), ch 3, sl st into the next st. (Ch 1, sl st into next st) repeated across remaining stitches until reaching the start point. Join with a sl st into the starting base.
Part 4: Edging, Assembly & Finishing
- Fasten off leaving a 4-inch (10 cm) tail.
- Thread the yarn tail onto a tapestry needle and weave it securely through the back loops of Round 3.
- Lightly steam block or finger-shape the facial openings to accentuate the cheekbones and square jawline.
Detailed Pattern Breakdown
1. Upper Crown & Openwork Architecture Breakdown:
- R1 Concept: The crown construction balances 8 solid double crochet stitches across the upper half with strategically placed chain loops on the lower half. The
ch 5loops form large circular eye orbits, while the centralch 3loop creates the lower skull drop. - R2 Crown Expansion: Working alternating
hdcandhdc incacross the upper 8 stitches turns the flat center into a smooth semi-circular forehead contour.
2. Facial Opening Fill & Jaw Foundation Breakdown:
- R2 Cavity Work: By working
5 scinside thech 5spaces, the eye sockets receive a firm, clean border. Filling the centralch 3space with6 dcprojects the mouth area downward, creating the proper facial proportion before adding teeth. - R3 Edge Accent: The alternating
ch 1, sl stpattern creates a subtle picot-like ridge along the skull boundary, adding texture without overwhelming the piece.
3. Teeth Block & Final Framing Breakdown:
- R3 Jaw Construction: The jaw section transitions from the delicate picot edging into a solid block using
ch 3,4 dc, andch 3. This creates a defined rectangular chin that mimics teeth alignment. Finishing with symmetricalch 1, sl strepeats brings complete harmony to the silhouette.
Pattern Question:
Question 1: Why are my skull’s eye sockets warping or collapsing instead of staying round?
Answer: Eye socket distortion usually happens if stitches in Round 2 are worked into individual chain threads rather than around the chain loop itself. Make sure you insert your hook directly under the entire chain arch when working your 5 single crochets. Furthermore, ensure you do not pull your working yarn too tightly when transitioning between the eye spaces and the double crochet stitches in Round 1.
Question 2: How can I make these skulls larger or smaller for a bunting banner?
Answer: This pattern scales effortlessly with yarn weight and hook size! For mini skull confetti or delicate jewelry, use fine sock yarn/lace thread with a 2.0 mm hook. For large accent wall hangings or thick bunting, switch to plush chenille or bulky weight yarn with a 6.0 mm hook. You do not need to change any stitch counts in the pattern.
Question 3: What is the best way to keep the skull flat so it does not curl up at the edges?
Answer: If your work curls slightly toward the front, your Round 3 slip stitches might be a bit too tight. Focus on keeping your wrist relaxed during the ch 1, sl st border. Giving your finished piece a quick spritz of water and pinning it flat on a blocking board for a few hours will make the teeth crisp and the eye sockets pop perfectly!