
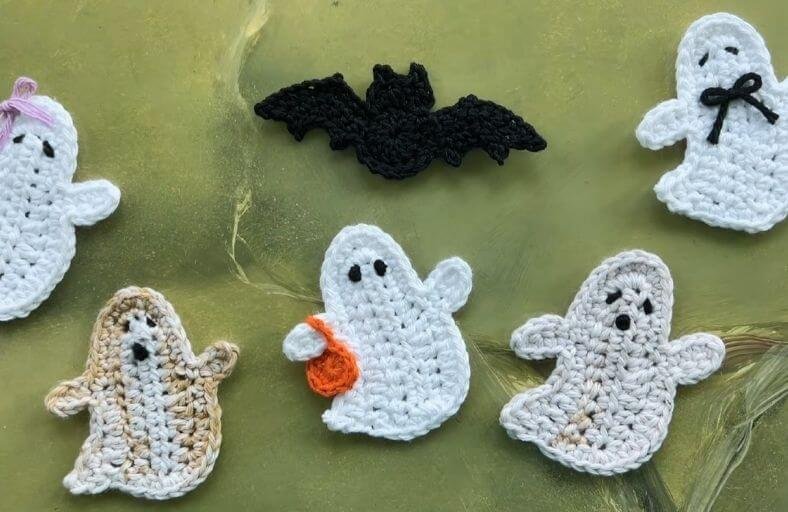
Who says ghosts have to be scary?
If your Halloween decor needs a dose of irresistible charm, these pocket sized crochet ghosts are here to haunt your heart in the sweetest way possible.
Whether you want to string them into a spooky garland, slap a magnet on the back for your fridge, or stitch them onto a sweater, bag, or blanket, this quick project uses minimal yarn and comes together in no time.
Grab your hook, and let us whip up some spooktacular cuteness together!
Materials and Preparation
Materials:
- Yarn:
- Medium weight cotton yarn (Category 4 / Worsted Weight, such as I Love This Cotton!) in White (or cream/beige for a vintage look).
- A tiny scrap of Black yarn for embroidery (eyes and mouth).
- Optional scraps of yarn in Pink, Orange, or Black for accessories (bows, purses, or bowties).
- Magnets (Optional): Small craft magnets if making fridge magnets (hot glue recommended for a secure hold).
Tools:
- Crochet Hook: 4.0 mm (US Size G/6) crochet hook.
- Yarn Needle / Darning Needle: For embroidering facial features and weaving in ends.
- Scissors: For trimming yarn.
- Stitch Markers: Optional, but helpful for tracking rows and rounds.
Preparation Notes:
- Basic familiarity with basic stitches (chain, single crochet, half double crochet, double crochet, and slip stitch) is all you need.
- Working with cotton yarn gives the applique crisp stitch definition, making the ghost silhouette pop.
- When working along the initial foundation chain in Round 3, catching just a single loop helps eliminate unsightly gaps along the spine of the ghost.
Abbreviations and Notes
Abbreviations:
- ch: Chain
- sc: Single Crochet
- hdc: Half Double Crochet
- dc: Double Crochet
- inc: Increase (2 stitches worked into the same stitch)
- sl st: Slip Stitch
- st(s): Stitch(es)
- SK: Skip
- FO: Fasten Off
Pattern Notes:
- The pattern begins with a foundation chain and two flat rows of half double crochet to form the inner core.
- Round 3 builds around both sides of these initial rows to create the rounded head and body contour.
- The arms and tail details are worked directly onto the body outline using clever chaining and reattachment steps, minimizing sewing.
Gauge, Approximate Size, and Pattern Notes
Gauge:
Gauge is not critical for this applique project. Keep your tension consistent so the stitches sit flat and tidy.
Finished Size:
Approximately 3 in x 3 in (7.6 cm x 7.6 cm) when using recommended worsted weight cotton yarn and a 4.0 mm hook.
Special Techniques:
- Chain Extension Arms: Waving ghost arms are created by chaining outward from the body margin, working back down the chain with half double crochets, and securing back into the base stitch.
- French Knot Mouth embroidery: A simple wrap and knot technique on the front of the piece creates an adorable, expression filled o-shaped mouth.
Step-by-Step Pattern
Part 1: Core Base
Start with White yarn:
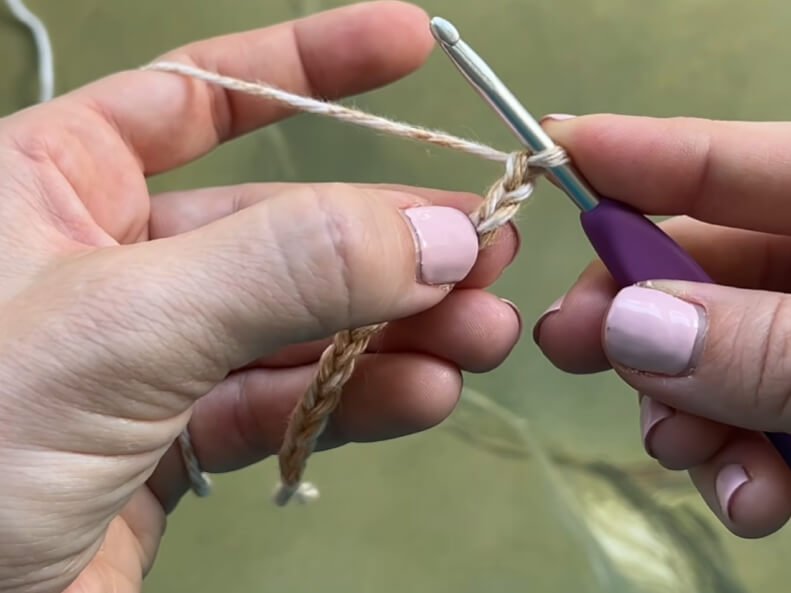
- Foundation: Ch 13.
- R1: Starting in the 3rd ch from hook (skipping 2 ch), hdc in each ch across. Turn. (11 hdc)
- R2: Ch 1, hdc in each of the 11 sts across. Turn. (11 hdc)
Part 2: Body and Head Shaping
Now working around the perimeter of the base to form the ghost head and back:
- R3:
- Ch 1, sc in first st.
- hdc in next 2 sts.
- dc in next st.
- 2 dc in next st.
- hdc in next 2 sts.
- sc in next 3 sts.
- 2 sc in the remaining last st of the top edge.
- Working down the row ends (rounding the top of the head): 2 sc in first row end, 2 sc in second row end.
- Rotate work to stitch along the unworked bottom loops of the foundation chain: sc in next 6 ch, hdc in next 2 ch, dc in final 3 ch.
- Rotate work to stitch across row ends along the bottom side: sc in first row end space, sc in second row end space, sc in third space, sc in fourth space, 2 sc in final row end space. Do not chain 1.
Part 3: Outer Border, Arms, and Tail
Ghost Arms & Body Outline:
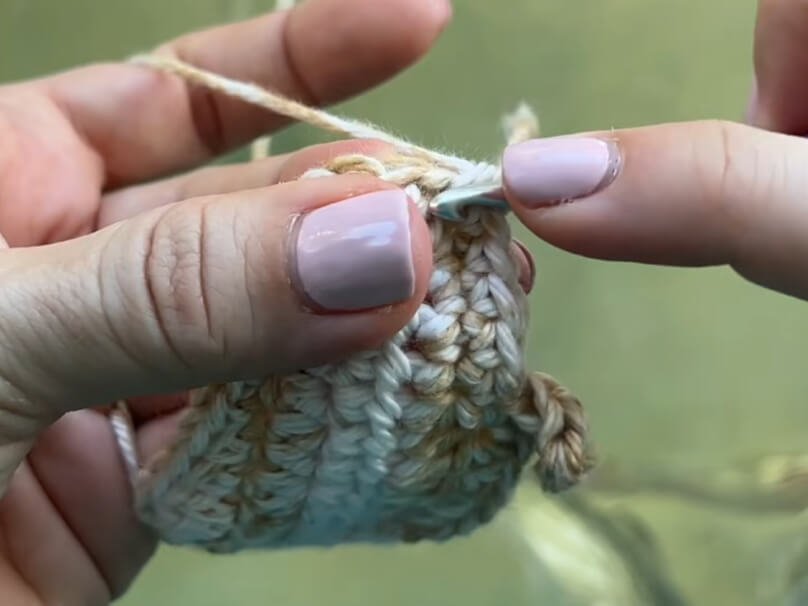
Continuing directly into the first st of Round 3 in a continuous motion:
- R4:
- sc in next st, hdc in next st, 2 hdc in next st, 2 hdc in next st, hdc in next st, sc in next 2 sts.
- First Arm: Ch 4. Starting in 2nd ch from hook, hdc in next 3 ch. sc back into the same st on the body where the last sc was worked.
- SK next st, sc in next 5 sts.
- 2 sc in next st, 2 sc in next st (rounds out the bottom corner).
- sc in next 7 sts.
- Second Arm: Ch 4. Starting in 2nd ch from hook, hdc in next 3 ch. sc back into the same st on the body where the last sc was worked.
- SK next st, sl st in next 3 sts.
- Curved Tail: sc in next st, hdc in next st, 2 dc in the final chain space.
- FO: Ch 1, cut yarn leaving a tail, pull through, and weave in ends at the back.
Part 4: Assembly & Facial Details
- Facial Embroidery:
- Thread a darning needle with a short strand of Black yarn.
- Eyes: Stitch two vertical or slightly slanted stitches across Round 3 near the top rounded section for the eyes. Tie off on the back side.
- Mouth: Bring the black thread from back to front between the eyes, tie a small knot flat on the front surface to form a cute open mouth, then pass the needle back through to the reverse side nearby. Knot securely behind the work.
- Optional Embellishments:
- Bow / Bowtie: Tie a small piece of yarn or ribbon into a tiny bow and stitch/glue it to the head or neck.
- Accessories: Add a tiny crocheted pumpkin or bag to one of the ghost arms for extra personality.
Detailed Pattern Breakdown
1. Core Structure Breakdown:
- The motif starts from a central strip of 11 hdc sts (R1 and R2). This rectangular base gives structural stability, ensuring the applique stays flat rather than curling into a cup shape.
2. Head & Back Contour Breakdown:
- In Round 3, the stitches transition dynamically: sc rightarrow hdc rightarrow dc rightarrow dc inc rightarrow hdc rightarrow sc. This gradient of stitch heights creates a gentle curve for the ghost back.
- Clustering 2 sc into each row end around the top corner turns the rectangular strip into a smooth, dome shaped head profile.
- Working down the foundation chain in single loops gives a clean edge without large holes.
3. Arms & Tail Contour Breakdown:
- The arms use an outward chain extension (ch 4, 3 hdc back) that anchors back into its originating base stitch, guaranteeing sturdy arms that maintain their shape without flopping.
- Skipping a stitch after each arm attachment prevents puckering along the body edge.
- The tail finishes with a progression of sc rightarrow hdc rightarrow 2 dc into the end space, giving the bottom a playful swoop.
Pattern Question:
Question 1: Why is my ghost curving or curling around the edges instead of laying flat?
Answer: Curling usually happens if your tension is too tight or if you are working with a hook that is too small for your yarn weight. Try stepping up to a 4.5 mm hook or blocking your finished applique by dampening it slightly and pinning it flat until dry.
Question 2: How do I secure this ghost applique to other crochet projects like blankets or bags?
Answer: Leave a long yarn tail (around 12–15 inches) when finishing off Round 4. Use your darning needle to whip stitch through the outer loops of the ghost boundary onto your main fabric piece.
Question 3: What is the best way to turn these appliques into sturdy fridge magnets?
Answer: While self adhesive magnet backings are convenient, they tend to peel off yarn over time. For a lasting bond, apply a generous dab of hot glue directly onto the back center of the crocheted ghost, press your magnet firmly into place, and allow it to cool completely.