
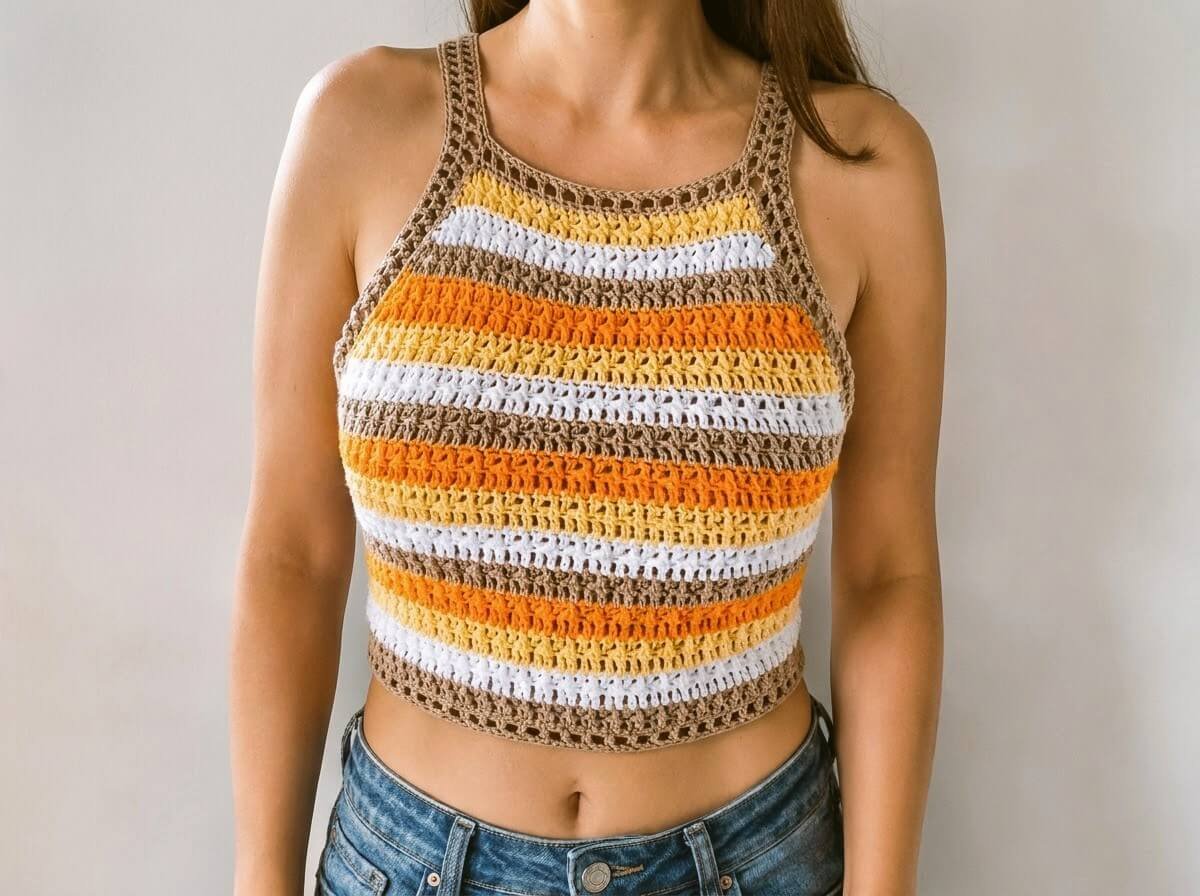
Ready to spice up your summer wardrobe with a retro, sun-kissed vibe?
This colorful striped halter crop top is the ultimate breezy summer piece, featuring a flattering high neck, open back criss-cross lacing, and textured ridged post stitches.
Whether you are heading to a music festival, lounging at the beach, or sipping iced coffee on a sunny patio, this customizable top will quickly become your favorite handmade garment.
Materials and Preparation
Materials:
- Yarn: DK / Light Worsted weight yarn (Category 3) in 4 complementary colors:
- Color A: Brown (Main border and accent stripes)
- Color B: Pink / Rose
- Color C: Cream / Beige
- Color D: White
- Lacing Cord Yarn: Matching brown yarn for the back lacing cord.
Tools:
- Crochet Hook: 3.5 mm (US E-4 or size needed to obtain gauge).
- Stitch Markers: At least 2 stitch markers to define front bust shaping boundaries.
- Yarn Needle: Tapestry needle for weaving in ends and joining shoulder straps.
- Scissors: Sharp craft scissors.
Preparation Notes:
- Practice the front post double crochet (
fpdc) stitch beforehand, as it creates the signature raised ridge texture on alternating rows. - Color changes occur every 2 rows at the end of even-numbered rows. Keep your yarn tails tidy as you go to avoid endless weaving later.
- The pattern is easily adjustable for custom lengths: add or remove pairs of rows in the lower body section to get your ideal crop height.
Abbreviations and Notes
Abbreviations:
- ch: Chain
- sc: Single Crochet
- hdc: Half Double Crochet
- dc: Double Crochet
- fpdc: Front Post Double Crochet
- dec: Decrease (dc2tog: Double Crochet 2 Together)
- sl st: Slip Stitch
- sk: Skip
- st(s): Stitch(es)
- RS: Right Side
- WS: Wrong Side
Pattern Notes:
- Original design and pattern credit belongs to manos de crochet.
- The turning chain-2 (
ch 2) at the start of double crochet rows does NOT count as a stitch throughout the pattern. - The main body consists of a 2-row repeat: Row 1 is worked in standard
dc, and Row 2 alternates standarddcandfpdcto produce a ribbed effect. - The pattern instructions below are written for Size M (125 initial chains). Stitch count adjustments for other sizes:
- Size XS / S: Chain 121 (count 30 stitches inward from each edge for bust shaping).
- Size M / L: Chain 125 (count 32 stitches inward from each edge for bust shaping).
- Size XL / XXL: Chain 133+ (count 36+ stitches inward from each edge for bust shaping).
Gauge, Approximate Size, and Pattern Notes
Gauge:
18 sts x 10 rows = 4 x 4 inches (10 x 10 cm) in alternating dc and ribbed post-stitch pattern using a 3.5 mm hook.
Finished Size:
- Bust Width (Lower Band): Approx. 27.5 inches (70 cm) un-stretched, suitable for 34 – 36 inch (86 – 91 cm) bust size with open back tie adjustment.
- Top Length (Center Neck to Hem): Approx. 13.5 inches (34 cm).
Special Techniques:
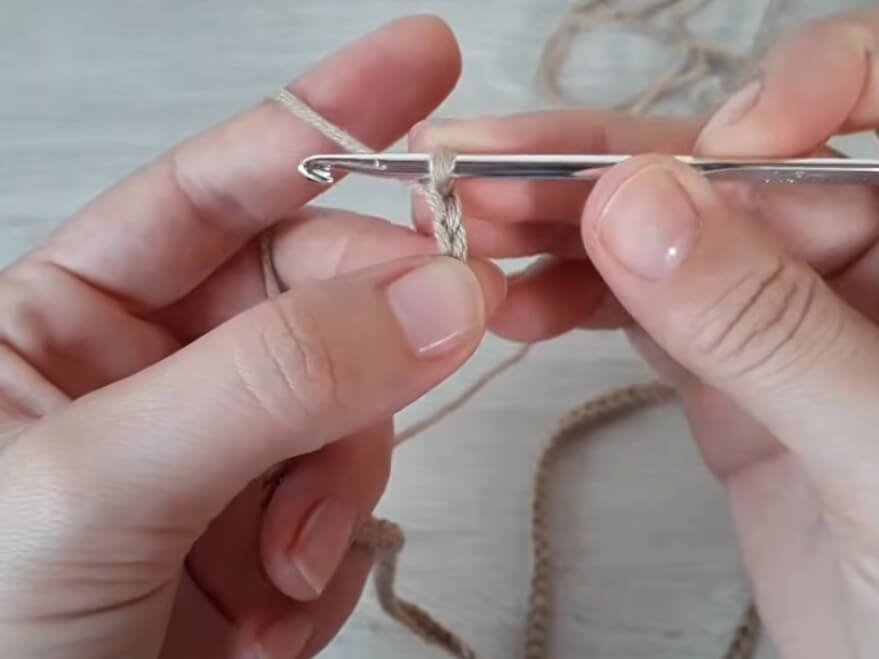
- Front Post Double Crochet (fpdc): Yarn over, insert hook from front to back to front around the post of the stitch from the row below, yarn over, pull up a loop, and finish the double crochet as normal.
- Color Change on Final Pull-Through: Change yarn color on the last yarn-over pull-through of the final stitch of the previous row.
Step-by-Step Pattern
Part 1: Main Lower Body (Rows 1 to 16)
Worked in alternating 2-row color stripes (Brown, Pink, Beige, White).
Row 1 (RS – Color A / Brown):
- Start with a slip knot and ch 125 (for Size M).
- ch 2 to turn (does not count as a st).
- In the 3rd ch from hook, work 1
dc. - Work 1
dcin each ch across to the end. (125 sts)
Row 2 (WS – Color A / Brown):
- ch 2, turn.
- Work 1
dcin the first st. - *Work 1
fpdcaround the next st, 1dcin the following st; repeat from * across until 2 sts remain. - Work 1
fpdcaround the second-to-last st, 1dcin the last st (on the last pull-through of this final st, join Color B / Pink). (125 sts)
Rows 3–4 (Color B / Pink):
- Row 3 (RS): ch 2, turn. Work 1
dcin every st across. (125 sts) - Row 4 (WS): ch 2, turn. 1
dcin first st, *1fpdcaround next st, 1dcin next st; repeat from * across. On final pull-through of last st, join Color C / Beige. (125 sts)
Rows 5–6 (Color C / Beige):
- Repeat Row 3 and Row 4 sequence. On final pull-through of Row 6, join Color D / White. (125 sts)
Rows 7–8 (Color D / White):
- Repeat Row 3 and Row 4 sequence. On final pull-through of Row 8, join Color A / Brown. (125 sts)
Rows 9–16:
- Repeat the 2-row color sequence (Brown, Pink, Beige, White) through Row 16. Fasten off and cut yarn after Row 16. (125 sts)
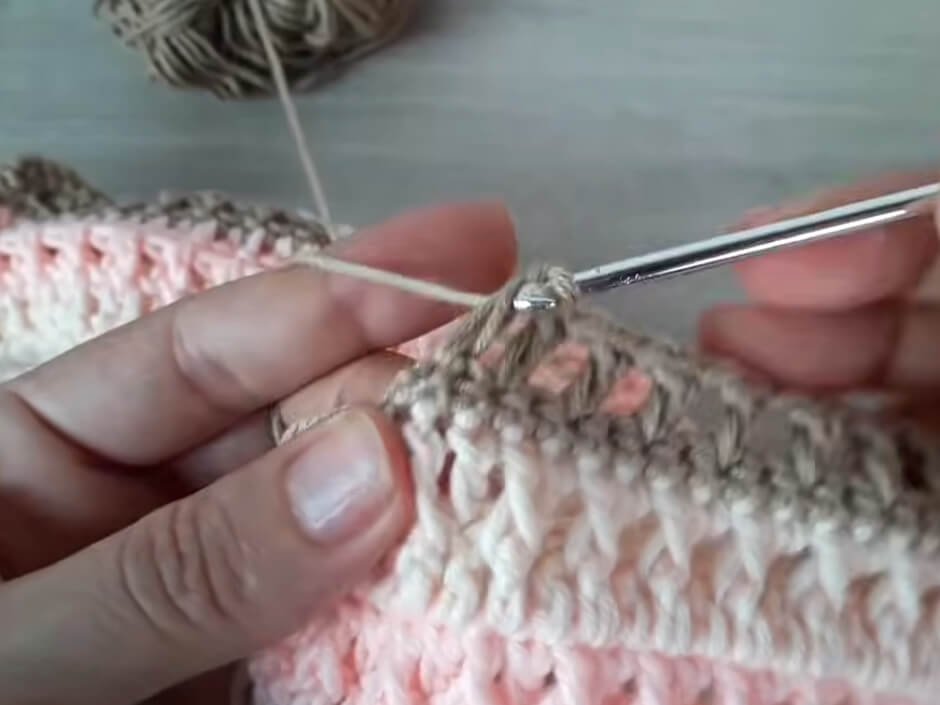
Part 2: Bust Shaping & Neck Incline (Rows 17 to 30)
Setup: Lay garment flat. Count 32 sts inward from the right edge and place a stitch marker in st 32.
Count 32 sts inward from the left edge and place a stitch marker in st 32. You will work across the central 61 sts between the markers (from st 33 to st 93).
Row 17 (RS – Color A / Brown):
- Join Brown yarn in st 33 (the st immediately following the right marker).
- ch 2,
dcin next st (this forms a 2-st decrease /decat the start). - Work 1
dcin each st across until 2 sts before the left marker. - Work a
dec(dc2tog) across the last 2 sts. Turn. (59 sts)
Row 18 (WS – Color A / Brown):
- ch 2, turn. Work a
decacross the first 2 sts. - Maintain post-stitch pattern: *1
fpdcaround next st, 1dcin next st; repeat from * until 2 sts remain. - Work a
decacross the last 2 sts (switch to Color B / Pink on final pull-through). Turn. (57 sts)
Rows 19–30:
- Continue the 2-row color rotation every 2 rows while executing a
decat the beginning AND end of every row. - Row 30: Final decrease row completed (33 sts remaining). Fasten off yarn.
Part 3: Neck Trim and Shoulder Straps
Top Neck Mesh Edge (Color A / Brown):
- Row 1: Join Brown yarn at the top neck row edge. ch 1, work 1
scin each st across top edge. Turn. (33 sts) - Row 2: ch 2,
dcin first st, *ch 1, sk 1 st,dcin next st; repeat from * across to create an eyelet mesh band. Turn. - Row 3: ch 1, 1
scin eachdcst and ch-1 space across. Do NOT cut yarn.
Shoulder Straps (Make 2):
- Ch 50 from top corner of neck band.
- ch 2 to turn. In 3rd ch from hook, work 1
dc. - *ch 1, sk 1 ch, 1
dcin next ch; repeat along chain until 6 sts remain. - Graduated neckline taper:
ch 1, sk 1, 1 hdc in next ch; ch 1, sk 1, 1 sc in next ch; ch 1, sk 1, sl st into neck corner. - Fasten off strap and attach to back edge with
sl st. Repeat for second strap on opposite neck corner.
Part 4: Side Edgings, Back Eyelet Panels & Assembly
Back Lacing Eyelet Panels:
- Join Brown yarn at the back left vertical edge.
- Work 2 rows of
dcvertically along the side edge to form a firm panel for lacing loops. - Repeat for back right vertical edge.
Hem Line Finish:
- Work 1 row of
dc,ch 1, sk 1mesh along bottom hem for optional decorative tassels or drawstring placement. - Work a final stabilizing row of
scalong all outer armhole borders.
Lacing Cord (300 Chains):
- ch 301 with Brown yarn.
- Turn, work 1
sl stin each ch across to create a durable cord. - Criss-cross cord through back eyelet panels to complete garment.
Detailed Pattern Breakdown
1. Lower Body Panel & Ribbed Texture Strategy:
- The base structure utilizes a foundation row of standard double crochets followed by alternating rows of front post double crochets (
fpdc). - The front post stitches pull the yarn forward, creating raised vertical ridges that mimic knit ribbing. This adds natural elasticity across the ribcage without needing complex shaping.
2. Angular Bust Decrease Logic:
- Bust shaping is achieved by placing decreases at both ends of every single row across Rows 17 to 30.
- Decreasing exactly 2 stitches per row (1 st at the start, 1 st at the end) creates a clean 45-degree diagonal line that neatly transitions from the underarm to the halter neckline.
3. Integrated Straps and Back Assembly:
- Shoulder straps are worked directly from the neck corners using open eyelet mesh, which allows the halter top to remain breathable and lightweight.
- Graduated stitch heights (
dcrightarrowhdcrightarrowscrightarrowsl st) smooth out the junction where straps meet the bust line, preventing unsightly bunching under the armpits.
Pattern Question
Question: My top curves upward along the bottom edge, and the post stitches look messy. How can I fix this?
Answer: If the bottom hem is curling, your initial foundation chain was likely too tight. Try using a 0.5 mm larger crochet hook for the chain row only.
For messy post stitches, always ensure you insert your hook completely under the post of the stitch from the row below (not under the top loops), and pull your loop up to the height of a regular double crochet before completing the stitch.