

Ready to spin some spooky magic without summoning any actual eight-legged roomies?
Whether you are gearing up for Halloween or simply want to add a dash of gothic charm to your handmade decor, this crochet spider web is the ultimate quick project.
It transforms from a simple wheel of stitches into a striking, realistic spider web with just a splash of starch and a few strategically placed pins.
Materials and Preparation
Materials:
- Yarn: Fine sport weight yarn or double knit (DK) yarn in black (or any bright color if you prefer high visibility while stitching).
- Blocking Supplies: Foam blocking mat (or a firm cushion/cardboard), plastic wrap or plastic sheet (to protect your mat), and plenty of rust-proof T-pins.
- Stiffening Agent: Fabric stiffener or liquid laundry starch.
Tools:
- Crochet Hook: 3.5 mm crochet hook (or the size recommended on your yarn band).
- Yarn Needle: Tapestry needle for weaving in ends.
- Scissors: Sharp craft scissors.
- Small Bowl/Container: For soaking the web in fabric stiffener.
Preparation Notes:
- Working with black yarn can be tricky on the eyes, so make sure you work in a well-lit area or practice the round repeats with a bright swatch first.
- Keep your chain tension relatively consistent so the web expands evenly when pinned out.
Abbreviations and Notes
Abbreviations:
- MR: Magic Ring (Magic Circle)
- ch: Chain stitch
- sc: Single Crochet
- dc: Double Crochet
- sl st: Slip Stitch
Pattern Notes:
- This project is worked in joining rounds. Each round begins with a chain sequence where the first 3 chains act as your initial
dc. - The core pattern expands outward by adding 2 chain stitches to the chain spaces on every new round.
Gauge, Approximate Size, and Pattern Notes
Gauge:
Exact gauge is not critical for this project. Tension will naturally open up during the wet blocking phase.
Finished Size:
Approximately 5 inches (12.7 cm) in diameter after Round 5. The pattern can easily be scaled up to any desired size by following the expansion formula.
Special Techniques:
- Wet Blocking & Stiffening: Soaking the finished crochet piece in fabric stiffener and stretching it with pins on a foam board to give the spider web its rigid, geometric shape.
- Arched Shaping: Using additional pins to pull the chain lengths inward or outward to create classic scalloped spider web edges.
Step-by-Step Pattern
Part 1: Central Hub & Inner Spokes
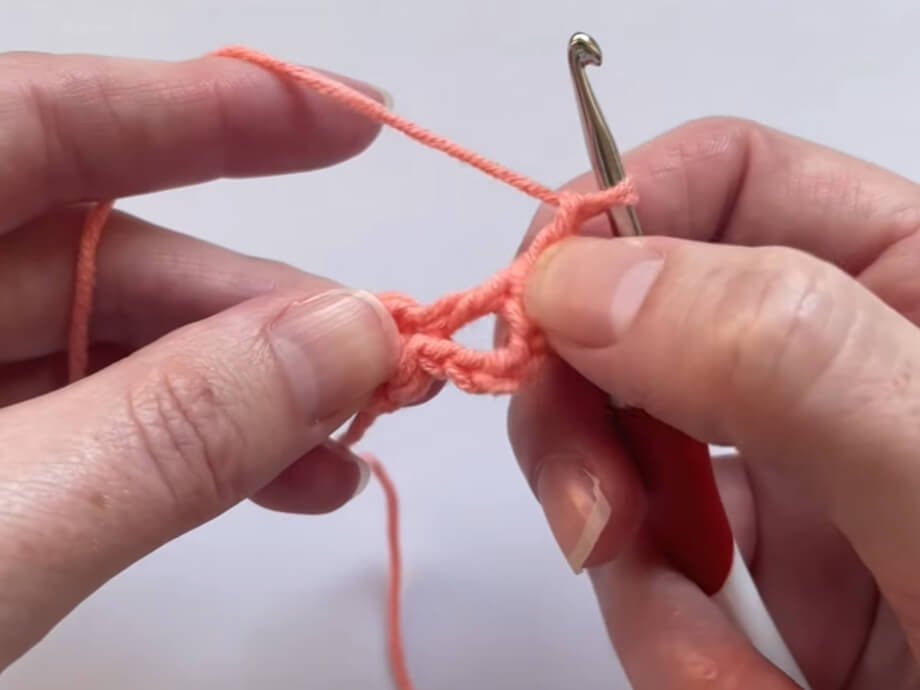
- Round 1: Start with a MR. Work 4 sc into the circle. Pull the ring closed and sl st into the first sc to join. (4 sc)
- Round 2: Ch 5 (counts as 1 dc + ch 2). Work 1 dc into the same stitch at the base of the joining sl st, then ch 2. (In the next sc: work 1 dc, ch 2, 1 dc, ch 2). Repeat * to * 2 more times (working across the remaining 3 sc of Round 1). Sl st into the 3rd ch of the starting ch-5 to join. (8 dc spokes separated by ch-2 spaces)
Part 2: Expanding the Web Structure
- Round 3: Ch 7 (counts as 1 dc + ch 4). Work 1 dc into the next dc stitch, ch 4. (Work 1 dc into the next dc, ch 4). Repeat * to * 5 more times around (7 times total). Sl st into the 3rd ch of the starting ch-7 to join. (8 dc spokes separated by ch-4 spaces)
- Round 4: Ch 9 (counts as 1 dc + ch 6). Work 1 dc into the next dc stitch, ch 6. (Work 1 dc into the next dc, ch 6). Repeat * to * 5 more times around (7 times total). Sl st into the 3rd ch of the starting ch-9 to join. (8 dc spokes separated by ch-6 spaces)
- Round 5: Ch 11 (counts as 1 dc + ch 8). Work 1 dc into the next dc stitch, ch 8. (Work 1 dc into the next dc, ch 8). Repeat * to * 5 more times around (7 times total). Sl st into the 3rd ch of the starting ch-11 to join. (8 dc spokes separated by ch-8 spaces)

Part 3: Scaling Up & Custom Sizes
Custom Sizing Formula:
To make a larger web, continue adding rounds using this formula: increase both the starting chain count and the intermediate chain gaps by 2 chains per round.
Round Extensions:
- Round 6 (Optional): Ch 13 (counts as 1 dc + ch 10). Work 1 dc into each dc around with ch-10 spaces between them. Join with a sl st to the 3rd ch.
- Round 7 (Optional): Ch 15 (counts as 1 dc + ch 12). Work 1 dc into each dc around with ch-12 spaces between them. Join with a sl st to the 3rd ch.
- Fasten off and weave in both tail ends securely.
Part 4: Blocking, Stiffening & Assembly
- Soaking: Pour liquid fabric stiffener or starch into a small bowl. Submerge your crochet web completely and press it so the fibers absorb the liquid fully. Gently squeeze out any excess stiffener without twisting.
- Board Setup: Cover your foam blocking board with a sheet of plastic wrap or a plastic bag to prevent sticking.
- Pinning the Main Framework:
- Insert a pin directly through the center of the web into the board.
- Pull the top spoke directly upward until taut and pin it. Pull the bottom spoke straight down and pin it.
- Stretch and pin the far left and far right spokes to establish a cross shape.
- Stretch and pin the remaining 4 diagonal spokes evenly to create an 8-pointed star/diamond frame.
- Creating the Curved Web Effect:
- For classic scalloped edges, place additional pins along the chain loops between the main spokes.
- Gently pull the midpoint of each inner chain loop slightly toward the center hub and pin down.
- For the longer outer chain loops, use two pins per section (placed at approximately one-third and two-thirds along the length) to pull the chains inward and form realistic curved webs.
- Drying: Leave the web pinned overnight until completely dry to the touch. Once dry, remove all pins and display your stiffened spider web.
Detailed Pattern Breakdown
1. Central Foundation & Spoke Architecture:
- Round 1: The project begins with a tight
MRcontaining 4sc. This serves as the anchor for the entire geometric structure. - Round 2: Each of the 4 base
screceives twodcstitches separated bych-2spaces. This doubles the stitch points from 4 to 8, establishing the 8 main structural radial spokes that run through the web.
2. Radial Expansion Logic:
- Rounds 3 to 5: The length of the radial spokes remains fixed by using 1
dcdirectly into eachdcfrom the previous round. The open web mesh is created purely by widening the chain spaces between these spokes. - Chain Increment Math: Each consecutive round increases the chain gap count by 2 (
ch-2in Round 2 rightarrowch-4in Round 3 rightarrowch-6in Round 4 rightarrowch-8in Round 5). - Starting Chain Conversion: The initial chain sequence at the start of each round replaces the first
dcplus the chain gap. Since adcequals 3 chains in height, the calculation is always:3 chains + current round's chain gap(e.g., Round 3 starts with 3 + 4 = 7 chains).
3. Transformation Through Blocking Mechanics:
- Wet State vs. Finished State: Unblocked, the crochet piece resembles a soft, wavy floral motif. The geometric spider web appearance is achieved entirely through wet blocking with stiffener.
- Tension & Curvature: Pinning the 8 main
dcspokes outward under tension straightens the radial lines. Pinning the intermediate chain loops inward against that tension creates the distinctive concave arches seen in natural spider webs.
Pattern Question:
Question: My crochet web looks floppy and looks more like a round coaster or flower than a spider web. What did I do wrong?
Answer: Don’t worry, that is completely normal! Before stiffening, the pattern looks like a loose, wavy wheel. The magic of this pattern lies in the blocking phase.
You must soak the piece in fabric stiffener or starch, pin the 8 main spokes outward tightly onto a foam mat, and then use extra pins to pull the chain spaces inward toward the center to create those iconic curved web arches. Once it dries completely, it will hold its rigid, spooky shape!