
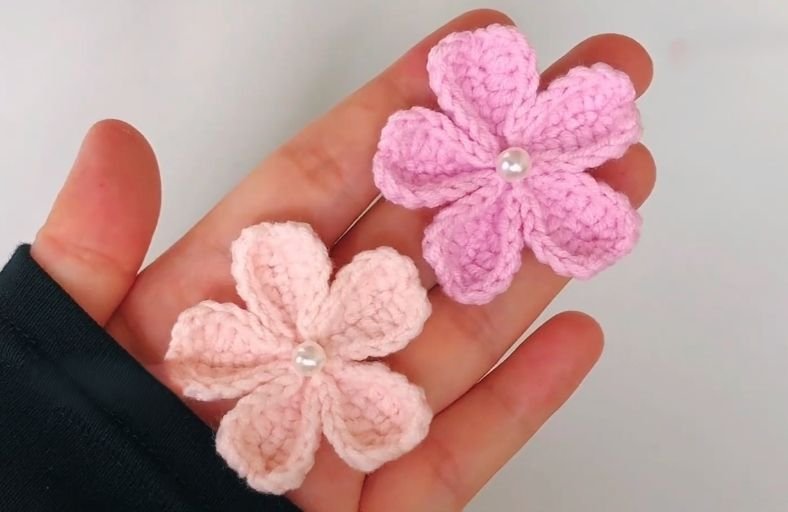
Ever wished spring could last all year long without triggering your pollen allergies? Grab your yarn and hook because these charming little cherry blossoms are about to bring a permanent pop of floral joy to your handmade collection!
Whether you want to attach them to hair clips, adorn your favorite tote bag, or sprinkle them across a handmade blanket, this delightful project comes together quickly and easily.
Materials and Preparation
Materials:
- Yarn: Soft cotton or acrylic yarn in light pink or magenta (or any flower shade you prefer). A small amount of white or yellow yarn can be added for accent details.
- Embellishments (Optional): Faux pearl beads or small buttons for the flower center.
Tools:
- Crochet Hook: 2.0 mm to 2.5 mm hook (or sized appropriately for your chosen yarn weight).
- Yarn Needle: Tapestry needle for weaving in ends and sewing on central pearls.
- Stitch Marker: Optional marker to track your base ring.
- Scissors: Sharp craft scissors.
Preparation Notes:
- Practice your basic stitches (single crochet, half double crochet, and double crochet) before starting.
- Keeping your tension even ensures all five petals stay uniform and flat.
Abbreviations and Notes
Abbreviations:
- MR: Magic Ring
- ch: Chain stitch
- sc: Single Crochet
- hdc: Half Double Crochet
- dc: Double Crochet
- dc inc: Double Crochet Increase (2 dc worked into the same stitch)
- sl st: Slip Stitch
Pattern Notes:
- This pattern creates a 5-petal blossom worked in two main stages: forming the 5 foundation petal stems, then shaping each petal with symmetrical stitches on both sides.
- Make sure not to twist your chains when working back down the petal stems.
Gauge, Approximate Size, and Pattern Notes
Gauge:
Gauge is not critical for this project. Choosing a smaller hook relative to your yarn gauge creates firmer, neat-looking petals.
Finished Size:
Approximately 2.0 in to 2.5 in (5.0 cm to 6.5 cm) in diameter when using standard sport/DK weight yarn.
Special Techniques:
- Working along both sides of a chain: You will hook stitches down one side of the foundation stem, make a picot-like chain tip, and then work symmetrically down the opposite side of the chain loops.
- Central Pearl Attachment: Sewing a small pearl bead directly in the center conceals the magic ring join while elevating the finished blossom.
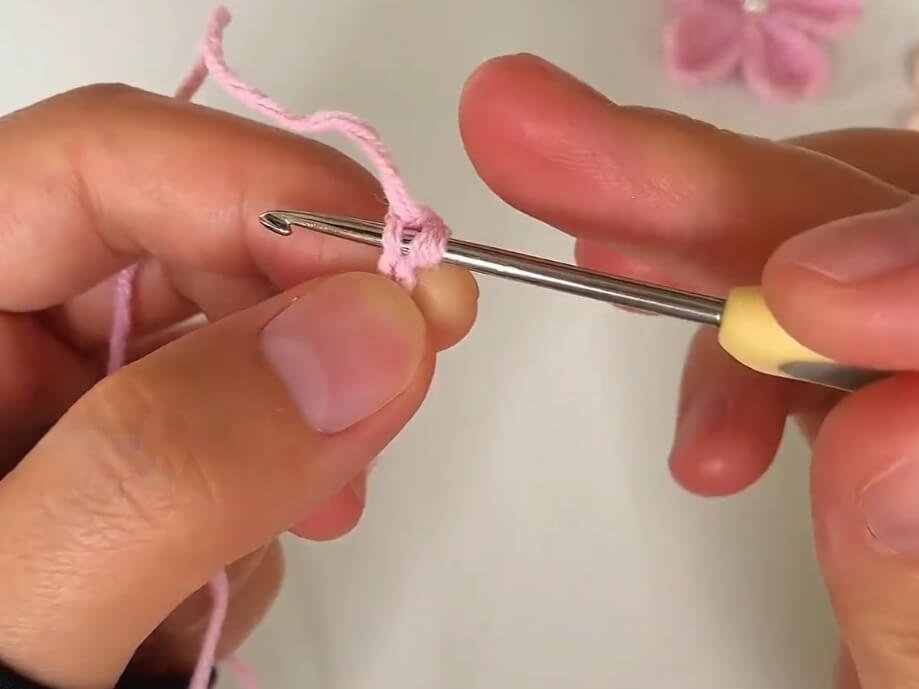
Step-by-Step Pattern
Part 1: Foundation Stems & Base Ring
Worked into a Magic Ring to form 5 petal spokes:
- R1: In MR, repeat the following sequence 5 times to create 5 petal stems:
- [ch 6, turn and work back down from the 2nd chain from hook: 5 sc. Sl st into the MR.] (5 petal stems formed)
- Pull the magic ring tight and ch 1 to secure.
Part 2: Petal Round & Shaping
Work around both edges of each 5-sc stem to create 5 full petals:
- R2: For each of the 5 stems, work as follows:
- Side 1: 1 sc in 1st st, 1 hdc in 2nd st, 2 dc in next two stitches (1 dc in 3rd st, 1 dc in 4th st), 1 dc inc in 5th st.
- Petal Tip: ch 2, sl st into the base of ch 2 (or into the top st to turn). ch 2.
- Side 2 (Symmetrical return): 1 dc inc in 1st st of opposite side, 2 dc in next two stitches (1 dc in each), 1 hdc in next st, 1 sc in last st.
- Petal Base Join: Sl st into the center base between petals.
- Repeat R2 for all 5 petals.
Part 3: Secondary Details & Center Accent
Center Finish & Pearl Attachment:
- Fasten off leaving a long tail for sewing.
- Pull both central tails tightly to close any remaining center hole and tie a secure knot at the back.
- Using a tapestry needle, sew a pearl bead into the exact center of the cherry blossom.
Part 4: Edging, Assembly & Finishing
- Trim excess yarn tails or weave them securely into the back loops of the petals.
- Gently press and flatten the 5 petals with your fingertips to curve them neatly outwards.
Detailed Pattern Breakdown
1. Base Ring and Petal Spokes Construction:
- The flower starts with a flexible Magic Ring (
MR) that holds five identical spoke chains. - Each spoke consists of
ch 6with5 scworked back down the chain, anchored back into the center ring viasl st. This structure establishes an exact 5-petal geometry while maintaining equal spacing around the central core.
2. Petal Expansion and Symmetrical Contour:
- Petal volume is achieved by graduating stitch heights along the 5-sc stem: starting low with
sc, building throughhdc, and expanding outwards withdcanddc inc. - The outer edge uses a
dc incpaired with ach 2turning sequence to create the signature rounded, indented curve seen on realistic cherry blossom petals. - Mirroring the exact stitch sequence on the return side (
dc incrightarrowdcrightarrowhdcrightarrowsc) guarantees smooth, balanced petals without warping or curling.
Pattern Question:
Question: Why are my cherry blossom petals curling up instead of lying flat?
Answer: Petal curling usually occurs if your chain stitches are too tight or if your hook size is too small for the yarn weight. To fix this, try using a hook that is half a millimeter larger, or make sure to relax your tension when working the ch 6 foundation chains.
You can also lightly steam-block your finished blossoms using an iron on low heat (held an inch away) to gently shape the petals flat.