
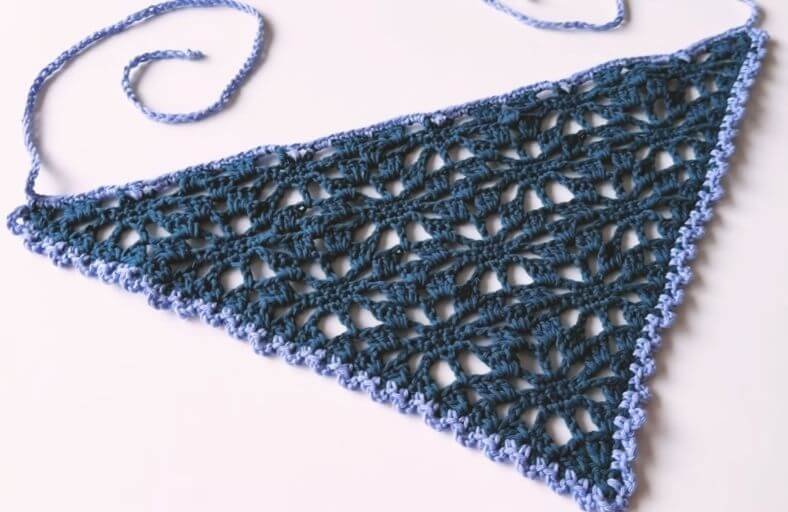
Ready to level up your cottagecore wardrobe or add a breezy, vintage flair to your bad hair days? Say hello to your new favorite weekend project: the Lacy Floral Crochet Bandana!
Featuring a delicate openwork flower motif and an adorable mini scalloped border, this headkerchief is as fun to stitch as it is to style.
Best of all, it grows row by row from a single corner, meaning you can easily customize the size to fit kids, teens, or adults using just one cozy skein of yarn.
Grab your hook and let us dive into this charming step-by-step tutorial!
Materials and Preparation
Materials:
- Yarn: 1 skein (approx. 50g / 1.76 oz) of lightweight/sport weight cotton yarn (e.g., Flinders Cotton). Solid colors highlight the lacy details beautifully, while variegated yarns create a playful watercolor effect. You will also need a small amount of a contrasting color if you choose to make a duo-tone scalloped border.
- Yardage/Weight: Approx. 120–140 meters of Category 2 or 3 yarn.
Tools:
- Crochet Hook: 4.0 mm (US G/6) hook (or sized appropriately for your chosen yarn).
- Yarn Needle: Tapestry needle for weaving in ends.
- Scissors: Snips or small crafts scissors.
- Blocking Supplies: Foam mat, stainless steel pins, and a handheld garment steamer or spray bottle.
Preparation Notes:
- Stitch Mastery: Make sure you are familiar with basic crochet stitches: chains (
ch), single crochets (sc), double crochets (dc), and working into chain spaces (ch-sp). - Custom Sizing Flexibility: Because this triangle grows outwards from the bottom center point, you can stop at any row repeat when the width comfortably reaches behind your ears!
- Tension & Block: Maintain a relaxed, natural tension so the floral lace opens up nicely. Steam blocking at the end will give your finished piece that store-bought, crisp finish.
Abbreviations and Notes
Abbreviations:
- MR: Magic Ring
- ch: Chain
- ch-sp: Chain Space
- sc: Single Crochet
- dc: Double Crochet
- sl st: Slip Stitch
- st(s): Stitch(es)
- rep: Repeat
Pattern Notes:
- US Crochet Terms: This pattern is written entirely in Standard US Crochet Terminology.
- Turning Work: You will turn your work at the end of every row for the main body.
- Edge Expansion: Every row begins with a 3-dc cluster worked into the very first stitch (starting with
ch 3+2 dc), and ends with a 3-dc cluster worked into the last stitch. This consistent increase creates the expanding triangle shape. - 4-Row Pattern Repeat: The lacy floral motif repeats every 4 rows (Rows 13–16 serve as the foundation repeat).
- Original design and pattern credit belongs to Carley Rose Studio.
Gauge, Approximate Size, and Pattern Notes
Gauge:
Gauge is not critical for this accessory since you can adjust the size by working more or fewer row repeats.
- Reference Gauge: 1 full 4-row floral repeat measure approx. 1.5 inches (3.8 cm) in height along the central axis.
Finished Size:
- Top Edge (Width): Approx. 16 inches (40 cm) excluding straps.
- Depth (Center Point to Top): Approx. 8.5 inches (21.5 cm).
- Tie Straps: Approx. 16 inches (40–42 cm) on each side.
Special Techniques:
- Working into Chain Spaces: Instead of poking your hook inside individual chain loops, insert your hook directly under/around the chain arches.
- Mini Scallop Edging: A simple sequence of
(ch 3, sc)created along the diagonal sides to give an eyelet finish. - Steam Blocking: Vital for cotton lacework! Blocking stretches out the stitches and reveals the hidden flower petals.
Step-by-Step Pattern
Main Body (Triangle Lace)
Row 1:
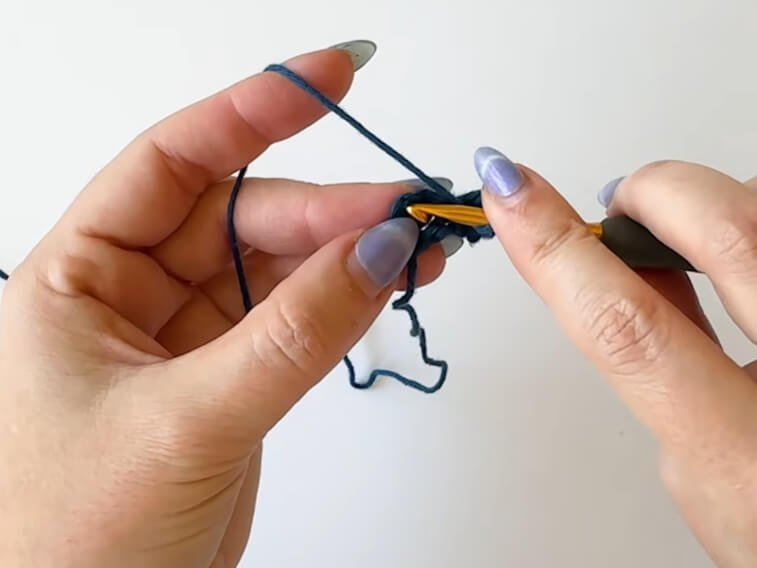
- Start with a Magic Ring (
MR). ch 2(counts as firstdc), work2 dcinto the ring. (3dctotal)- Pull
MRtight. Turn.
Row 2:
ch 3(counts as firstdc),2 dcinto the very first st.ch 1.- Skip next st, work
3 dcinto the top of the turning chain/last st. (Two 3-dc clusters, 1ch-sp) Turn.
Row 3:
ch 3,2 dcinto the first st.ch 3,1 dcaround thech-1space,ch 3.3 dcinto the top of the last st. Turn.
Row 4:
ch 3,2 dcinto the first st.ch 3.1 scinch-3space,1 scin nextdc,1 scin nextch-3space.ch 3,3 dcinto the last st. Turn.
Row 5:
ch 3,2 dcinto the first st.ch 3.1 scinch-3space,1 scin each of the next 3sc,1 scin nextch-3space. (5scin total across the middle)ch 3,3 dcinto the last st. Turn.
Row 6:
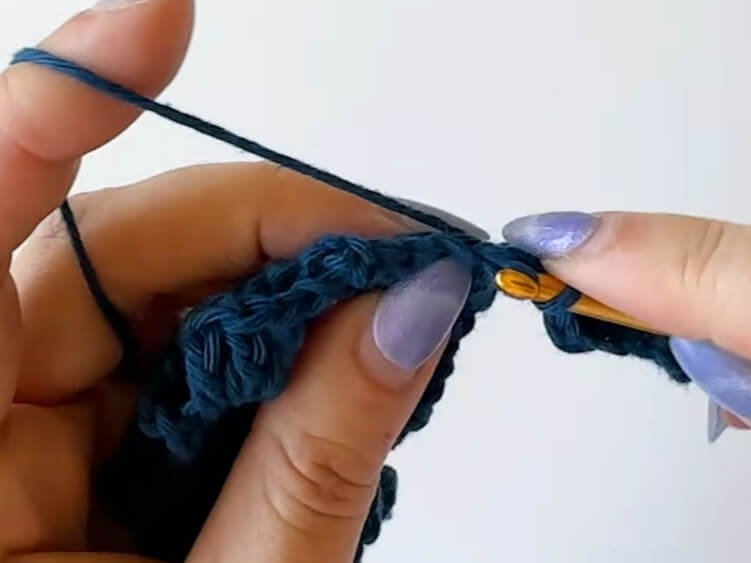
ch 3,2 dcinto the first st.ch 1, skip 2dc,3 dcin nextch-3space.ch 3, skip firstsc,1 scin each of next 3sc, skip lastsc.ch 3,3 dcin nextch-3space,ch 1,3 dcinto last st. Turn.
Row 7:
ch 3,2 dcinto the first st.ch 3,1 dcinch-1space,ch 3,3 dcin nextch-3space.ch 3, skip 1sc,1 dcin middlesc,ch 3.3 dcin nextch-3space,ch 3,1 dcinch-1space,ch 3,3 dcinto last st. Turn.
Row 8:
ch 3,2 dcinto the first st.ch 3,1 scinch-3space,1 scindc,1 scin nextch-3space.ch 3, skip 3dc,3 dcin nextch-3space,ch 1,3 dcin nextch-3space.ch 3, skip 3dc,1 scinch-3space,1 scindc,1 scin nextch-3space.ch 3,3 dcinto last st. Turn.
Row 9:
ch 3,2 dcinto the first st.ch 3,1 scinch-3space,1 scin next 3sc,1 scinch-3space.ch 3,3 dcinch-1space,ch 3.1 scinch-3space,1 scin next 3sc,1 scinch-3space.ch 3,3 dcinto last st. Turn.
Row 10:
ch 3,2 dcinto the first st,ch 1,3 dcin nextch-3space.ch 3, skip 1sc,1 scin next 3sc,ch 3.3 dcinch-3space,ch 1,3 dcin nextch-3space.ch 3, skip 1sc,1 scin next 3sc,ch 3.3 dcin nextch-3space,ch 1,3 dcinto last st. Turn.
Row 11:
ch 3,2 dcin first st.ch 3,1 dcinch-1space,ch 3,3 dcinch-3space,ch 3.1 dcin middlesc,ch 3,3 dcinch-3space.ch 3,1 dcinch-1space,ch 3,3 dcinch-3space.ch 3,1 dcin middlesc,ch 3,3 dcinch-3space.ch 3,1 dcinch-1space,ch 3,3 dcinto last st. Turn.
Row 12:
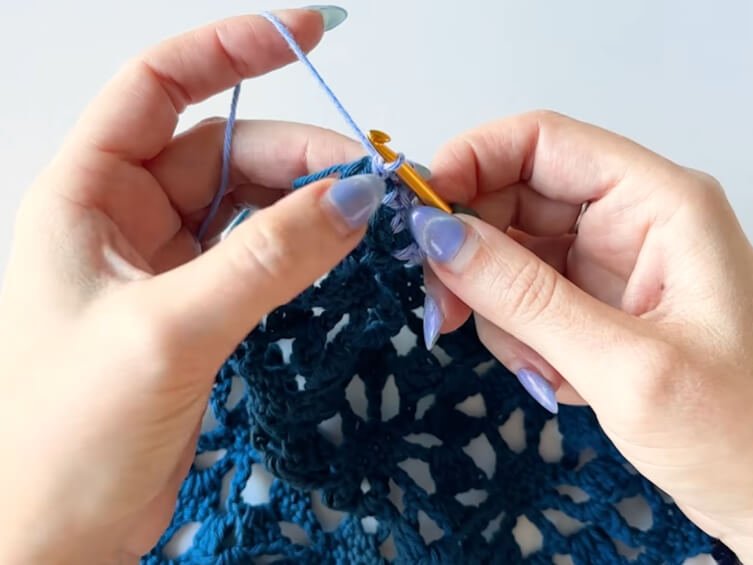
ch 3,2 dcin first st.ch 3,1 scinch-3space,1 scindc,1 scinch-3space,ch 3.3 dcinch-3space,ch 1,3 dcin nextch-3space,ch 3.1 scinch-3space,1 scindc,1 scinch-3space,ch 3.3 dcinch-3space,ch 1,3 dcin nextch-3space,ch 3.1 scinch-3space,1 scindc,1 scinch-3space,ch 3.3 dcinto last st. Turn.
Main Body Repeat (Rows 13–22 or desired size)
To continue expanding your bandana, repeat the 4-row pattern sequence below. Make sure to end your bandana on Repeat Row 2 (equivalent to Row 14, 18, 22, 26, etc.) so that the top edge is ready for the border.
- Repeat Row 1 (Row 13 equivalent):
ch 3,2 dcin first st. *ch 3,1 scinch-3space,1 scin next 3sc,1 scinch-3space,ch 3,3 dcinch-1space; rep from * across to last segment, ending with3 dcin last st. Turn. - Repeat Row 2 (Row 14 / Row 22 equivalent):
ch 3,2 dcin first st,ch 1. *3 dcinch-3space,ch 3, skip 1sc,1 scin next 3sc,ch 3,3 dcinch-3space,ch 1; rep from * across, ending with3 dcin last st. Turn (or fasten off if changing color for border). - Repeat Row 3 (Row 15 equivalent):
ch 3,2 dcin first st. *ch 3,1 dcinch-1space,ch 3,3 dcinch-3space,ch 3,1 dcin middlesc,ch 3,3 dcinch-3space; rep from * across, ending with3 dcin last st. Turn. - Repeat Row 4 (Row 16 equivalent):
ch 3,2 dcin first st. *ch 3,1 scinch-3space,1 scindc,1 scinch-3space,ch 3,3 dcinch-3space,ch 1,3 dcin nextch-3space; rep from * across, ending with3 dcin last st. Turn.
Edging, Assembly & Finishing
Diagonal Scalloped Border:
(Do not turn the work after your final row; rotate your work 90 degrees to work along the raw diagonal edge).
- Join contrast color (or continue with main yarn) in the top corner stitch,
ch 1,1 scin same st. - *
ch 3, work1 scinto the post/bar of the edgedc, work1 scinto the small loop at the base of the nextdc; rep from * all the way down the first side. - Bottom Point Corner: At the lower tip of the triangle,
ch 4, rotate around the point, and work1 scinto the side of the next stitch on the opposite diagonal edge. - Continue the pattern up the second side: *
ch 3,1 scin next stitch/space,1 scin next space; rep from * until reaching the top corner.ch 3,1 scin the corner. Fasten off yarn.
Top Edge & Straps:
- First Tie Strap: Attach yarn at the top-right corner,
ch 80(or desired strap length). - Top Edge Clean-up:
1 scback into the corner space. Work1 scinto eachdcstitch,1 scinch-1spaces, and3 scinside eachch-3space across the flat top edge. - Closing Flowers: When reaching a flower opening on the top edge, work
3 scinch-3space,ch 1,1 dcinto the middlescof the row below,ch 1, and3 scin nextch-3space. - Continue across to the opposite corner, work
1 scin the corner. - Second Tie Strap:
ch 80. Fasten off yarn.
Detailed Pattern Breakdown
1. The Central Triangle Growth Concept
The foundation of this bandana lies in working from the bottom corner upward. By starting with a Magic Ring containing 3 dc and placing a 3 dc cluster in the very first and last stitches of every single row, the sides expand symmetrically outward at a precise 45-degree angle. This eliminates complex shaping charts and allows seamless sizing adjustments!
2. Deconstructing the Flower Motif
The openwork lace is formed over a 4-row geometric cycle:
- The Base (Petal Foundation): Row 1 of the repeat creates a wide 5-single crochet bridge over chain spaces, gathering the open lace together.
- The Center Bud: Row 2 contracts the center by skipping the outer single crochets and creating a neat cluster of 3 single crochets.
- The Blossom Opening: Row 3 places isolated double crochets into chain spaces and middle single crochets, fanning out the lace like opening petals.
- The Frame: Row 4 resets the pattern by pairing double crochet clusters separated by
ch-1spaces, paving the way for the next tier of flowers.
3. Edging and Finishing Precision
- Even Side Scallops: Working alternating single crochets into the “bar” and “loop” of the side
dcposts guarantees that your scalloped edging stays completely flat without puckering or curling. - Seamless Straps: Instead of crocheting back down an 80-chain foundation (which can twist and strain your hands), leaving the straps as clean, tightly chained strands creates a lightweight, flexible tie that knots easily behind the head!
Pattern Question:
Question 1: Why is my bandana curling at the edges, and how do I fix it?
Answer: Lacy openwork patterns often look slightly bunched or misshapen while still on the hook due to stitch tension. Do not panic! Steam blocking is magic for cotton yarn.
Pin your finished bandana flat on a foam mat, lightly steam it with a garment steamer (keeping the steamer an inch away from the yarn), and let it cool completely. The floral lace will stretch out and stay flat permanently.
Question 2: Can I use a heavier yarn weight like Worsted/Category 4?
Answer: Absolutely! If using a heavier yarn and a larger hook (like 5.0 mm), the floral motif will scale up faster. You will simply need fewer row repeats (e.g., stopping around Row 14 or 18) to reach the recommended 16-inch top width.
Question 3: How do I make tidy knot ends for the tie straps without weaving in long tails?
Answer: Fold the cut yarn tail back against the chain strand near the end, wrap it into a simple overhand knot right at the tip, pull it extra tight, and snip the excess tail close to the knot! It creates a cute, clean bead-like finish without needing a tapestry needle.