
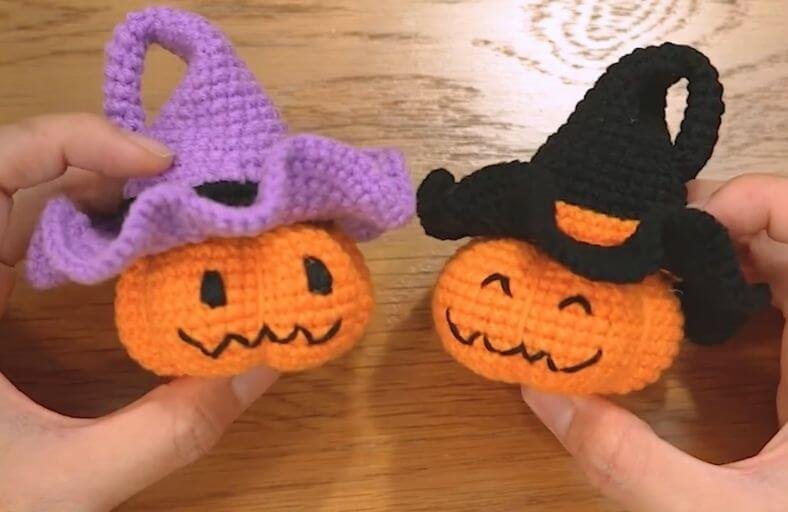
Ready to add a dash of spooky magic to your Halloween crafting?
Whether you are dressing up your favorite amigurumi plushies, decorating mini pumpkins, or creating the ultimate festive keychain, this adorable mini witch hat is the perfect quick stitch!
Grab your hook, pick your favorite mystical yarn colors, and let us whip up a charming hat that is guaranteed to brew up some serious handmade joy.
Materials and Preparation
Materials:
- Yarn: Fine or Sport weight yarn in Black, Purple, and Orange (or your preferred witchy color palette).
- Stuffing: Optional light Polyfill stuffing if you want to keep the cone tip extra firm and upright.
Tools:
- Crochet Hook: 2.0 mm to 2.5 mm crochet hook (choose a size smaller than recommended for your yarn to keep stitches tight).
- Yarn Needle: Tapestry needle for weaving in ends and shaping.
- Stitch Marker: Essential for tracking the start of each round.
- Scissors: Sharp craft scissors.
Preparation Notes:
- Ensure you are comfortable with basic stitches like single crochet, increases, and slip stitches.
- Maintaining an even, tight tension throughout the cone will help the tip hold its classic bent or upright witchy shape naturally without flopping over.
Abbreviations and Notes
Abbreviations:
- MR: Magic Ring
- ch: Chain stitch
- sc: Single crochet
- inc: Single crochet increase (2 sc in the same stitch)
- sl st: Slip stitch
- st(s): Stitch(es)
- Rnd(s): Round(s)
- F.O.: Fasten off
Pattern Notes:
- The cone section (Rnd 1 to Rnd 24) is worked in continuous spiral rounds without joining. Do not chain at the start of these rounds.
- The band and brim transition (Rnd 25 to Rnd 28) uses join technique with
ch 1andsl stto keep color changes clean and crisp. - Pay special attention to Rnd 25 where a special loop technique is used for the increase stitch to form a neat textured ridge.
- Original design and pattern credit belongs to AnDesign_Craft.
Gauge, Approximate Size, and Pattern Notes
Gauge:
Gauge is not critical for this project. Keep stitches snug so the fabric is dense enough to hold its shape.
Finished Size:
Approximately 2.5 in to 3.0 in (6.3 cm to 7.6 cm) in height and 3.0 in (7.6 cm) across the brim when using sport weight yarn and a 2.25 mm hook.
Special Techniques:
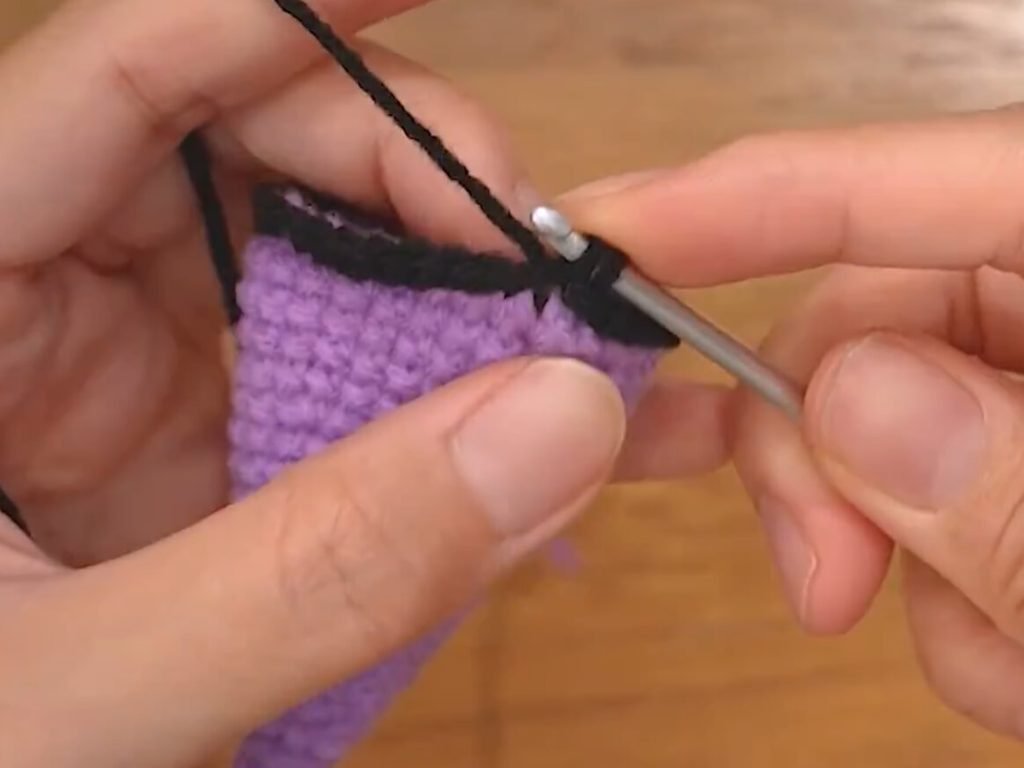
- Special Increase in Rnd 25: For the increase stitches in Rnd 25, work the 1st
scthrough both loops as usual, then work the 2ndscinto the back loop only (BLO) of the same stitch. - Color Switching: Join new yarn colors during the final pull-through of the slip stitch at the end of the round for seamless transitions.
Step-by-Step Pattern
Part 1: Main Cone
Worked in continuous rounds using Black or Purple yarn:
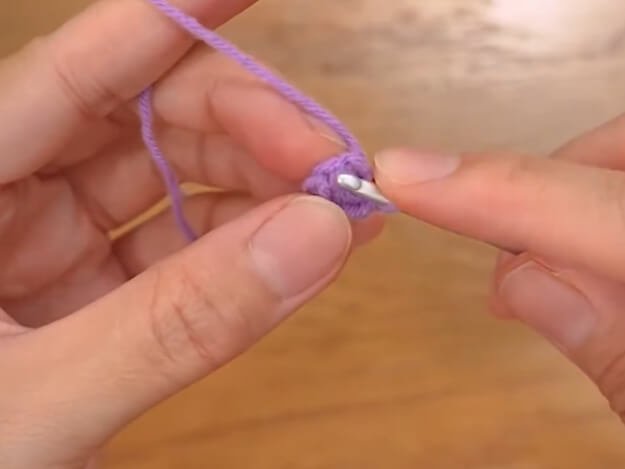
- Rnd 1: 6 sc in MR (6)
- Rnd 2–9: 6 sc (6) (8 rounds of 6 sc to form the narrow pointed tip)
- Rnd 10: [inc, sc] x 3 (9)
- Rnd 11: 9 sc (9)
- Rnd 12: [sc, inc, sc] x 3 (12)
- Rnd 13: 12 sc (12)
- Rnd 14: [inc, 3 sc] x 3 (15)
- Rnd 15: 15 sc (15)
- Rnd 16: [2 sc, inc, 2 sc] x 3 (18)
- Rnd 17: 18 sc (18)
- Rnd 18: [inc, 5 sc] x 3 (21)
- Rnd 19: 21 sc (21)
- Rnd 20: [3 sc, inc, 3 sc] x 3 (24)
- Rnd 21: 24 sc (24)
- Rnd 22: [inc, 7 sc] x 3 (27)
- Rnd 23: 27 sc (27)
- Rnd 24: [4 sc, inc, 4 sc] x 3, sl st to first st (30)
Part 2: Decorative Hat Band
Switching colors between Purple/Orange and Black:
- Rnd 25: ch 1, [2 sc, inc, 2 sc] x 6, sl st to first st (36) (Note: For each
incin Rnd 25, crochet the 1stscthrough both loops, and the 2ndscthrough the back loop only). - Rnd 26: (Using Black yarn only) ch 1, 36 sc, sl st (36)
- Rnd 27: ch 1, [inc, 5 sc] x 6, sl st (42)
- Rnd 28: (Alternating Black and Purple yarn or switching to Purple) ch 1, 42 sc, sl st (42)
Part 3: Flared Hat Brim
Worked using Purple or Black yarn:
- Rnd 29: ch 1, [3 sc, inc, 3 sc] x 6 (48)
- Rnd 30: 48 sc (48)
- Rnd 31: [inc, 7 sc] x 6 (54)
- Rnd 32: [inc, sc] x 27 (81)
- Rnd 33: [sc, inc] x 40, sc (121)
- Rnd 34–35: 121 sc (121)
- Fasten off, weave in all loose ends.
Part 4: Edging, Assembly & Finishing
- Shaping the Tip: Gently bend the long narrow spire (Rnds 1 to 9) to give it a classic, whimsical crooked witch hat appearance.
- Finishing Touches: Weave all yarn tails neatly into the inside of the hat using your tapestry needle. If attaching to a mini pumpkin, bear, or plushie, leave a long tail from Rnd 35 or sew through the inner rim onto your toy.
Detailed Pattern Breakdown
1. Cone Construction & Tapering
- The pattern begins with a tight magic ring of 6
scand maintains this exact stitch count across 9 straight rounds. This deliberate lack of expansion creates the iconic thin, crooked tip of a traditional witch’s hat. - From Rnd 10 through Rnd 24, increases are added evenly using a structured 3-point multiplication formula (
x 3). This gradually expands the diameter by exactly 3 stitches every two rounds, producing a smooth, uniform conical gradient without drastic flare.
2. Decorative Color Band & Special Increase
- Rnd 25 transitions the cone into the hat band. The special increase technique (1st
scthrough both loops, 2ndscin BLO) leaves an exposed front loop ridge that gives the decorative band a crisp, raised border separate from the main cone. - Alternating colors across Rnds 25 to 28 provides a bold visual contrast, mimicking a ribbon wrapped around the base of the hat.
3. Rapid Brim Expansion Geometry
- Transitioning to the brim in Rnd 32 and Rnd 33 involves a dramatic jump in stitch count (from 54
scto 81sc, and then up to 121sc). - This rapid increase density causes the crochet fabric to expand outward horizontally rather than vertically, creating a wide, dramatic brim that holds its ruffle and shape perfectly around the base.
Pattern Question:
Question: Why does the top of my witch hat tip look straight instead of curved, and how can I fix the brim if it curls up too much?
Answer: The top of the hat is worked straight for 9 rounds (6 sc), which allows you to manually fold, pinch, or curve the spire into any whimsical angle you like. If you want it to hold a permanent curl, you can insert a tiny piece of craft wire or lightly stuff the cone up to Rnd 15.
If your brim is curling up too sharply, ensure your stitch count in Rnds 32 and 33 is exact, as these rapid increases are designed to push the fabric flat outward.
Lightly steaming the brim with an iron (holding it an inch away without touching the yarn directly) will also help lay the brim flat and smooth!