
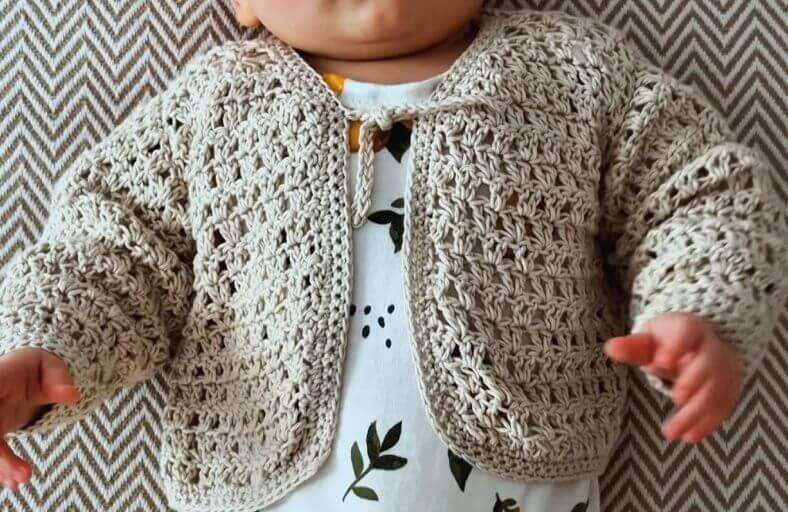
Did your yarn stash just whisper, “Hey, it is time to make something ridiculously tiny and adorable today”?
Whether you are sneaking in a quick crafting session while your little one naps or looking for that ultimate sweet summer wardrobe staple, this lightweight baby cardigan is here to save the day!
Made with breezy cotton yarn and a charming shell like texture, it is gentle on delicate baby skin and surprisingly fast to whip up.
Materials and Preparation
Materials:
- Yarn: Approximately 70 g of Fine (Category 2) or Sport weight 100% Cotton yarn (such as Cotton Kings from Hobbii in a natural cream/beige shade).
- Embellishments (Optional): Small crocheted daisy flowers or appliqués to sew onto the front.
- Closure (Optional): Small buttons, sew-on snaps, or extra yarn to create simple cord ties.
Tools:
- Crochet Hook: Size 4.0 mm (US G/6) hook.
- Yarn Needle: Tapestry needle for joining pieces and weaving in ends.
- Stitch Markers: 2 to 4 markers to assist with marking first stitches and placing sleeves.
- Scissors: Standard craft scissors.
Preparation Notes:
- Reference Garment Tip: To ensure a perfect fit for a 5-6 month old baby (or any customized size), grab a cardigan your baby already wears and use it as a measurement reference. Lay your crocheted pieces directly over it as you work to compare width and length.
- Tension: Maintain a loose, relaxed tension, especially when joining pieces with slip stitches, to keep seam edges flexible and comfortable for a baby.
Abbreviations and Notes
Abbreviations:
- ch: Chain stitch
- sc: Single crochet
- dc: Double crochet
- sl st: Slip stitch
- sc2tog: Single crochet 2 together (sc decrease across 2 stitches)
- dc2tog: Double crochet 2 together (dc decrease across 2 stitches)
- dc3tog: Double crochet 3 together (dc decrease across 3 stitches)
- st(s): Stitch(es)
- rep: Repeat
Pattern Notes:
- Front Panels: Worked flat in rows from the bottom up, followed by specific neck decreases. You will make two identical front panels.
- Back Panel: Worked flat as a plain rectangle without decreases.
- Sleeves: Worked in continuous or joined rounds, starting from the cuff/top and worked outward, then finished with a clean single crochet edging.
- Seaming: Shoulder seams, sleeve attachments, and side seams are joined cleanly using slip stitches.
- Original design and pattern credit belongs to WONDER NETTING.
Gauge, Approximate Size, and Pattern Notes
Gauge:
- Approximately 18 sts and 10 rows = 4 inches (10 cm) in pattern stitch using a 4.0 mm hook. (Gauge is flexible, matching a baby garment sizing is recommended).
Finished Size:
- Designed to fit 5–6 months old babies.
- Chest Width: Approximately 10.2 inches (26 cm).
- Sleeve Length: Approximately 7.1 inches (18 cm).
- Total Length: Approximately 9.8 inches (25 cm).
Special Techniques:
- Textured Cluster Stitch Pattern: The main body stitch alternates between skipping stitches and placing 2 dc (or 4 dc on expansion rows) in a single stitch, creating a breathable, lacy summer weave.
- Neckline Contouring: Systematic combination of
sc2tog,dc2tog, anddc3togdecreases along the inner chest edge to form a smooth curve for the collar.
Step-by-Step Pattern
Part 1: Front Panels (Make 2 Identical Pieces)
Main Panel Body:
- Foundation: Ch 20.
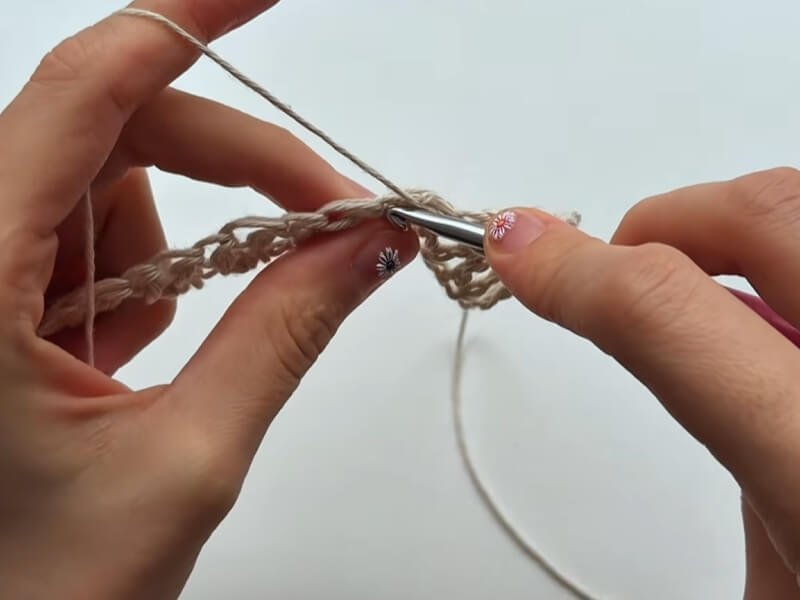
- R1: In the 2nd ch from hook, work 1 sc, then work 1 more sc into that same ch (counts as 1st st). Work 1 dc into that same ch. *Skip 1 ch, work 2 dc into next ch; rep from * across to last ch. In last ch, work 1 dc. Turn.
- R2: Work 1 sc into 1st st, then work 1 dc into same 1st st. *Skip 1 st, work 2 dc into next st; rep from * across. Work 1 dc into last st (the marked first st of previous row). Turn.
- R3–R13: Repeat R2 until front panel reaches approximately 13 total rows (or desired height before neckline shaping).
Neckline Decreases (Inner Chest Edge):
- R14 (Decrease Row 1): Insert hook in 1st st, pull up loop, insert in 2nd st, pull up loop, yarn over, pull through all 3 loops on hook (
sc2tog). Work 1 sc over these sts. Skip 1 st. Work 1dc2togover next 2 sts (dc2tog: yarn over, insert in st, pull through 2, yarn over, insert in next st, pull through 2, yarn over, pull through all 3 loops). Skip 1 st, continue main pattern (2 dc in next st, skip 1) across row. Turn. - R15 (Decrease Row 2): Work in main pattern across to last 4 sts. Skip 1 st. Over last 3 sts, work a 3-stitch double crochet decrease (
dc3tog: yarn over, insert in 1st st, pull through 2, yarn over, insert in 2nd st, pull through 2, yarn over, insert in 3rd st, pull through 2, yarn over, pull through all 4 loops). Turn. - R16 (Decrease Row 3): Start with 1 decrease over first 2 sts, then skip 1 st, work 2 dc in next st, skip 1, and continue main pattern across. Turn.
- R17 (Decrease Row 4): Start with 1 decrease, skip 1 st, work
dc2togover next 2 sts, skip 1 st, continue pattern to end. Turn. - R18 (Decrease Row 5): Work across pattern to last 2 sts. Skip 1 st, work 1 dc in last st. Turn.
- R19 (Straight Row): Work 1 sc in 1st st, 1 dc in same 1st st, skip 1 st, continue pattern across without any decreases.
- Fasten off, leaving a long tail for sewing. Repeat process for the second identical front panel.
Part 2: Back Panel
- Foundation: Ch 40.
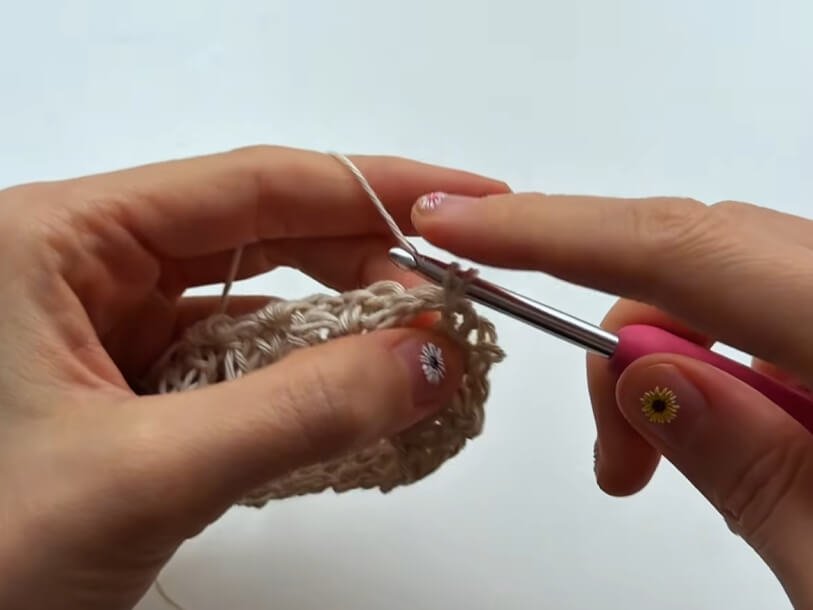
- R1: Starting in 2nd ch from hook, work 1 sc and 1 dc in same ch. *Skip 1 ch, work 2 dc in next ch; rep from * across to last ch, 1 dc in last ch. Turn.
- R2–R18: Repeat R2 of Front Panel (work straight without decreases) for 18 total rows (matching the height of the front panel).
- Fasten off yarn.
Part 3: Sleeves (Make 2)
Sleeve Body (Worked in Joined Rounds):
- Foundation: Ch 22. Join with a sl st to form a ring, taking care not to twist.
- Rnd 1: Into same st as join, work 1 sc and 1 dc. *Skip 1 st, work 2 dc in next st; rep from * around. Join with sl st to first st. Turn work.
- Rnd 2: Into 1st st, work 1 sc and 1 dc. *Skip 1 st, work 2 dc in next st; rep from * around. Join with sl st to first st. Turn work.
- Rnd 3 (Increase Round): Into 1st st, work 1 sc and 3 dc (counts as 4 dc increase cluster). *Skip 1 st, 2 dc in next st, skip 1 st, 4 dc in next st; rep from * around. Join with sl st. Turn work.
- Rnd 4–Rnd 14: Work in pattern (alternating 2 dc clusters, skip 1 st) around without further increases for about 14 rounds total (or until reaching approximately 7.1 inches / 18 cm in length).
Sleeve Cuff Edging:
- Rnd 15–Rnd 18: Ch 1, work 1 sc in each st around. Join with sl st, ch 1, turn. Work 3 to 4 rounds of plain single crochet for a neat cuff border.
- Fasten off. Make a second sleeve identically.
Part 4: Assembly, Edging, and Finishing
- Shoulder Seams: Align top edges of front panels to back panel. Join shoulders using sl st on the inside (wrong side), working loosely. Fasten off.
- Sleeve Attachment: Locate the center of top edge of the sleeve (approx 15th st). Align sleeve center with shoulder seam. Join sleeve edge along side armhole opening using sl st (joining roughly 2 sleeve stitches to 1 edge row on the body). Repeat for second sleeve.
- Side Seams: Align sides of front and back panels. Join using sl st from bottom hem up to underarm. Fasten off.
- Cardigan Outer Edging:
- Join yarn at bottom corner of front panel.
- Work sc evenly up front opening, around back neckline, down opposite front opening, and across bottom hem.
- Work 2 sc into the edge of each row along vertical edges, and 1 sc into each stitch along horizontal edges.
- Closures / Ties:
- Option A (Cords): Attach yarn to top neck corners, ch 35–40, sl st back down chain to form ties.
- Option B (Buttonholes): On the final edging round along front panel, skip 2 sc, ch 2 to form buttonhole loops aligned with small buttons sewn on the opposite side.
- Decorations (Optional): Crochet small 5-petal daisies using white and yellow yarn and stitch them to the front panels for a cute summer touch. Weave in all loose ends.
Detailed Pattern Breakdown
1. Front Panels & Neckline Contouring
The front panels rely on a classic skip and shell variation. By working 2 double crochets into every second stitch, you achieve a stretchable grid like structure.
The clever part comes at row 14: instead of cutting off abruptly, combining single crochet decreases (sc2tog) and double crochet decreases (dc2tog / dc3tog) creates an angled scoop neckline that fits comfortably around a baby’s neck without gathering or pulling.
2. Back Panel Simplicity
The back panel balances the cardigan design by keeping the geometric structure simple. Starting with 40 chains (double the front panel width), it acts as a straight rectangular anchor. Matching the 18 rows of the front ensures the shoulder height aligns seamlessly during assembly.
3. Sleeve Radial Expansion & Edging
Mocing sleeves in the round eliminates the need for bulky inner arm seams that could irritate baby skin. Starting with 22 chains, Round 3 introduces 4 dc clusters spaced regularly to flare the sleeve slightly toward the armhole. Finishing with solid single crochet rounds at the cuff stabilizes the stretchy mesh, preventing fraying or catching on tiny fingers.
4. Modular Slip Stitch Joining
Instead of traditional needle sewing, using slip stitches (sl st) directly with your crochet hook provides a durable seam structure. Maintaining loose tension and joining two sleeve stitches per body row allows the arms to move freely while keeping the garment flexible.
Pattern Questions
Question: How can I adjust this baby cardigan pattern for older toddlers or different yarn weights?
Answer: To modify the sizing, measure a well fitting sweater belonging to the child and adjust your foundation chains accordingly.
Ensure your initial chain count for front panels is an even number so the “skip 1, work 2 dc” pattern repeats evenly. For larger sizes, simply add extra straight rows before starting the neckline decreases, and add additional decrease rounds to widen the collar opening proportionally.
Question: Why does my sleeve join look puckered or feel stiff?
Answer: Puckering usually happens if slip stitches are pulled too tight during seaming or if too many stitches are crammed into a single row edge. Be sure to keep your slip stitch tension loose. Aim to join roughly 2 sleeve stitches into every 1 body row edge. If it still puckers, try using a hook half a size larger strictly for seaming!
Question: What is the best way to add buttonholes without altering the cardigan front chart?
Answer: You don’t need to alter the main body pattern at all! During your final single crochet edging round along the front right (or left) panel, identify where you want your buttons.
At those spots, skip 2 single crochets, chain 2, and then continue single crocheting in the next stitch. On the following row, work 2 single crochets directly into that chain-2 loop to form a neat, reinforced buttonhole.