
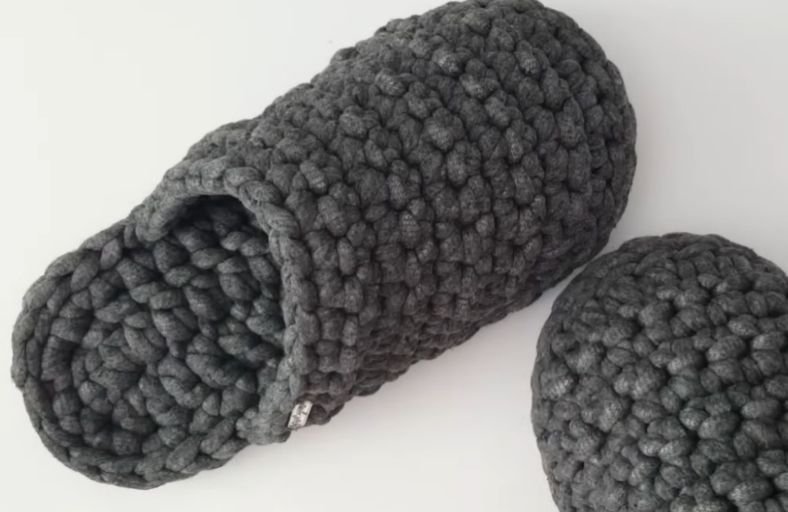
Ever caught yourself staring at your cold floor thinking, “I could literally make a pair of clouds for my feet right now”?
If you have a hook, two skeins of chunky yarn, and a cozy evening ahead, you are in luck!
These squishy, ultra-comfortable home slippers feature a sturdy double-layered sole and a seamless slip-on upper that will keep your toes warm all year long.
Grab your favorite mug of tea, and let’s get crafting!
Materials and Preparation
Materials:
- Yarn: 2 balls of YarnArt Macrame Cord / Macrame Cotton yarn (40% Cotton, 60% Polyester or equivalent chunky cord yarn).
- Sole Construction: Worked with doubled soles for extra stability and cushioning (4 sole pieces made in total).
Tools:
- Crochet Hook: 7.0 mm crochet hook.
- Yarn Needle & Tapestry Needle: For weaving in loose ends and seamless invisible finishes.
- Stitch Markers: 2 or more stitch markers to locate center alignment points on the upper sole.
- Measuring Tape & Scissors: Sharp craft scissors and measuring tape.
Preparation Notes:
- Keep your tension firm and consistent throughout the soles so that all four sole pieces match perfectly in size.
- When working the upper part attached directly to the sole edge, make sure you hook through the full stitch loops of the double-layered slip-stitched edge for maximum durability.
Abbreviations and Notes
Abbreviations:
- ch: Chain
- sl st: Slip Stitch
- sc: Single Crochet
- hdc: Half Double Crochet
- dc: Double Crochet
- inc: Increase (2 stitches worked into the same stitch)
- dc inc: Double Crochet Increase (2 double crochets worked into the same stitch)
- st(s): Stitch(es)
Pattern Notes:
- US Terms Used: All measurements, abbreviations, and instructions follow standard US Crochet Terms.
- Double-Layered Sole: You will crochet 4 identical sole pieces. Pairs are layered together and joined using a slip-stitch border to create a thick, sturdy base.
- Upper Construction: The top upper flap is worked directly onto the double sole in rows, anchoring each row end into the sole edge with extra anchoring stitches.
- Original design and pattern credit belongs to Tommy’s sheep crochet and knitting.
Gauge, Approximate Size, and Pattern Notes
Gauge:
Sole gauge is approximate depending on yarn thickness and hook size. The priority is creating a firm, dense fabric that resists stretching out.
Finished Size:
- Sole Length: Approximately 9.6 inches (24.5 cm), corresponding to European shoe sizes 38 to 39 (US Women’s 7.5–8.5).
- Tip: Adjusting hook size up or down slightly easily modifies the finished shoe length.
Special Techniques:
- Invisible Join / Invisible Stitch Finish: Used at the end of each completed sole piece to create a smooth, seamless outer edge.
- Double Sole Joining: Joining two sole pieces back-to-back using surface slip stitches.
- Anchored Side Edges (Extra Base Stitches): Anchoring row ends directly into the base sole to shape the shoe toe without sewing separate pieces.
Step-by-Step Pattern
Part 1: Sole Pieces (Make 4 Identical Soles)
Work 4 soles total using a 7.0 mm hook:
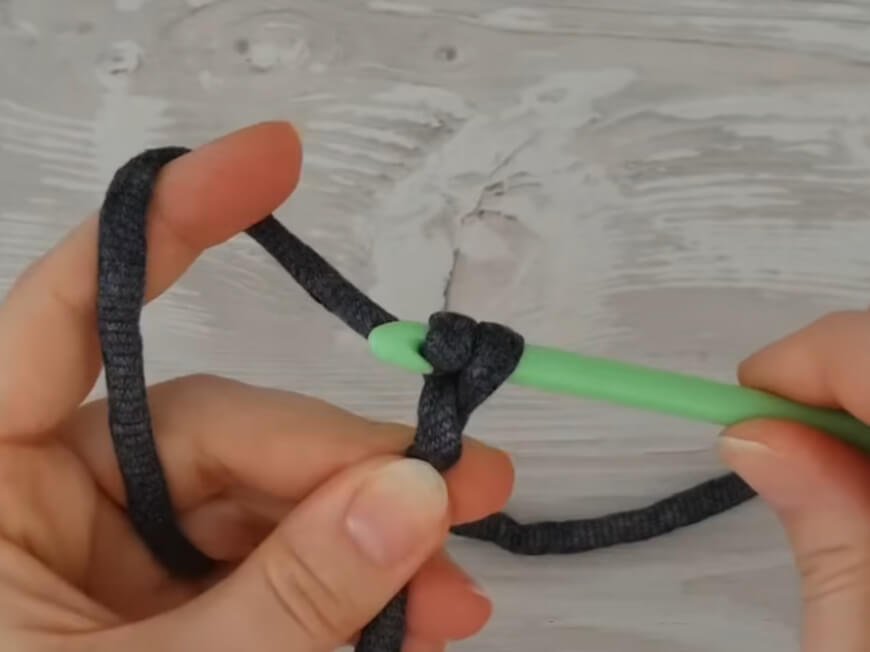
- Foundation: Ch 15 (do not pull too tight).
- R1: Starting in the 3rd ch from hook, work 2 dc into the 3rd ch. Work 1 dc in each of the next 11 chs. In the very last ch, work 6 dc (turning toe curve). Working along the opposite side of the foundation chain, work 1 dc in each of the next 11 chs. Work 2 dc into the same starting space as the first 2 dc (making 4 dc total in that end space). Join round with sl st to first st.
- R2: Ch 1, 2 sc in next 2 sts, 1 sc in next 3 sts, 1 hdc in next 4 sts, 1 dc in next 4 sts. Work 2 dc in each of the next 6 sts (toe expansion curve). Work 1 dc in next 4 sts, 1 hdc in next 4 sts, 1 sc in next 3 sts. Work 2 sc in next 2 sts (heel expansion), 1 sc in next st.
- Finish: Fasten off using the invisible join technique: Cut yarn, pull tail through, use needle/hook to thread tail under first st from inside out, then back into center of last st. Weave in end.
Part 2: Joining Soles into Double-Layered Bases
Combine 2 pairs of soles to create 2 thick bases:
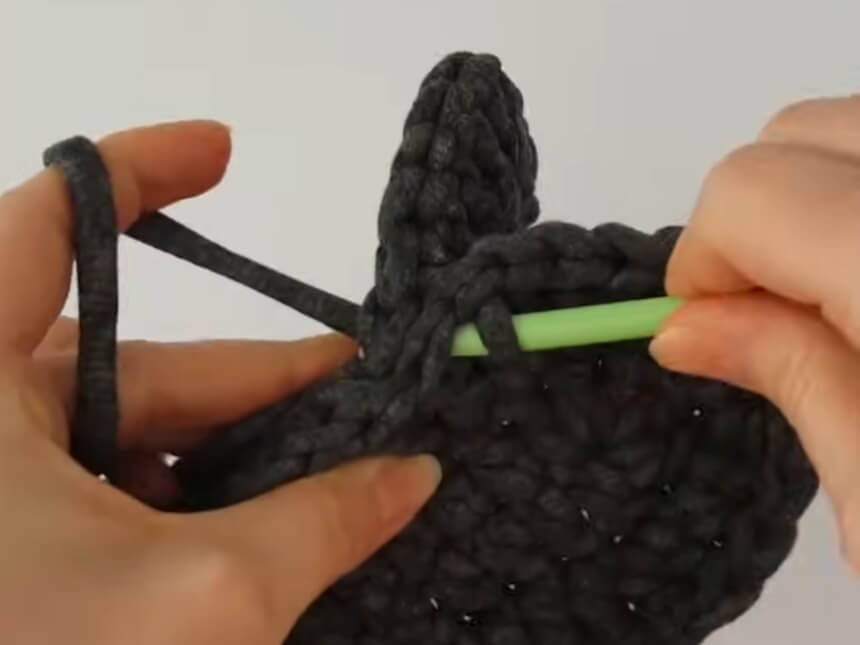
- Step 1: Place two sole pieces wrong-sides together (bottom to bottom).
- Step 2: Join yarn at the front portion of the sole through both layers.
- Step 3: Sl st through both loops of both soles all the way around to lock them together into a sturdy 3D sole base.
- Step 4: Finish round with an invisible join and weave yarn end into the center between the sole layers.
- Step 5: Repeat process for the second slipper base.
Part 3: Upper Slipper Top
Upper Flap Construction:
Mark center toe on the top double sole. Count 4 sts left and 4 sts right (8 sts total across front toe area):
- R1: Attach yarn at right marker, ch 1 (counts as 1 sc), work 1 sc in each st across to left marker (8 sc total). At the end of row, anchor by making 2 extra sc into the sole edge. Turn work.
- R2: Do NOT chain. Start in the 2nd st from hook, work 1 sc in each st across (9 sc). Make 2 extra sc into sole edge. Turn work.
- R3: Start in 2nd st from hook, work 1 sc in each st across (10 sc). Make 2 extra sc into sole edge. Turn work.
- R4–R8: Repeat row building pattern, working 1 sc in each st across, and anchoring with 2 extra sc into sole edge at each row end.
- R9: Start in 2nd st from hook, 1 sc in next st, 1 hdc in next 4 sts, 1 sc in next 8 sts, 1 hdc in next 4 sts, 1 sc in next st. Make 2 extra sc into sole edge. Turn work.
- R10: Start in 2nd st from hook, work 1 sc in each st across row. Anchor with 1 extra sc and 1 sl st into sole edge to secure final shape cleanly. Fasten off and weave in ends inside.
Part 4: Assembly & Finishing
- Assembly: No sewing required! The entire upper slipper is constructed directly onto the double sole base using anchored sole stitches.
- Finishing Touches: Trim all excess yarn tails. Add a leather/metal craft label on the top side of the slipper for an elevated handmade finish.
Detailed Pattern Breakdown
1. Sole Foundation & Shaping
- Foundation Alignment: The sole begins on a foundation chain of 15 stitches using double crochet stitches (
dc) to rapidly build up the length and structure. - Curved Increases: By placing 6
dcstitches in the single turning chain space at the toe, the piece wraps naturally without curling. The heel uses symmetrical 2dcadditions at each corner to maintain an oval profile. - Anatomic Contouring (R2): Transitioning from
scat the heel tohdcalong the midfoot anddcnear the ball of the foot creates a contoured arch and toe box that mirrors natural foot ergonomics.
2. Double-Layered Sole Mechanics
- Structural Integrity: Single-layer crochet soles tend to be floppy and slip easily. Working two identical sole pieces and joining them using a tight perimeter slip-stitching technique (
sl st) doubles the thickness, providing structure similar to commercial indoor footwear. - Hidden Tails: Joining the two soles wrong-sides together provides an internal hollow cavity where starting and ending yarn tails can be tucked away without needing extensive hand weaving.
3. Upper Bridge Direct Construction
- Seamless Attachment: Rather than crocheting a flat upper trapezoid and sewing it onto the sole with a needle, the upper bridge is anchored step-by-step into the sole loops using 2 extra
scstitches at the end of every row. - Instep Expansion: By skipping the first stitch and beginning in the second stitch of each row, the stitch count expands organically per row (8 sts to 9 sts to 10 sts), creating a smooth 3D dome over the instep.
- Top Rim Sculpting (R9): Mixing
hdcandscstitches along the final top rows creates an ergonomic curve that rests gently across the top of the foot without biting into the skin.
Pattern Question:
Question: My slippers feel a bit too loose around the opening after wearing them for a few days. How can I fix or prevent this?
Answer: Cotton/polyester chord yarn can relax slightly with wear. To prevent stretching, ensure you maintain firm tension when working the double-layered sole joining and the extra anchoring stitches along the sole edge.
If your upper already stretched out, simply reattach your yarn at the inner corner of the upper opening and crochet one tight row of slip stitches (sl st) or single crochet stitches (sc) across the top rim to pull the edge back into shape.