
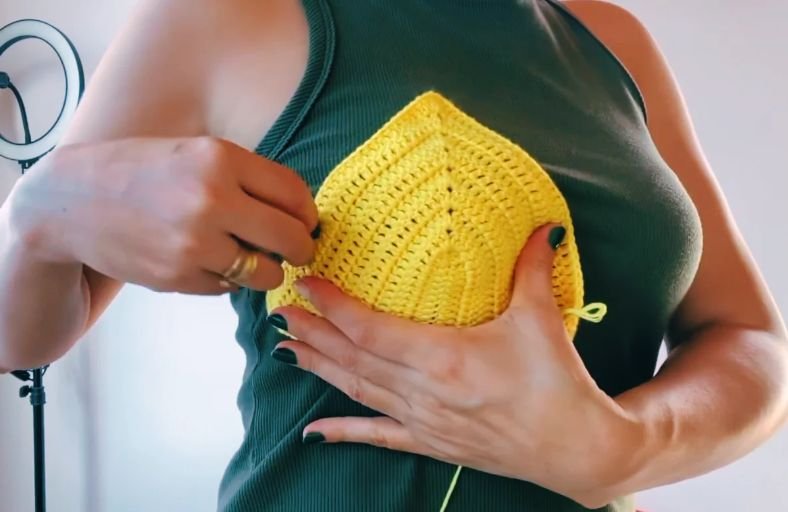
Ever struggled with crochet tops that just do not fit quite right or feel a bit too loose in all the wrong places? Say goodbye to guessing games and ill-fitting garments!
Today, we are mastering the ultimate secret to custom handmade wardrobe pieces: crafting flawless, perfectly contoured crochet bra cups using just two simple body measurements.
Whether you are building a summer crop top, a festival bralette, or a cozy swimsuit coverup, this fail-proof method guarantees a smooth, professional fit every single time.
Materials and Preparation
Materials:
- Yarn: Cloud yarn by Cusy Cusi (or any sport/DK weight yarn of your choice). Since this pattern relies entirely on custom measurements, feel free to use your favorite cotton, acrylic, or bamboo blend!
- Color: Bright Yellow (or any shade that inspires your summer wardrobe).
Tools:
- Crochet Hook: 3.5 mm (or a hook size appropriate for your chosen yarn weight).
- Measuring Tape: Crucial for taking your two personalized measurements.
- Yarn Needle: For weaving in ends neatly.
- Scissors: For trimming yarn tails.
- Stitch Markers: Optional, but handy for marking the top corner chain space.
Preparation Notes:
- Before beginning, you must take two essential measurements directly on the body:
- Measurement 1 (Base Chain Length): Measure from directly under the bust straight up to the center of the nipple (e.g., 8 cm / 3.15 in).
- Measurement 2 (Full Cup Width): Measure across the widest part of the bust, from the outer edge to the center cleavage (e.g., 19 cm / 7.48 in).
- The entire cup is worked continuously around a central chain spine, creating a seamless 3D darted shape without any harsh seams.
Abbreviations and Notes
Abbreviations:
- ch: Chain
- dc: Double Crochet
- sl st: Slip Stitch
- st(s): Stitch(es)
- ch-sp: Chain Space
Pattern Notes:
- Turning Chains: The 2 turning chains made at the start of each row do NOT count as a double crochet stitch. Always work your first double crochet directly into the very first stitch of the row.
- Increasing Corner: The cup gains its 3D depth by working a custom shell sequence
(2 dc, ch 1, 2 dc)into the top peak chain space on every single row. - Working Both Sides: Row 1 is worked along the front loops of the foundation chain, around the top point, and then down the opposite side of the chain loops.
- Original design and pattern credit belongs to manos de crochet.
Gauge, Approximate Size, and Pattern Notes
Gauge:
Exact stitch gauge is not required because the pattern relies 100% on personalized measurements in centimeters or inches. Adjust your row count until your piece matches your physical measurements.
Finished Size:
Customizable to any size! For the sample shown in this tutorial:
- Base Height: 8 cm (3.15 in)
- Total Cup Width: 19 cm (7.48 in) at the bottom edge (or 16 cm / 6.30 in across the middle slant line).
Special Techniques:
- 3D Peak Contouring: Adding
(2 dc, ch 1, 2 dc)into the apex chain space creates a natural dart, curving the flat crochet fabric into a contoured 3D cup. - Carrying the Tail: Tail end from the slip knot is crocheted over along the backside of the foundation chain during Row 1 to minimize end-weaving later.
Step-by-Step Pattern
Part 1: Foundation Chain & Setup Peak
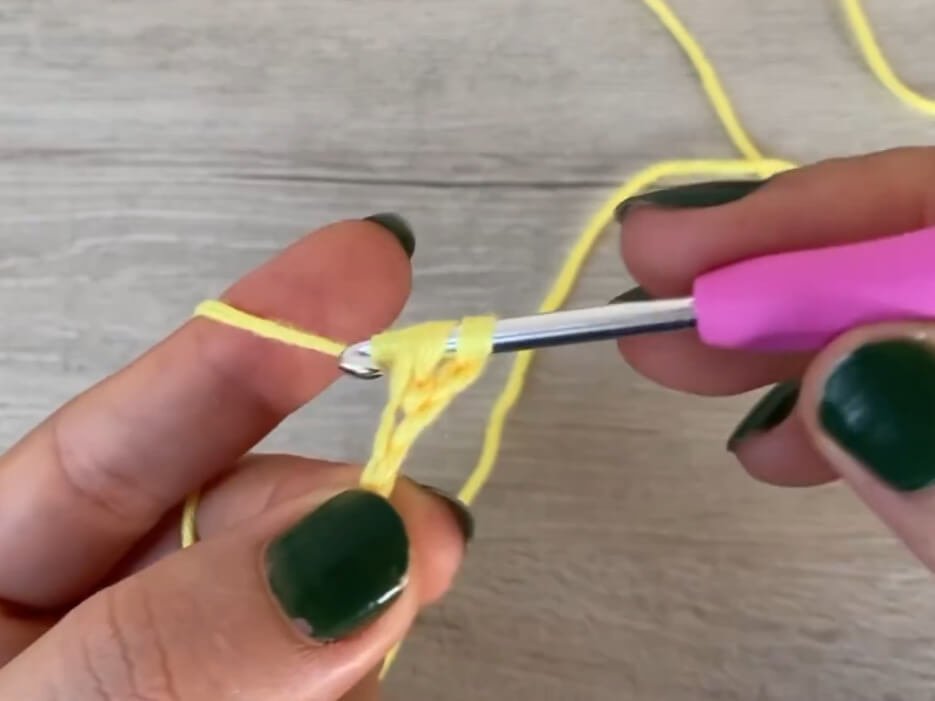
Make a slip knot and leave a short tail to weave in.
- Foundation Row: Work a chain equal to Measurement 1 (e.g., 8 cm / 3.15 in). In the tutorial sample, 8 cm equals 18 ch.
Part 2: Main Cup Body & Expansion Rows
- Row 1:
- Ch 2 (does not count as st).
- Work 1 dc into the 3rd ch from hook (which is ch 18).
- Work 1 dc in each ch across until reaching the very first foundation ch.
- In that first foundation ch, work the peak turn:
2 dc, ch 1, 2 dcall in the same ch. - Pivot your work to crochet along the opposite side of the foundation chain.
- Work 1 dc in each ch down the opposite side while working over the yarn tail. Turn.
- Row 2:
- Ch 2 (does not count as st), turn.
- Work 1 dc in the first st and in each dc across until reaching the top ch-1 sp.
- In the ch-1 sp, work the peak expansion:
(2 dc, ch 1, 2 dc). - Work 1 dc in each remaining dc down the other side until the end of the row. Turn.
- Row 3 to Desired Size:
- Repeat Row 2 continuously.
- Every row adds 4 double crochets in total (2 dc on each side of the central peak).
- Continue repeating Row 2 until the bottom straight edge measures Measurement 2 (e.g., 19 cm / 7.48 in).
Part 3: Sizing Check & Variations
Full Coverage Cup Option:
- If you prefer full coverage across the entire chest slant rather than just the underbust line, measure Measurement 2 (19 cm) across the middle diagonal section of the cup rather than along the bottom straight line. Continue working Row 2 repeats until that diagonal line hits 19 cm.
Part 4: Edging, Assembly & Finishing
- Fasten off yarn leaving a 15 cm (6 in) tail for weaving in.
- Thread yarn tail into a yarn needle and weave neatly through the back loops on the reverse side of the cup.
- Repeat the entire process to make a second matching cup for your top!
Detailed Pattern Breakdown
1. Foundation Spine Construction:
The brilliance of this pattern lies in its geometry. Instead of working in standard horizontal rows, the cup starts with a vertical spine representing the height from underbust to nipple. By pivoting around the end of the foundation chain on Row 1, you instantly establish a symmetrical two-sided panel.
2. The Apex Expansion Technique:
Placing (2 dc, ch 1, 2 dc) into the ch-1 space on every row forces the center to expand outward faster than the edges. This architectural increase creates a natural 3D dome (or dart) right where the cup needs space, completely eliminating flat or awkward gaping along the sides.
3. Custom Measurement Adaptability:
Because turning chains are strictly used for height elevation and do not count as stitches, every row retains clean, straight edges at the bottom. Measuring in centimeters ensures that no matter what yarn thickness, hook size, or personal tension you use, your finished cup will fit your unique body proportions perfectly.
Pattern Question:
Question: Why does my crochet cup look flat or buckle along the outer edges instead of forming a neat 3D cup shape?
Answer: Flattening or buckling usually happens for two reasons:
- Incorrect Peak Increases: Ensure you are putting exactly
(2 dc, ch 1, 2 dc)inside the top chain-1 space on every single row. Skipping stitches or adding extra stitches outside the chain space will alter the cup’s natural curve. - Counting Turning Chains: Make sure you do not treat the
ch 2at the beginning of each row as a double crochet stitch. Always place your firstdcinto the very first stitch. Counting turning chains as stitches can cause unwanted flair along the outer bottom edge.