
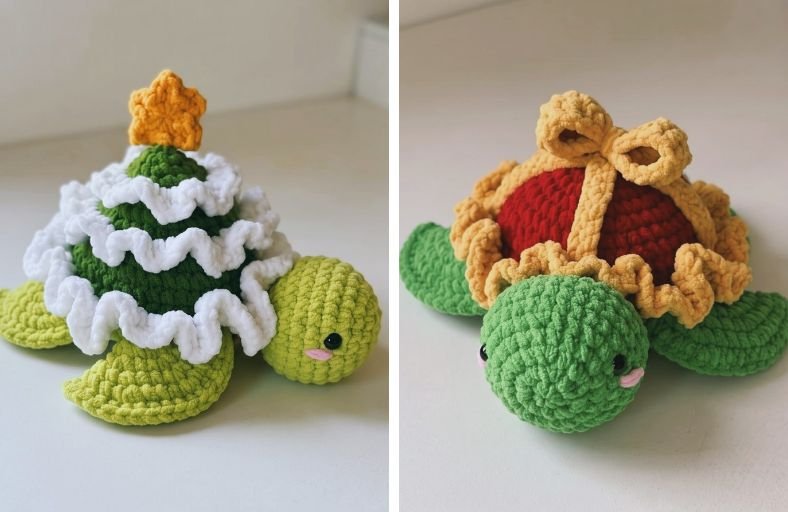
Looking to add a slow, steady, and ultra-adorable splash of holiday cheer to your crochet hook this season?
These festive Christmas turtles are the ultimate holiday project, combining classic amigurumi charm with cozy Christmas magic.
Whether you are decking out your mantle or crafting heartfelt last-minute handmade gifts, this 3-in-1 pattern lets you create a trio of adorable holiday companions: Santa Turtle, Gift Box Turtle, and Christmas Tree Turtle!
Materials and Preparation
Materials:
- Plush / Velvet Yarn (Super Bulky or Chenille Yarn recommended):
- Light Green / Beige / Medium Green (for the head, body base, and fins depending on your chosen turtle design)
- Dark Green and Red (for the main shells)
- White and Yellow (for the ruffles, bow, and Santa belt buckle details)
- Black (for Santa’s belt strap)
- Small amount of Pink yarn (for cute blush accents)
- Safety Eyes: 1 pair per turtle (8 mm – 10 mm black safety eyes)
- Stuffing: Premium Polyfill fiberfill stuffing
Tools:
- Crochet Hook: 4.0 mm – 5.0 mm (or sized appropriately for your plush yarn to keep stitches tight)
- Yarn Needle: Tapestry needle with a wide eye for assembly and embroidery
- Stitch Marker: Essential for marking continuous spiral rounds
- Fabric Glue / Hot Glue: For securing Christmas tree ruffles and star accent
- Scissors: Sharp craft scissors
Preparation Notes:
- Work with an even, firm tension so that the plush stuffing remains completely hidden inside the shell and head.
- Keep stitch markers handy, as all head and shell components are worked in continuous rounds without joining unless specified.
Abbreviations and Notes
Abbreviations:
- MR: Magic Ring
- ch: Chain stitch
- sc: Single Crochet
- inc: Single Crochet Increase (2 sc in the same stitch)
- dec: Single Crochet Decrease (sc2tog / Invisible decrease)
- hdc: Half Double Crochet
- dc: Double Crochet
- sl st: Slip Stitch
- BLO: Back Loop Only
- FLO: Front Loop Only
Pattern Notes:
- All base turtle parts (Head, Fins, Shell base) are written in Standard US Crochet Terms.
- Heads and fins are flattened at the end and sealed closed with single crochet stitches across both folded sides, eliminating messy sewing seams.
- Color changes occur seamlessly at the end of rounds before joining or transitioning to textured ruffles.
- Original design and pattern credit belongs to Chubby Cheeks.
Gauge, Approximate Size, and Pattern Notes
Gauge:
Gauge is not critical for this project. Keep stitches tight enough to prevent fiberfill from poking through.
Finished Size:
Approximately 6 in. to 8 in. (15 cm to 20 cm) in length when made with bulky plush yarn.
Special Techniques:
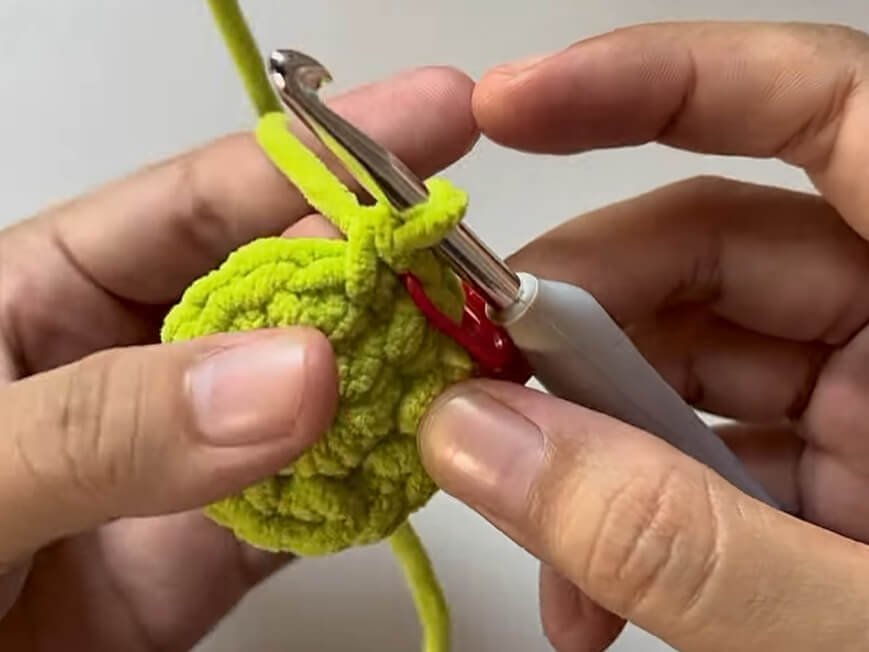
- Sealing Flat Edges: Folding 3D pieces (like the head and fins) and single crocheting through both loops to create a clean, flat attachment tab.
- Textured Ruffles: Working (1 dc, ch 1, 1 dc) or (1 hdc, ch 1, 1 hdc) repetitive shells into front loops to create lush Christmas ruffles and tree branches.
Step-by-Step Pattern
Part 1: Head & Flippers (Fins)
Head (Make 1 per turtle)
Use Light Green for Christmas Tree Turtle, Beige for Santa Turtle, Green for Gift Box Turtle:
- R1: MR 8 sc (8)
- R2: 8 inc (16)
- R3: (1 sc, inc)*8 (24)
- R4: 24 sc (24)
- R5: (2 sc, inc)*8 (32)
- R6–R9: 32 sc (32) (4 rounds total)
- R10: (2 sc, dec)*8 (24)
- R11: (1 sc, dec)*8 (16)
- R12: 16 sc (16)
- Pause to insert safety eyes between R5 and R6, spaced 13 stitches apart. Stuff the head firmly with polyfill. Add pink blush stitches under each eye using yarn needle.
- Flatten the opening edge. Skip the last stitch, align opposite stitches, and close with 7 sc across both sides.
- Fasten off, ch 1, leaving a long tail for sewing.
Hind Fins / Back Flippers (Make 2)
Use matching skin color yarn:
- R1: MR 6 sc (6)
- R2: 6 inc (12)
- R3: (1 sc, inc)*6 (18)
- R4: (2 sc, inc)*6 (24)
- R5: (3 sc, inc)*6 (30)
- Flatten opening, skip last stitch, and close by working 14 sc across both folded sides.
- Fasten off, ch 1, leaving a long tail for sewing.
Front Fins / Front Flippers (Make 2)
Use matching skin color yarn:
- R1–R5: Repeat R1–R5 of Hind Fins (30)
- R6: (4 sc, inc)*6 (36)
- Flatten opening, skip last stitch, and close by working 17 sc across both folded sides.
- Fasten off, ch 1, leaving a long tail for sewing.
Part 2: Main Upper & Lower Shell
Upper Shell (Main Dome)
Use Dark Green for Christmas Tree Turtle, Red for Santa & Gift Box Turtles:
- R1: MR 8 sc (8)
- R2: 8 inc (16)
- R3: (1 sc, inc)*8 (24)
- R4: (2 sc, inc)*8 (32)
- R5: (3 sc, inc)*8 (40)
- R6: 40 sc (40)
- R7: (4 sc, inc)*8 (48)
- R8: 48 sc (48)
- R9: (5 sc, inc)*8 (56)
- R10: FLO 56 sc (56)
- Change to White yarn for Christmas Tree & Santa Turtles, or Yellow yarn for Gift Box Turtle:
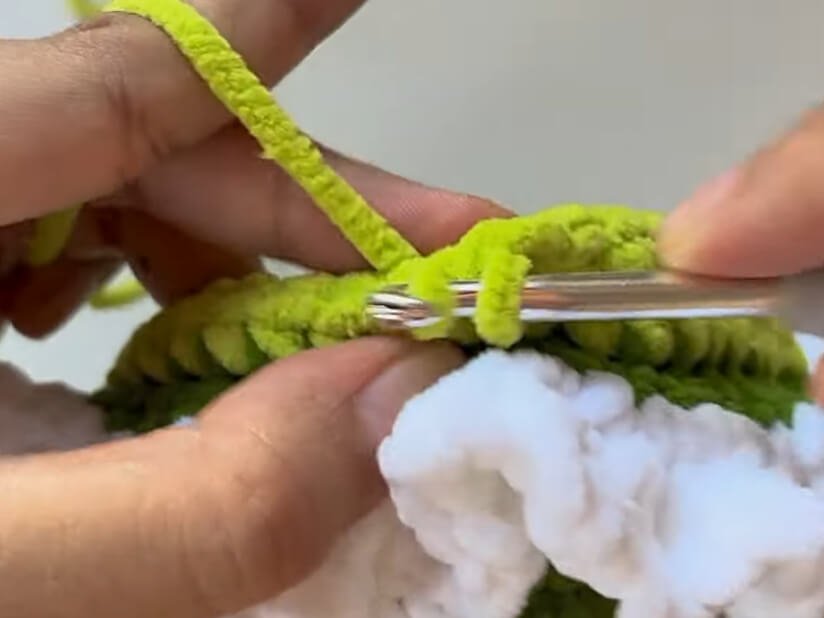
- R11: Sl st to first st, ch 2. In same st, work (1 dc, ch 1, 1 dc). Repeat (1 dc, ch 1, 1 dc) in every stitch around (56 repeat groups). Sl st to join, ch 1, fasten off and weave in end.
Lower Shell (Underbelly Base)
Attach skin color yarn to the unworked back loops (BLO) of R10 from Upper Shell:
- R1: 56 sc around back loops (56)
- R2: (5 sc, dec)*8 (48)
- R3: (4 sc, dec)*8 (40)
- R4: (3 sc, dec)*8 (32)
- R5: (2 sc, dec)*8 (24)
- R6: (1 sc, dec)*8 (16)
- Stuff the main body firmly with polyfill.
- R7: 8 dec (8)
- Fasten off, weave tail through remaining 8 FLO, pull tight to close hole, and tie off securely.
Part 3: Accessories & Variations
Santa Claus Turtle Accessories:
Belt Strap
Using Black yarn:
- Foundation: Ch 23.
- Row 1: Starting in 2nd ch from hook, 22 sc across (22).
- Fasten off, leaving long tail to wrap and sew around shell base.
Belt Buckle
Using Yellow yarn:
- Embroider a square belt buckle outline in the center of the black strap using tapestry needle.
Gift Box Turtle Accessories:
Gift Straps (Make 2)
Using Yellow yarn:
- Foundation: Ch 23.
- Row 1: Starting in 2nd ch from hook, 22 sc across (22).
- Fasten off, leaving long tail for sewing.
Gift Bow
Using Yellow yarn:
- Foundation: Ch 23.
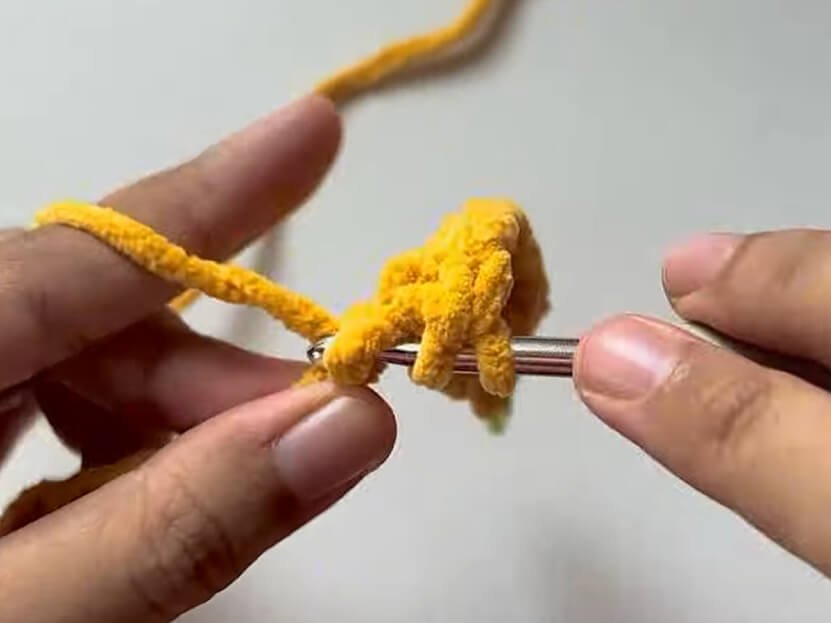
- Row 1: Starting in 2nd ch from hook: 1 sc, 2 hdc, 5 dc, 2 hdc, 1 sc, 2 hdc, 5 dc, 2 hdc, 1 sc. Repeat down opposite side of chain. Sl st to join.
- Fasten off, wrap center 7–8 times with yarn to form bow loops, and attach on top.
Christmas Tree Turtle Accessories:
Middle Tree Layer
Using Dark Green yarn:
- R1: MR 6 sc (6)
- R2: 6 inc (12)
- R3: (1 sc, inc)*6 (18)
- R4: (2 sc, inc)*6 (24)
- R5: (3 sc, inc)*6 (30)
- R6: (4 sc, inc)*6 (36)
- R7: (5 sc, inc)*6 (42)
- Change to White yarn:
- R8: Sl st to first st, ch 2. Work (1 hdc, ch 1, 1 hdc) in each st around (42 repeat groups). Sl st to join, fasten off.
Top Tree Layer
Using Dark Green yarn:
- R1–R3: Repeat R1–R3 of Middle Layer (18)
- R4: (2 sc, inc)*6 (24)
- Change to White yarn:
- R5: Sl st to first st, ch 2. Work (1 hdc, ch 1, 1 hdc) in each st around (24 repeat groups). Sl st to join, fasten off.
Yellow Tree Star
Using Yellow yarn:
- R1: MR (1 sc, 1 dc, ch 2, 1 dc)*5 into ring. Sl st to first sc to join, fasten off, pull magic ring tight.
Part 4: Assembly & Finishing
- Head Attachment: Thread yarn needle with head tail. Sew the 7 sc flat edge of the head securely between the upper and lower shell seam opposite the spiral end.
- Flipper Attachment:
- Front Fins: Position 3 stitches away from head on either side. Sew across 3 stitches through lower shell R1–R2.
- Hind Fins: Position 8 stitches back from front fins. Sew across 3 stitches. Tie remaining yarn tails together internally and hide ends.
- Detailing:
- Santa Turtle: Wrap black belt around middle of shell and stitch flat. Embroider golden yellow buckle over center.
- Gift Box Turtle: Criss-cross the two yellow straps over upper shell and stitch ends down. Secure yellow bow directly over intersection point.
- Christmas Tree Turtle: Glue or sew Middle Layer centered on top of shell. Glue or sew Top Layer over Middle Layer with light stuffing inside. Top with Yellow Tree Star.
Detailed Pattern Breakdown
1. Turtle Head and Limb Construction Dynamics
The head and flippers utilize clever continuous amigurumi techniques that transition seamlessly into flat attachment tabs:
- Head (R1 – R12): Begins with an 8 sc magic ring expanded via symmetrical increase rounds up to 32 stitches. After building vertical round height, rapid decrease rounds taper the neck to 16 stitches. The innovation lies in skipping the final stitch and single crocheting directly through opposite loops across the opening, creating a perfectly flat, sew-ready 7-stitch join without bulky seams.
- Flippers (Front & Hind): Both front and rear fins rely on flat circle geometry expanded with 6-point increase increments. The front flippers extend to 36 stitches before being pressed flat and closed with 17 sc, providing a sweeping curved paddle effect ideal for aquatic turtle anatomy.
2. Dual-Layer Shell Architecture & Ruffle Edging
The shell construction integrates structural support with decorative rifting:
- Upper Shell (R1 – R11): Radiates from an 8 sc magic ring up to 56 stitches. R10 isolates the front loop only (FLO), allowing R11 to anchor a high-density wave border constructed from repeated
1 dc, ch 1, 1 dcshells into every available front loop. - Lower Shell Base (R1 – R7): Picks up the unworked back loops (BLO) from R10, establishing an independent inner floor. Symmetrical decrease rounds gradually pull the belly flat while encapsulating the inner polyfill, closing cleanly via front-loop cinch at R7.
3. Holiday Ornamentation Breakdown (Tree Layers, Belt, & Bow)
Customizing each turtle involves modular overlay techniques:
- Tree Tier Hierarchy: The Christmas Tree modification utilizes concentric stacked cones. The middle layer expands to 42 stitches before adding a ruffle trim of
1 hdc, ch 1, 1 hdc, while the top layer caps off at 24 stitches before adding its matching snow border. - Ribbons & Accessories: The gift box bow employs a clever sequence of scalar stitches (
sctohdctodcand back tosc) down a foundation chain to form natural leaf-like petals that fold into three-dimensional loops when wrapped tightly at the center.
Pattern Questions & Answers
Question 1: How do I ensure my plush chenille yarn doesn’t snap when pulling the Magic Ring tight?
Answer: Plush yarns can sometimes shred under friction. To prevent breaking, start your Magic Ring with a smooth, matching mercenated acrylic or cotton yarn end, or cast 2 chains and work your first round of single crochets directly into the second chain from the hook instead of a traditional magic loop.
Question 2: Why are my turtle fins flaring up instead of laying flat against the table?
Answer: Flipper direction depends on how you hold the flattened edge during closing. Make sure the natural curve of the closed single crochet seam faces forward toward the head when sewing them onto rounds 1 and 2 of the lower shell.
Question 3: Can I sew the Christmas tree layers instead of using fabric glue?
Answer: Absolutely! While fabric glue or hot glue offers a fast, clean hold for plush yarn layers, hand sewing the lower rim of each tree tier to the shell with matching green yarn provides maximum durability, especially if the plushie is intended as a toy for young children.