

Ever lost your favorite lip balm at the bottom of a tote bag right when autumn breezes hit?
Say goodbye to frantic bag digging with this spooktacular Ghost Lip Balm Holder Bag Charm!
Featuring a clever dual sleeve construction and a charming witch hat sliding lid, this functional accessory keeps your lip tint safe while doubling as the cutest spooky-season bag charm.
Materials and Preparation
Materials:
- Yarn:
- White yarn (main ghost body and inner pouch)
- Purple yarn (witch hat)
- Yellow yarn (witch hat decorative band)
- Black and pink embroidery thread (for facial features)
- Safety Eyes: 1 pair of small safety eyes (approx. 5 mm – 6 mm) or black embroidery thread
- Polyfill / Stuffing: Optional light stuffing (if extra shaping is desired)
Tools:
- Crochet Hook: Size 2.5 mm – 3.0 mm (use a hook size slightly smaller than recommended on the yarn label for firm, tight stitches)
- Yarn Needle: For weaving in ends and embroidering details
- Stitch Marker: Essential for tracking rounds
- Scissors: For trimming yarn tails
Preparation Notes:
- You should be familiar with basic US crochet stitches: single crochet (
sc), half double crochet (hdc), double crochet (dc), slip stitch (sl st), chain (ch), and magic ring (MR). - Keep your tension consistent throughout the project so the inner pouch snugly holds your lip balm tube without sliding out.
Abbreviations and Notes
Abbreviations:
- MR: Magic Ring
- ch: Chain
- sc: Single Crochet
- inc: Single Crochet Increase (2 sc in the same stitch)
- dec: Single Crochet Decrease (sc2tog)
- hdc: Half Double Crochet
- dc: Double Crochet
- sl st: Slip Stitch
- FLO: Front Loop Only
- BLO: Back Loop Only
Pattern Notes:
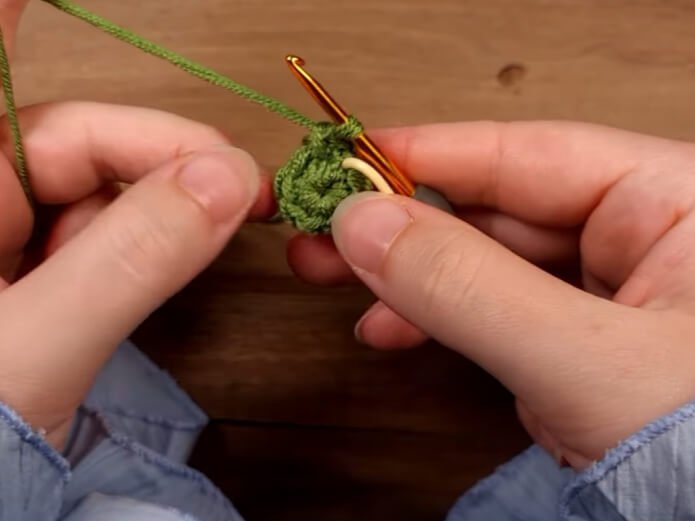
- The Inner Pouch is worked in continuous spiral rounds (use a stitch marker to track the first stitch).
- The Outer Ghost Body and Witch Hat are worked in joined rounds (end each round with a
sl stto the first stitch, thench 1to start the next round). - Always skip the joining
sl standch 1from the previous round when starting new stitches in joined rounds.
Gauge, Approximate Size, and Pattern Notes
Gauge:
Gauge is not critical for this project, but stitches must be tight enough to firmly secure the lip balm tube inside the pouch.
Finished Size:
Approximately 4.0 in – 5.0 in (10 cm – 13 cm) in height (including the witch hat), perfectly sized for standard lip balms or lip tints.
Special Techniques:
- Working into Unused Loops (BLO/FLO Separation): Round 1 of the outer body works into the outer loops of the inner sleeve, leaving the inner loops accessible for attaching the hanging strap.
- Scalloped Skirt Border: A repeating combination of
(sl st, hdc + dc in next st, hdc in next st)creates the wavy ghost hemline. - Surface Slip Stitch: Used to crochet the contrasting yellow band directly onto the witch hat.
Step-by-Step Pattern
Part 1: Inner Lip Balm Sleeve
Worked in continuous spiral rounds using White yarn:
- R1: MR 8 sc (8)
- R2: 8 inc (16)
- R3–R15 (or desired height): 16 sc around (16)
- Fit check: Insert your lip balm tube. Continue adding rounds of 16 sc until the sleeve covers the body of your lip tint.
- R16: chain 1 , 1 sc in every stitch (16)
- R17: ch 1, (3 sc, inc )*4 (20)
- Finish: Sl st into the next stitch. Do not cut yarn if continuing with the ghost body, or fasten off if changing colors.
Part 2: Outer Ghost Body
Worked in joined rounds using White yarn, starting from the outer loops of the Inner Sleeve:
- R1: Join yarn in the outer/front loop of the last round of the inner sleeve. Ch 1, 16 sc in outer loops only (BLO/FLO separation), sl st to first sc (16)
- R2: Ch 1, 16 sc around, sl st to first sc (16)
- R3: Ch 1, (3 sc, inc)*4, sl st to first sc (20)
- R4: Ch 1, (3 sc, inc)*5, sl st to first sc (25)
- R5–R9: Ch 1, 25 sc around, sl st to first sc (25)
- R10: ( 4 sc, inc )*5 (30)
- R11: (9 sc, inc )*3 (33)
- R12-R13: 33 sc (33)
- R14: ( 10 sc, inc ) *3 (36)
- R15-R17: 36 sc (36)
- Height check: Ensure the outer ghost body completely covers the inner sleeve. Add 1–2 more rounds of 25 sc if necessary.
- R18 (Scalloped Hem): Skip first stitch. In the second stitch work (1 hdc, 1 dc). In the third stitch work 1 hdc. (Sl st in next st, [1 hdc, 1 dc] in next st, 1 hdc in next st) repeat 11 times. Sl st to finish (12 scalloped waves total).
- Fasten off and weave in ends. Attach safety eyes between R6 and R7 of the outer body, and embroider cheeks and smile using pink and black thread.

Part 3: Accessories and Hanging Strap
Head: Witch Hat
Worked in joined rounds using Purple yarn:
- R1: MR 6 sc, sl st to first sc (6)
- R2: Ch 1, (2 sc, inc)*2, sl st to first sc (8)
- R3: Ch 1, (3 sc, inc)*2, sl st to first sc (10)
- R4: Ch 1, (4 sc, inc)*2, sl st to first sc (12)
- R5: Ch 1, (5 sc, inc)*2, sl st to first sc (14)
- R6: Ch 1, (6 sc, inc)*2, sl st to first sc (16)
- R7: Ch 1, (7 sc, inc)*2, sl st to first sc (18)
- R8 (Hat Brim): Ch 1, FLO 18 inc, sl st to first sc (36)
- Fasten off and weave in ends.
Decorative Hat Band:
- Surface slip stitch using Yellow yarn between R3 and R4 of the witch hat around the cone. Fasten off and secure ends inside the hat.
Body: Hanging Strap & Assembly
- Strap: Join White (or Purple) yarn to one of the unworked inner loops inside the ghost top. Leave a 6 in (15 cm) tail, then chain 50–60 (or desired length for bag attachment). Do not join into a ring. Fasten off leaving a 6 in (15 cm) tail.
- Hat Integration: Thread the looped end of the chain strap up through the bottom of the witch hat between R4 and R5, out to the top, and back down through the opposite side of the hat interior.
- Secure Base: Anchor the free end of the strap chain to the opposite inner loop inside the ghost body top with a slip stitch. Fasten off securely.
Part 4: Assembly & Finishing
- Place safety eyes and embroider a sweet facial expression onto the upper middle section of the outer ghost body.
- Insert your lip balm tube into the inner sleeve.
- Slide the witch hat down along the hanging strap chain to cover the exposed top of the lip balm.
- Loop the hanging strap around your handbag, tote, or backpack strap to carry your lip tint everywhere in spooky style!
Detailed Pattern Breakdown
1. Inner Sleeve Construction:
- Starts with a standard 8-stitch magic ring (
MR 8 sc) and expands to 16 stitches in R2 (8 inc). - Works in an un-joined spiral of 16 single crochets (
16 sc) to form a tight cylindrical pocket customized to the exact height of your lip balm.
2. Outer Ghost Shell & Hemline:
- Uses loop-separation (
BLO/FLO) at the transition between the inner pouch and outer shell, allowing two separate layers to originate from a single boundary. - Gradually expands from 16 stitches to 25 stitches using evenly distributed increases (
3 sc, inc). - Concludes with a decorative scalloped trim combining
hdc,dc, andsl stto emulate floating ghost fabric.
3. Sliding Witch Hat & Strap Mechanics:
- Starts as a cone with gentle increases (
2 sc, incup to7 sc, inc). - Flares at R8 into a brim using front-loop increases (
FLO 18 inc). - Functions as an interactive sliding cap: the hanging strap passes through the hat cone, allowing the hat to lift up when accessing the lip balm and slide down to cover it when closed.
Pattern Question:
Question: How do I ensure my lip balm doesn’t fall out of the holder, and how does the witch hat stay in place?
Answer: To keep your lip balm secure, make sure your stitch tension is firm while crocheting the inner sleeve (Part 1). Try on your lip balm tube after R3; it should fit snugly inside the 16-stitch cylinder.
The witch hat acts as a functional stopper lid: because the hanging strap passes directly through the body of the hat, pulling the bag charm upright automatically holds the hat down against the top of the ghost, keeping your lip balm fully enclosed!