
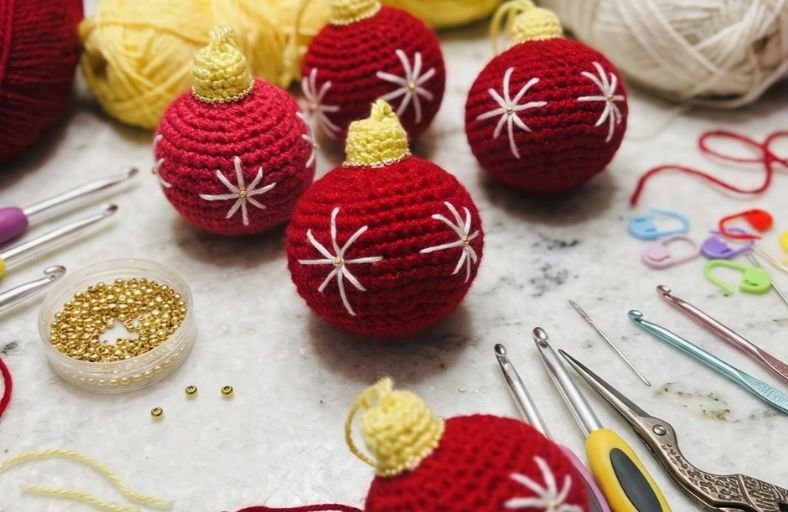
Looking to add a cozy, handmade sparkle to your holiday decor this season?
Why settle for store-bought plastic baubles when you can turn a simple skein of yarn into a heirloom-worthy Christmas bubble ornament?
Whether you are decorating a towering pine or looking for the ultimate quick gift for yarn-loving friends, this project brings pure festive joy directly to your hook.
Materials and Preparation
Materials:
- Main Ornament Yarn: Medium weight (#4) worsted yarn in classic Red (or any festive color of your choice).
- Cap Yarn: Light weight (#3) yarn in Gold or Yellow.
- Embroidery Yarn: Thin white yarn (or embroidery floss) for hand-embroidering the star bursts.
- Stuffing: Lightweight polyester fiberfill (Polyfill).
- Embellishments (Optional): Tiny gold beads, bead chain strand, and fabric glue (or hot glue).
Tools:
- Crochet Hooks:
- 4.5 mm hook for the main ornament body.
- 3.5 mm hook for the ornament cap.
- Tapestry / Yarn Needles: One large-eye yarn needle for worsted yarn and one smaller needle for the thin embroidery yarn.
- Stitch Marker: Essential for tracking rounds.
- Scissors: Sharp craft scissors.
Preparation Notes:
- If you decide to use the same yarn weight for both the ornament body and the cap, stick to one single hook size throughout the entire project.
- Keep your tension moderately firm while making the sphere so the fiberfill stuffing does not peek through the stitches.
Abbreviations and Notes
Abbreviations:
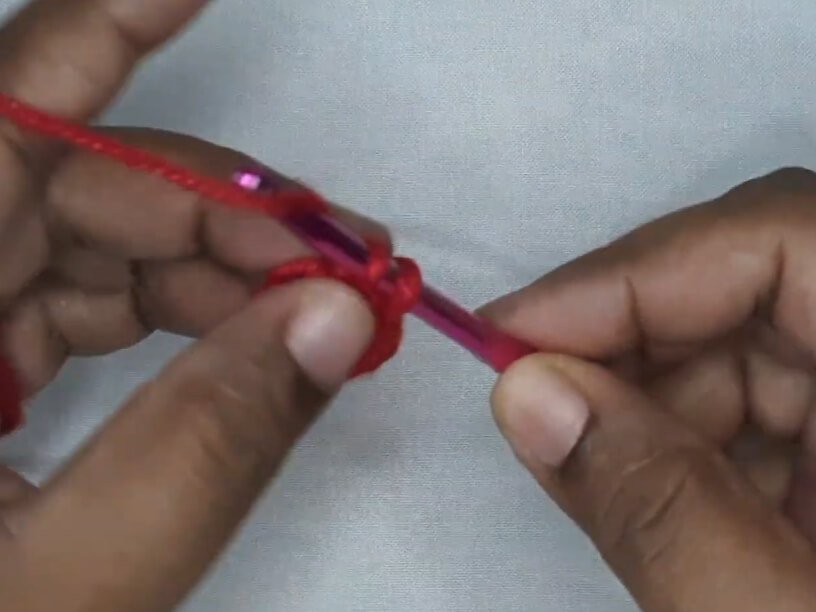
- MR: Magic Ring
- ch: Chain
- sc: Single Crochet
- inc: Single Crochet Increase (2 sc in the same stitch)
- dec: Single Crochet Decrease (Invisible decrease using front loops only)
- sl st: Slip Stitch
- BLO: Back Loop Only
Pattern Notes:
- The main bubble body is worked in joined rounds. Each round ends with a slip stitch into the first single crochet and begins with a chain 1 (the chain 1 does not count as a stitch).
- Decreases are worked using the invisible decrease technique (grabbing only the front loops of two adjacent stitches) to maintain a smooth 3D shape.
- The ornament cap is worked separately and sewn securely onto the top of the main body before adding embroidered details.
Gauge, Approximate Size, and Pattern Notes
Gauge:
Gauge is not critical for this ornament project, but your stitches should be tight enough to prevent stuffing from showing through.
Finished Size:
Approximately 3.0 to 3.5 inches (7.6 to 8.9 cm) in diameter when using worsted weight yarn and a 4.5 mm hook. Using lighter yarn will yield smaller mini-baubles.
Special Techniques:
- Invisible Decrease (dec): Insert hook into the front loop only of the next two stitches, yarn over, pull through both front loops, yarn over, and pull through both loops on hook.
- BLO Single Crochet: Insert hook into the back loop only (the loop furthest from you) to create a crisp 90-degree ridge for the base of the ornament cap.
- Hand-Embroidered Starbursts: A simple cross-hatch star stitch pattern embellished with center beads.
Step-by-Step Pattern
Part 1: Main Bubble Body (Red Yarn)
Using Red Yarn and a 4.5 mm hook:
- R1: MR 6 sc, sl st to first sc to join, ch 1 (6)
- R2: 2 sc in each stitch around, sl st to join, ch 1 (12)
- R3: (1 sc, inc)*6, sl st to join, ch 1 (18)
- R4: (2 sc, inc)*6, sl st to join, ch 1 (24)
- R5: (3 sc, inc)*6, sl st to join, ch 1 (30)
- R6: (4 sc, inc)*6, sl st to join, ch 1 (36)
- R7: (5 sc, inc)*6, sl st to join, ch 1 (42)
- R8–R12: 42 sc around, sl st to join, ch 1 (42) (5 rounds total of straight sc)
- R13: (5 sc, dec)*6, sl st to join, ch 1 (36)
- R14: (4 sc, dec)*6, sl st to join, ch 1 (30)
- R15: (3 sc, dec)*6, sl st to join, ch 1 (24)
- R16: (2 sc, dec)*6, sl st to join, ch 1 (18)
- R17: (1 sc, dec)*6, sl st to join, ch 1 (12)
- Stuff the bubble firmly with fiberfill until it forms a rounded shape.
- R18: 6 dec, sl st to join, ch 1 (6)Fasten off leaving a tail. Use a yarn needle to weave through the front loops of the remaining 6 stitches, pull tight to close the hole, and weave in the end.

Part 2: Ornament Cap (Gold/Yellow Yarn)
Using Gold Yarn and a 3.5 mm hook:
- R1: MR 6 sc, sl st to first sc to join, ch 1 (6)
- R2: 2 sc in each stitch around, sl st to join, ch 1 (12)
- R3: BLO 12 sc around, sl st to join, ch 1 (12)
- R4–R5: 12 sc around, sl st to join, ch 1 (12)Fasten off leaving a long tail for sewing and creating the hanging loop.
Part 3: Cap Assembly and Hanging Loop
- Insert a tiny bit of yarn scrap or fiberfill inside the cap.
- Align the cap over the top center of the red bubble body.
- Thread the long gold tail onto a yarn needle and stitch the bottom edge of the cap onto the red sphere.
- Pass the needle through the center of the bubble up through the top center of the gold cap.
- Form a loop of the desired length for hanging on your Christmas tree, tie a secure knot at the base of the cap, and weave the excess tail back inside the ornament body.
Part 4: Starburst Embroidery & Decorative Details
- Thread your needle with thin white yarn.
- Bring the needle out on the middle round of the main body (Round 10).
- Stitch large 8-pointed starburst figures around the ornament by making long straight stitches radiating out from a central point.
- Fasten off white yarn securely and hide ends inside the body.
- Apply a tiny dot of fabric glue to the center of each white starburst and place a tiny gold bead on top.
- Glue a strand of tiny bead chain around the rim where the gold cap meets the red ornament body for extra sparkle.
Detailed Pattern Breakdown
1. Main Sphere Geometry
- Rounds 1–7 (Increases): You build a flat circle that expands evenly by adding 6 single crochet stitches per round until reaching 42 stitches.
- Rounds 8–12 (Body Height): Working 5 straight rounds without any increases creates the spherical depth and volume required for a 3D bauble.
- Rounds 13–18 (Decreases): The decreasing steps mirror the increase rounds exactly, gradually closing the sphere back down to 6 stitches.
2. Cap & Ridge Construction
- Round 3 BLO Feature: Switching to Back Loop Only on Round 3 creates a crisp 90-degree outer edge that mimics the metallic cap of a glass Christmas bauble.
- Rounds 4–5 (Cylinder Wall): These rounds build height to form the classic socket shape before it attaches to the sphere.
3. Surface Decoration Techniques
- Star Embroidery Layout: Placing starbursts along the equator line ensures symmetrical spacing around the entire sphere.
- Bead & Trim Placement: Placing gold accents at the center of the stars and along the cap join elevates a basic crochet project into a polished holiday keepsake.
Pattern Question:
Question: How do I ensure my ornament stays lightweight and maintains a clean round shape on the tree?
Answer: Use polyester fiberfill sparingly and fluff it as you insert it into the opening. Over-stuffing can cause the single crochet stitches to stretch open, exposing the stuffing inside and making the ornament too heavy for tree branches.
Stuffing it just enough to round out the sphere will maintain its shape while keeping it feather-light.