
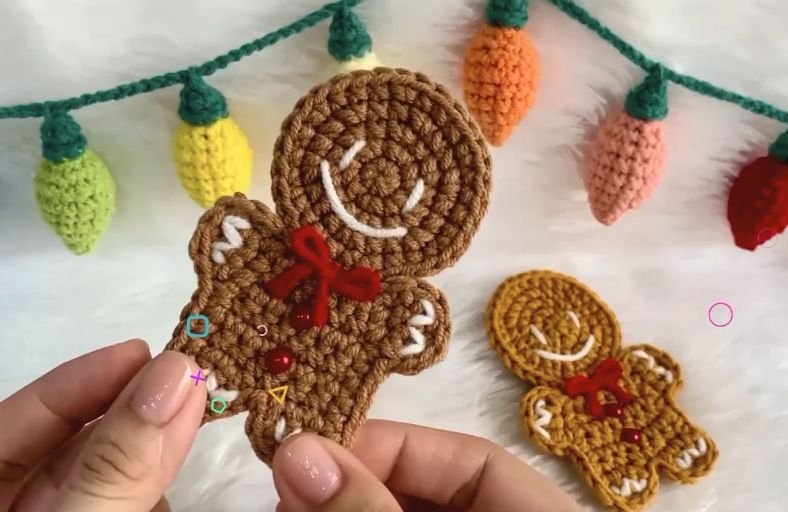
Ready to bring the sweet, festive charm of freshly baked holiday cookies right to your Christmas tree without heating up the oven?
This adorable Crochet Gingerbread Man Ornament is guaranteed to add a cozy, handmade sprinkle of joy to your holiday decor.
Grab your favorite golden brown yarn and your trusty hook, because this quick and fun project is about to become your new favorite holiday tradition!
Materials and Preparation
Materials:
- Yarn: 2 mm Cotton yarn in Golden Brown (for the gingerbread body), White (for facial details and squiggly icing frosting), and Red (for the optional accent embellishments).
- Red Felt: Small piece of red felt cut into a cute bow shape for the neck.
- Half Beads: 2 red half beads (6 mm) for the adorable buttons on the belly.
- Glue: Craft glue or fabric glue to secure the felt bow and beads neatly.
Tools:
- Crochet Hook: Size 3.0 mm crochet hook.
- Tapestry Needle: For embroidering the sweet smile, eyes, and icing details.
- Scissors: For trimming yarn ends and cutting felt shapes.
- Stitch Marker: To keep track of rounds and row beginnings.
Preparation Notes:
- Maintain a consistent tension so the gingerbread man keeps a flat, smooth shape that sits perfectly on your tree branches.
- Embroider all facial expressions and icing squiggles before gluing on the red felt bow and button beads for the cleanest finish.
Abbreviations and Notes
Abbreviations:
- MR: Magic Ring
- ch: Chain
- sc: Single Crochet
- inc: Single Crochet Increase (2 sc in the same stitch)
- sl st: Slip Stitch
- st(s): Stitch(es)
Pattern Notes:
- The head is worked in continuous rounds using a Magic Ring, while the body and limbs extend seamlessly down in rows and continuous edge passes to build the iconic gingerbread shape.
- Keep your slip stitches smooth along the outer border to give your ornament a neat, crisp outline.
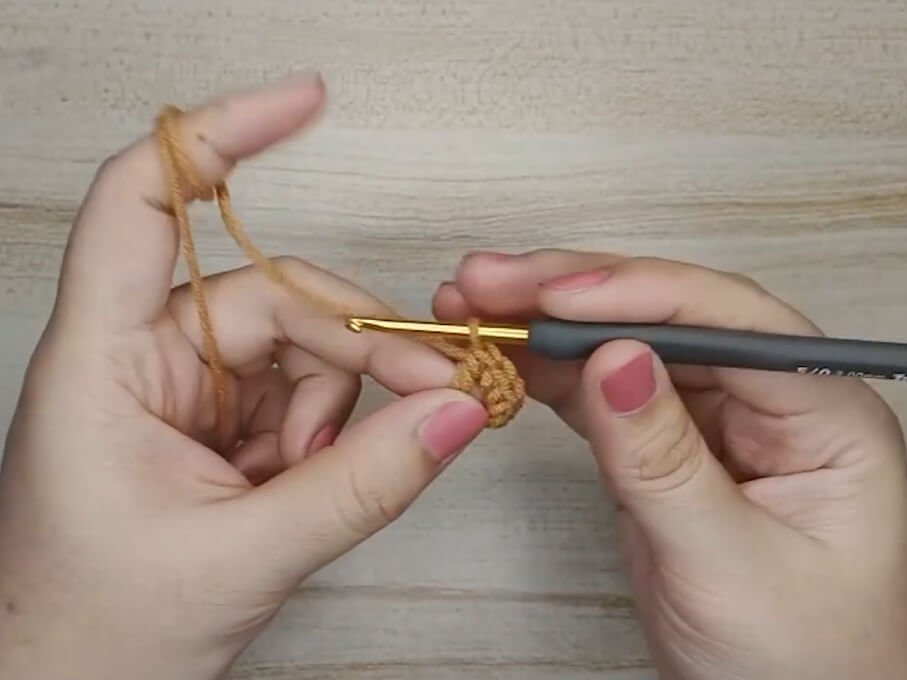
Gauge, Approximate Size, and Pattern Notes
Gauge:
Gauge is not critical for this project. Working with a 3.0 mm hook and 2 mm cotton yarn creates a firm, sturdy fabric that retains its shape nicely without curling.
Finished Size:
- Height: Approximately 3.9 inches (10 cm)
- Width: Approximately 2.8 inches (7 cm)
Special Techniques:
- Surface Embroidery: Simple straight stitches with white yarn create the whimsical icing details on the hands, feet, and face.
- Clean Edge Finishing: Working a smooth single crochet and slip stitch border around the entire body creates a polished, baker-approved silhouette.
Step-by-Step Pattern
Part 1: Head
Work in rounds using Golden Brown yarn:
- R1: MR 6 sc (6)
- R2: 6 inc (12)
- R3: (1 sc, inc)*6 (18)
- R4: (2 sc, inc)*6 (24)
- Do not cut the yarn. Continue directly into the body from the base of the head.
Part 2: Main Body & Limbs
Work in continuous rows extending down from the head to construct the body trunk, arms, and legs:
- Foundation Body Rows:
- Row 1: Attach/work 6 sc across the bottom of the head, ch 1, turn (6)
- Row 2: inc, 4 sc, inc, ch 1, turn (8)
- Row 3–Row 5: 8 sc, ch 1, turn (8)
- Arm Extensions:
- Left Arm: Ch 4, starting from the 2nd ch from hook, 3 sc along the chain, sc across the 8 body sts, ch 4 for Right Arm.
- Right Arm: Starting from the 2nd ch from hook, 3 sc along the chain, continue across the top row to complete both arms symmetrically.
- Arm Rows: Work 2 rows of sc straight across all sts (14 sts total across both arms and body).
- Fasten off arm sides and reattach yarn to the central 8 body sts to form the lower torso.
- Leg Extensions:
- Left Leg: Join yarn to the first 4 sts of the lower body. Work 3 rows of 4 sc. Fasten off.
- Right Leg: Join yarn to the remaining 4 sts of the lower body. Work 3 rows of 4 sc. Fasten off.
Part 3: Border and Details
Head & Body Outline:
- Reattach Golden Brown yarn at any corner stitch.
- Work 1 sc in each st around the outer perimeter of the head, arms, torso, and legs, placing (sc, ch 1, sc) in sharp outer corners to keep them flat and crisp.
- Finish with a sl st to the first st and fasten off, weaving in all golden brown tail ends neatly behind the body.
Part 4: Assembly and Decorating
- Facial Embroidery:
- Using white cotton yarn and a tapestry needle, embroider two gentle curved lines for the happy eyes and a big, cheerful crescent smile across the center of the head.
- Icing Details:
- Embroider small white squiggly “icing” lines near the edges of both wrists (arms) and ankles (legs) using white yarn.
- Embellishments:
- Cut a small bow shape from red felt and glue it securely at the neck seam between the head and body using fabric glue.
- Glue two 6 mm red half beads down the center of the chest to form bright, shiny gingerbread buttons.
- Attach a loop of gold thread or yarn at the top of the head for hanging on your Christmas tree!
Detailed Pattern Breakdown
1. Head Breakdown:
The head starts with a classic flat circular base beginning with a Magic Ring of 6 single crochets. By expanding evenly through 4 rounds using standard 6-point increases (6 inc rightarrow (1 sc, inc)*6 rightarrow$ (2 sc, inc)*6), the head achieves a perfectly round 24-stitch flat circle that mimics a classic cutout cookie.
2. Body & Limbs Breakdown:
Rather than crocheting separate limbs and sewing them together, this flat ornament utilizes a seamless row-by-row extension method. Working directly off 6 stitches at the base of the head allows the neck to stay sturdy without floppy joins.
The arms extend outwards using side chain extensions (ch 4), creating flat, rounded hands. The legs branch out at the bottom into two 4-stitch columns, maintaining the traditional gingerbread cookie proportions without adding unnecessary bulk.
3. Edging & Finishing Breakdown:
The magic of this ornament happens during the perimeter edging pass. Crocheting a single crochet border around the entire silhouette ties all the row ends, chain extensions, and circular top together into one cohesive piece.
The final addition of embroidered white yarn icing, a red felt bow, and red half beads creates texture contrast, turning simple flat stitches into an eye-catching, festive holiday ornament.
Pattern Question:
Question: My gingerbread man’s arms and legs are curling up at the edges instead of laying completely flat. How can I fix this?
Answer: Curling usually happens if your stitch tension is too tight or if corner turns are pulling too tightly. When working the single crochet border around the perimeter, make sure to place a extra ch 1 or work two single crochets into the outermost corner stitches of the hands and feet.
This gives the yarn enough ease to wrap around sharp turns without pulling the fabric inward. Additionally, lightly steam-blocking your finished gingerbread ornament with an iron (holding it a couple of inches away without directly touching the yarn or glue) will set the stitches flat and crisp!