
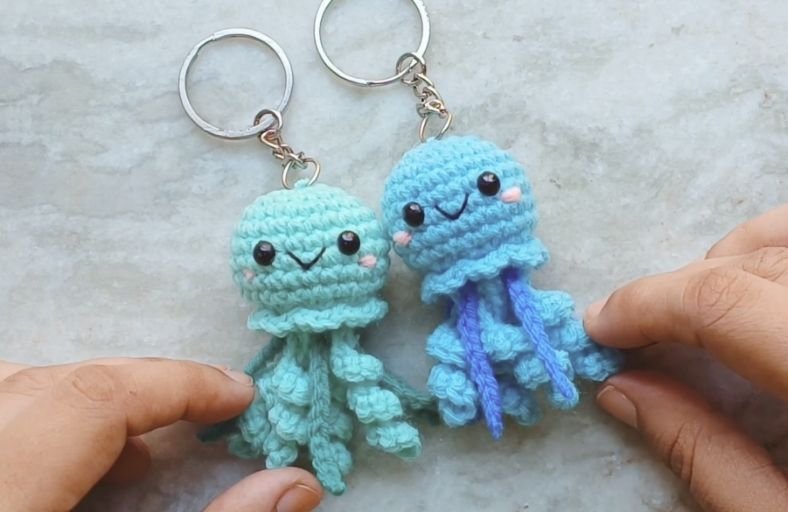
Looking for a quick, adorable crochet project that will bring a splash of handmade joy to your day? This Cute Baby Jellyfish Amigurumi Keychain is guaranteed to melt your heart!
Perfect as a charming accessory for your bag or keys, this pattern features a smart no-sew design (the main body, ruffles, and tentacles are worked directly in one piece).
The pattern has been prepared in standard US Crochet Terms so you can dive right into your crafting flow!
Materials and Preparation
Materials:
- Yarn:
- Light teal/mint yarn for the main jellyfish body.
- Dark green yarn for the straight accent tentacles.
- Small amounts of black yarn and light pink yarn for facial embroidery.
- Stuffing: Polyfill stuffing.
- Safety Eyes: 4 mm safety eyes with backings.
- Keychain Hardware: Jump ring and keychain assembly.
Tools:
- Crochet Hook: 3.0 mm crochet hook (using a hook size slightly smaller than recommended for 4-ply yarn creates tight stitches so stuffing won’t peek through).
- Yarn Needle: For embroidered details and attaching hardware.
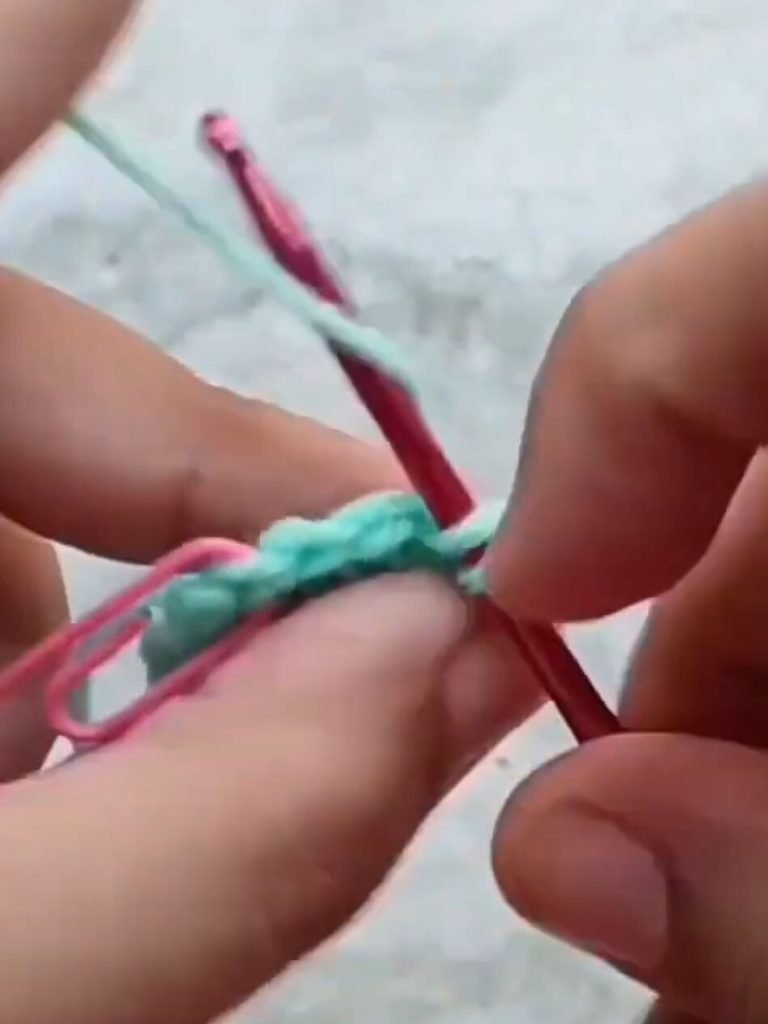
- Stitch Marker / Paper Clip: To mark the end of continuous rounds.
- Scissors: Sharp scissors.
Preparation Notes:
- You should be comfortable with basic amigurumi techniques including magic ring, working in continuous rounds, single crochet increases, and invisible decreases.
- Keep your tension firm and consistent throughout to maintain a crisp, plush shape.
Abbreviations and Notes
Abbreviations:
- MR: Magic Ring
- ch: Chain
- sc: Single Crochet
- inc: Single Crochet Increase (2 sc in the same stitch)
- dec / Invisible Dec: Single Crochet Decrease (worked through front loops only for a smooth finish)
- sl st: Slip Stitch
- BLO: Back Loop Only
- FLO: Front Loop Only
Pattern Notes:
- The body is worked in continuous rounds (spirals). Do not join at the end of each round unless instructed; use a stitch marker to track the last stitch of every round.
- The ruffles and curly tentacles are worked directly into the leftover loop ridges (
FLO/BLO) for a true no-sew experience.
Gauge, Approximate Size, and Pattern Notes
Gauge:
Exact gauge is not critical for this project. Aim for tight, tight stitches so polyfill remains hidden inside.
Finished Size:
Approximately 2.0 to 2.8 inches (5 to 7 cm) tall (excluding the hanging tentacles and keychain ring), making it an ideal portable size.
Special Techniques:
- Invisible Decrease: Insert hook into FLO of the first stitch, then twist and insert into FLO of the second stitch. Yarn over, pull up a loop, yarn over and pull through both loops.
- Curly Tentacles: Work 2 sc into each chain stitch to create a natural, bouncy curl.
Part 1: Head & Main Body
Worked in continuous rounds using light teal yarn:
- R1: MR 6 sc (6 sts)
- R2: Inc in every stitch around (12 sts)
- R3: (sc 1, inc) x 6 (18 sts)
- R4: sc 1, inc, (sc 2, inc) x 5, sc 1 (24 sts) (Staggering increases keeps the shape round)
- R5–R9: sc in each stitch around (24 sts)
Attach Safety Eyes & Stuffing:
- Count 6 rounds down from the top. Place 4 mm safety eyes between R6 and R7, leaving 3 stitches between them. Secure with backings.
- Lightly stuff the body with polyfill (do not over-stuff).
Decreases to Close Bottom:
- R10: (sc 1, Invisible Dec) x 8 (16 sts)
- R11: Working in BLO: Invisible Dec x 8 (8 sts) Fasten off, weave the yarn tail through the remaining 8 back loops to pull the hole closed, then bring the yarn needle straight up through the top center of the head to save for attaching the keychain.
Part 2: Tentacles
Curly Tentacles (4 Curly Tentacles):
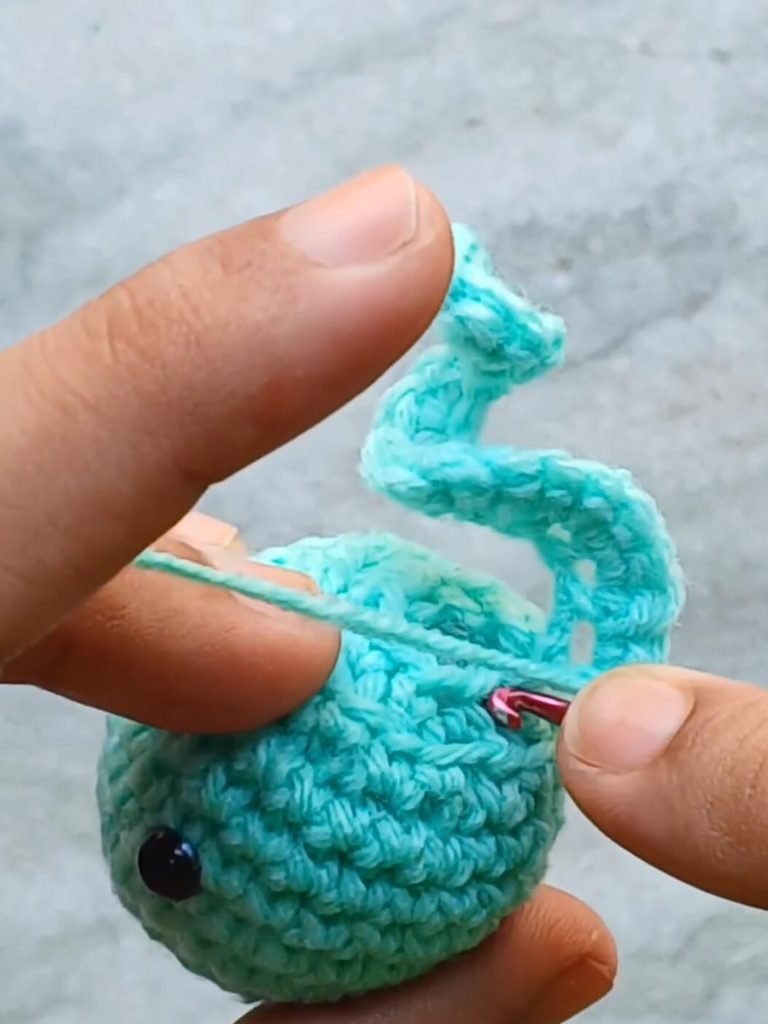
- Attach yarn with a sl st to the leftover front loop (
FLO) of R11: - Tentacle 1: sl st in FLO of next st, ch 12. Skip the first chain, work 2 sc in each of the remaining 11 chains. sl st in FLO of the next 2 stitches on the body.
- Tentacles 2, 3, 4: Repeat the process 3 more times for 4 curly tentacles total.
Straight Tentacles (4 Straight Tentacles):
- Using dark green yarn, attach with a sl st in the space between two curly tentacles.
- Formula: ch 12, cut yarn leaving a short tail, and pull tight into a firm knot at the end of the chain. Cut excess tail close to the knot.
- Repeat to create 4 straight tentacles evenly spaced between the curly tentacles. Hide all yarn tails inside the body using a yarn needle.
Part 3: Embellishments & Assembly
Ruffle Border:
- Locate the front loops (
FLO) of R10 around the lower head section. - Attach the main body yarn with a sl st in the first FLO at the back.
- Pattern: (3 sc in the next FLO, sl st in following FLO) – repeat around the entire circumference to create a ruffled skirt edge. Sl st to first FLO to join, fasten off, and weave in ends.
Facial Embroidery:
- Smile: Using black yarn (1 strand of 4-ply yarn), embroider a simple smile between the eyes across 2 stitches, tacking down the center to curve into a smile.
- Blush: Using light pink yarn, make small horizontal stitches just beneath each eye for blush.
Keychain Assembly:
- Thread the yarn tail left at the top center of the head onto a yarn needle.
- Pass the needle through the jump ring of the keychain assembly multiple times to attach securely.
- Tie a tight knot, bury the knot inside the body, and trim excess yarn.
Step by Step Guide
Detailed Pattern Breakdown
1. Head & Body Construction:
- R1–R5: Starts with a Magic Ring of 6 sc, expanding uniformly via standard radial increase increments (+6 sts per round) up to Round 4 (24 sts). Staggering the increases on Round 4 prevents hexagonal corners, creating a rounded sphere. Rounds 5–9 maintain 24 sts to build the cylindrical depth of the jellyfish head.
- R10–R11: Decreases down to 16 sts in R10, then uses Back Loop Only (
BLO) in R11 to drop the stitch count to 8 sts. The unworked front loops (FLO) of R10 and R11 serve as built-in anchor points for the ruffle border and curly tentacles.
2. No-Sew Tentacle & Ruffle Attachments:
- Curly Tentacles: Worked into the front loops of Round 11. By placing 2 sc in each chain stitch, the yarn accumulates extra physical volume per stitch, forcing the chain to naturally curl into spirals without requiring wire or extra sewing.
- Ruffle Border: Anchored directly into the front loops of Round 10. Alternating between 3 sc in one stitch and a slip stitch in the next creates a ruffled skirt edge around the jellyfish cap.
Pattern Question:
Question 1: How do I ensure the curly tentacles stay bouncy and defined?
Answer: Working 2 single crochets into every single chain link creates the exact mechanical force needed to form spiral curls. Once you finish a tentacle, simply twist it around your finger in the direction of the yarn twist to help set the curls into place.
Question 2: Why is working in BLO and FLO so important for this pattern?
Answer: Working in BLO for Round 11 leaves the front loops available for the curly tentacles, while working into FLO of Round 10 provides the ridge for the ruffle border. This clever technique eliminates the need to sew separate parts, making the project clean, fast, and sturdy!
Enjoy making your cute baby jellyfish keychain! Happy crocheting!