
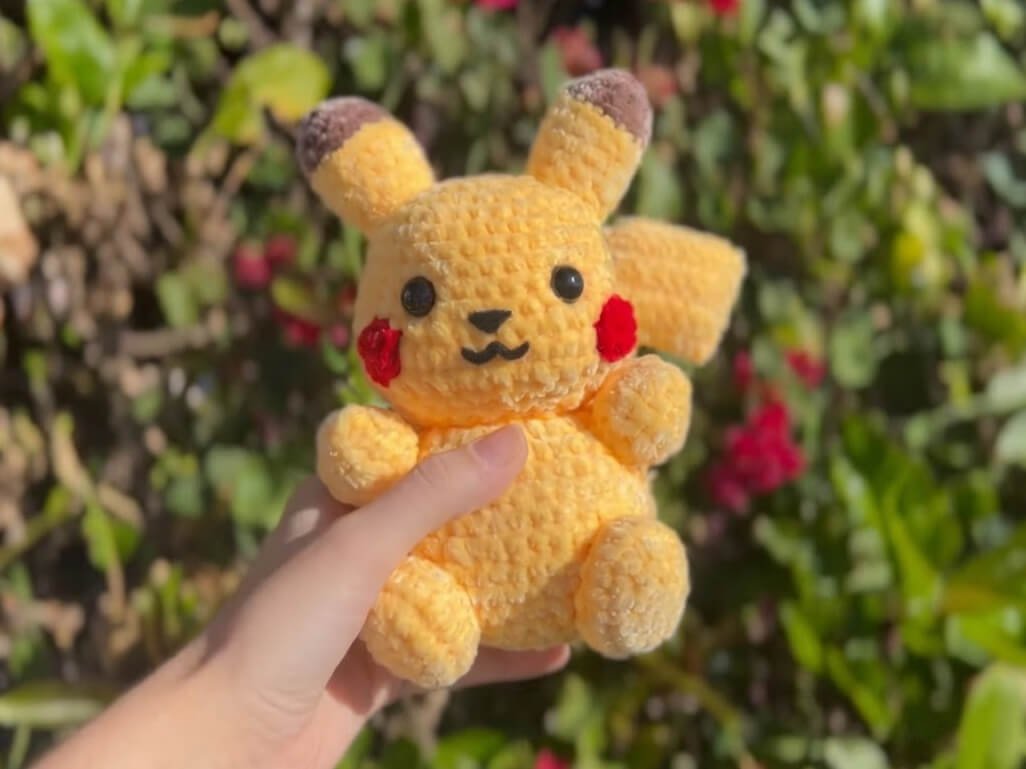
Ever wondered what happens when an iconic, electrical Pokemon gets transformed into a super squishy plushie?
You get an irresistibly chubby Pikachu that is ready to spark joy in your home!
Whether you are making this as a gift for a die-hard Pokemon fan or treating yourself to a cozy crafting session, this step by step tutorial will guide you through every single round, row, and adorable cheek detail.
Materials and Preparation
Materials:
- Yarn:
- Plush/Chenille or Worsted Weight Yarn in Yellow (Main body, head, arms, legs, tail, and upper ears).
- Plush/Chenille or Worsted Weight Yarn in Brown (Base of tail and tips of ears).
- Plush/Chenille or Worsted Weight Yarn in Red (Cheeks).
- Black yarn or felt sheet for embroidered facial details (nose and mouth).
- Stuffing: Premium Polyfill stuffing to bring out those iconic chubby cheeks.
- Safety Eyes: 1 pair of black safety eyes (size chosen based on preference and yarn weight).
Tools:
- Crochet Hook: 5.0 mm hook (or a hook size suited to your chosen yarn density to prevent stuffing from peeking through).
- Yarn Needle: Tapestry needle for sewing parts together.
- Stitch Marker: Essential for tracking continuous rounds.
- Scissors: Sharp craft scissors.
Preparation Notes:
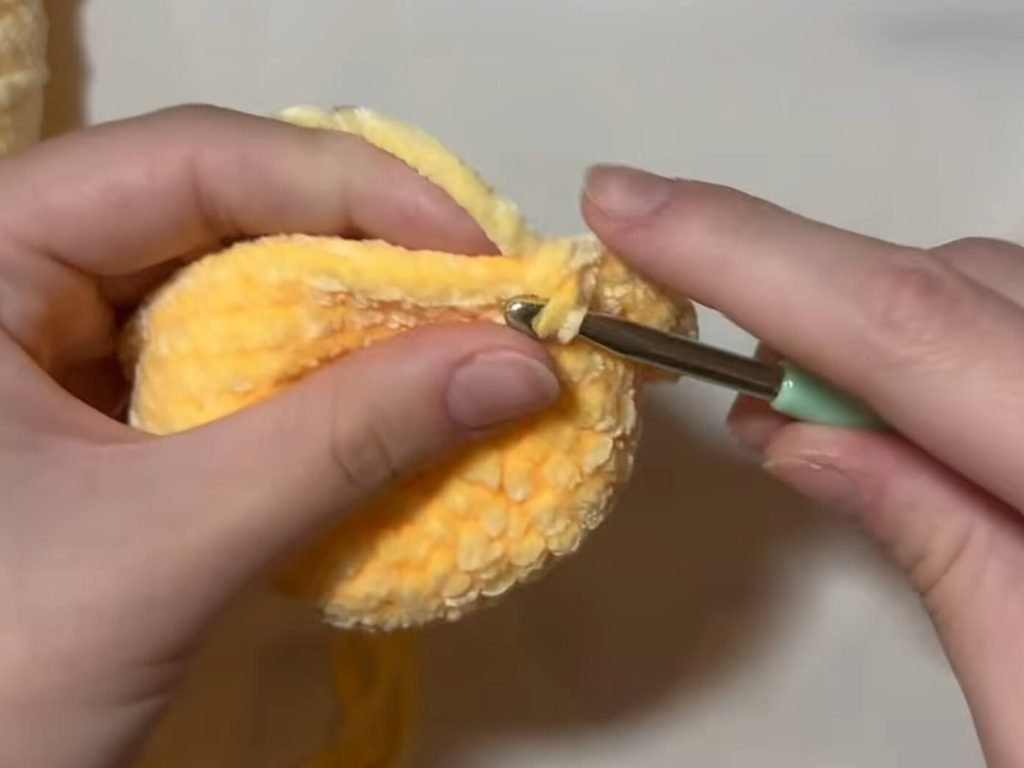
- If you are working with delicate plush or velvet yarn that breaks easily when pulling a magic ring tight, use the chain-2 method (chain 2, then work stitches into the second chain from hook) to prevent snapping.
- Keep your tension firm and consistent throughout the project, especially around the cheek increases and decreases, so the fiberfill stays hidden inside.
Abbreviations and Notes
Abbreviations:
- MR: Magic Ring
- ch: Chain stitch
- sc: Single crochet
- inc: Single crochet increase (2 sc in the same stitch)
- dec: Single crochet decrease (sc2tog)
- sl st: Slip stitch
- BLO: Back loop only
- st(s): Stitch(es)
Pattern Notes:
- The Head and Body are worked as one continuous piece from the top down, meaning less sewing and a sturdier structure!
- The Cheeks, Arms, Legs, and Ears are worked in continuous rounds (spirals) without joining at the end of each round unless specified.
- The Tail is worked in flat rows, turning after each row, with custom row lengths to form Pikachu’s signature lightning bolt shape.
Gauge, Approximate Size, and Pattern Notes
Gauge:
Gauge is not critical for this plushie project, but working with a smaller hook than recommended on your yarn label ensures a dense fabric that keeps polyfill contained.
Finished Size:
Approximately 7 inches to 9 inches (18 cm to 23 cm) tall when using plush yarn and a 5.0 mm hook.
Special Techniques:
- Cheek Sculpting (Selective Increments): Concentrated increases in Round 11 create 3D volume for Pikachu’s cheeks, which are then shaped with matching decreases in Round 13.
- BLO Color Transition: Working in the back loops only during color changes on the ears ensures a crisp, clean dividing line between brown and yellow.
- Turning Row Tail Construction: The lightning bolt tail uses precise chain additions and row extensions to build clean right-angle zigzags.
Step-by-Step Pattern
Part 1: Head & Body (Worked continuously as one piece)
Start with Yellow yarn:
- R1: 7 sc in MR (7)
- R2: inc in each st around (14)
- R3: (1 sc, inc)*7 (21)
- R4: (2 sc, inc)*7 (28)
- R5: (3 sc, inc)*7 (35)
- R6–R10: 35 sc (35) (5 rounds total)
- R11: 5 sc, 6 inc, 4 sc, 6 inc, 14 sc (47)
- R12: 47 sc (47)
- R13: 5 sc, 6 dec, 4 sc, 6 dec, 14 sc (35)
- R14: (3 sc, dec)*7 (28)
- R15: (2 sc, dec)*7 (21)
- R16: (1 sc, dec)*7 (14)
Pause here to attach eyes between R9 and R10, spaced 6 stitches apart between the two sculpted cheek areas. Stuff the head firmly, making sure to push extra fiberfill into the cheeks.
- R17: (inc)*7 (28)
- R18: (sc, inc)*7 (42)
- R19–R22: 42 sc (42) (4 rounds total)
- R23: (5 sc, inc)*7 (49)
- R24: 49 sc (49)
- R25: (5 sc, dec)*7 (42)
- R26: (4 sc, dec)*7 (35)
- R27: (3 sc, dec)*7 (28)
- R28: 28 sc (28)
- R29: (2 sc, dec)*7 (21)
Stuff the body firmly with polyfill.
- R30: (1 sc, dec)*7 (14)
- R31: 7 dec (7)
- R32: 3 dec, sl st in final st (4) Fasten off, leaving a yarn tail to weave through the remaining stitches and sew the bottom hole completely closed.
Part 2: Feet & Hands
Feet (Make 2)
Yellow crochet hook:
- Foundation: ch 5
- R1: Starting in the 2nd ch from hook: 3 sc, 2 sc in last ch. Turn to work on the opposite side of the chain: 3 sc, 2 sc in last st (10)
- R2: inc in each st around (20)
- R3: 20 sc (20)
- R4: 10 dec (10) Sl st in next st, fasten off leaving a long tail for sewing.
Hands (Make 2)
Yellow crochet hook:
- R1: 4 sc in MR (4)
- R2: inc in each st around (8)
- R3: (1 sc, inc)*4 (12)
- R4: 12 sc (12)
- R5: (1 sc, dec)*4 (8)
- R6: 8 sc (8) Sl st in next st, fasten off leaving a long tail for sewing. Lightly stuff.
Part 3: Ears, Cheeks & Lightning Tail
Ears (Make 2)
Start with Brown yarn:
- R1: 6 sc in MR (6)
- R2: inc in each st around (12)
- R3: 12 sc (Change to Yellow yarn in the last st) (12)
- R4–R5: Working in BLO only: 12 sc (12)
- R6: 12 sc through both loops (12)
- R7: (4 sc, dec)*2 (10)
- R8: 10 sc (10) Sl st, fasten off leaving a long tail for sewing. Stuff lightly.
Cheeks (Make 2)
Red crochet hook:
- R1: 4 sc in MR, sl st into first st to form a neat circle (4) Fasten off leaving a tail for sewing.
Tail (Lightning Bolt Shape)
Make 1 (or make 2 and sew together for extra thickness):
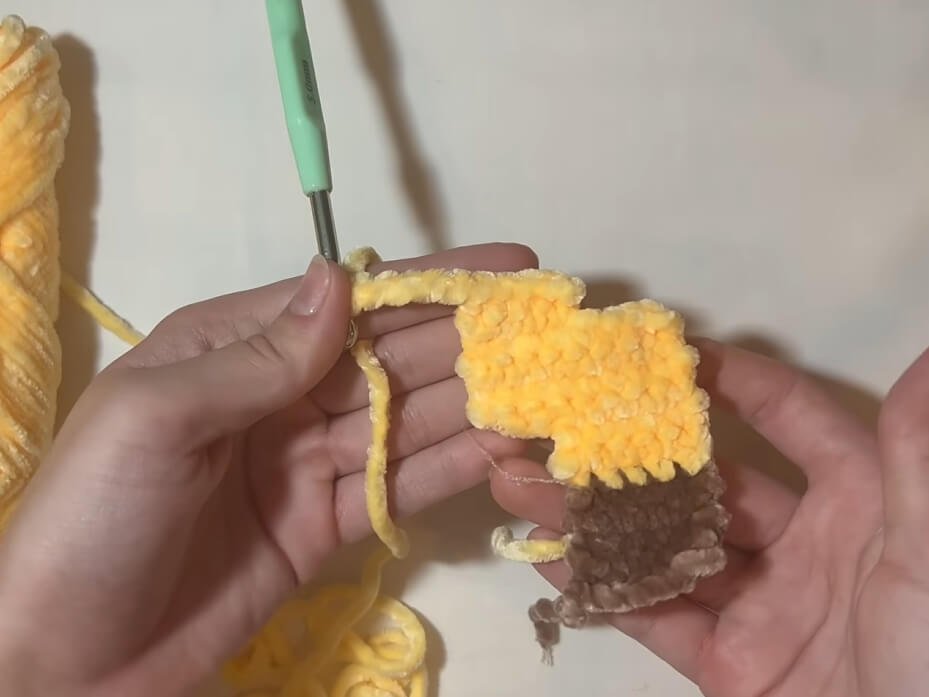
Start with Brown yarn:
- Row 1: ch 6. Starting in 2nd ch from hook: 5 sc (5)
- Row 2: ch 1, turn, 5 sc on back side (5)
- Row 3: ch 1, turn, 5 sc on front side (5)
- Row 4: ch 1, turn, 5 sc on back side (5)
- Row 5: ch 1, turn, 5 sc on front side (5)
- Row 6: ch 1, turn, 5 sc on back side, sl st in last st (5) Fasten off Brown yarn. Attach Yellow yarn to the corner st:
- Row 7: 5 sc across in Yellow yarn (5)
- Row 8: ch 1, turn, 5 sc on back side (5)
- Row 9: ch 1, turn, 5 sc on front side, ch 3 (8)
- Row 10: ch 1, turn, 8 sc along back side (8)
- Row 11: ch 1, turn, 8 sc along front side (8)
- Row 12: ch 1, turn, 8 sc along back side (8)
- Row 13: ch 1, turn, 8 sc along front side (8)
- Row 14: ch 1, turn, 4 sc along back side (4)
- Row 15: ch 1, turn, 4 sc, ch 5 (9)
- Row 16: ch 1, turn, 9 sc along back side (9)
- Row 17: ch 1, turn, 9 sc along front side (9)
- Row 18: ch 1, turn, 9 sc along back side (9)
- Row 19–Row 21: ch 1, turn, 9 sc (9)
- Row 22: ch 1, turn, 8 sc, sl st in last st (8) Fasten off leaving a long tail for assembly.
Part 4: Edging, Assembly & Finishing
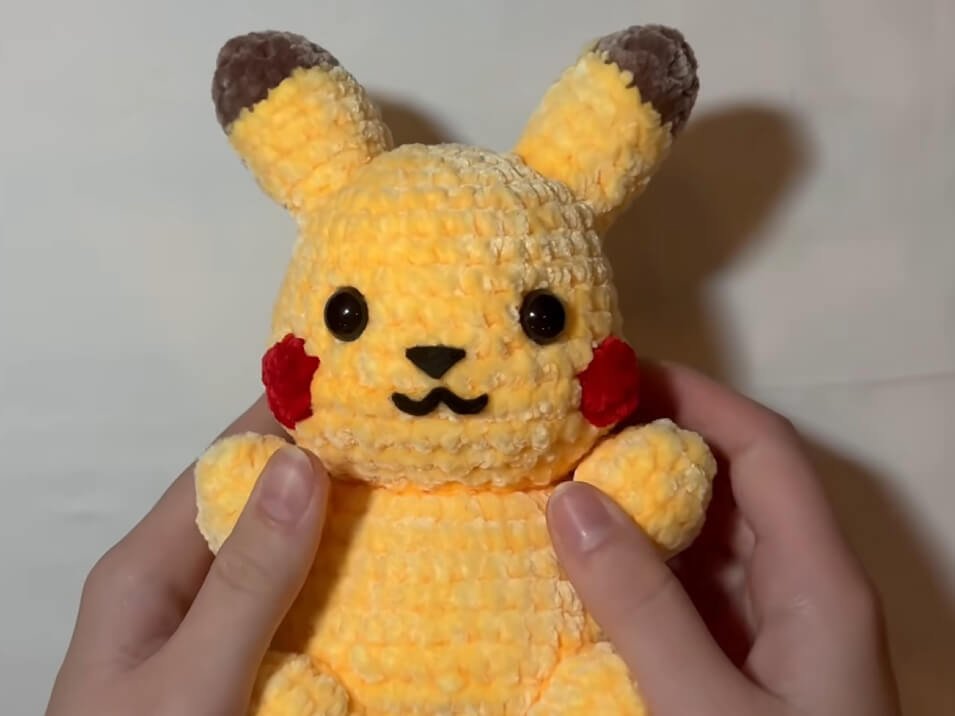
- Facial Features: Sew the red circular cheeks directly below the safety eyes on the inflated cheek areas. Using black embroidery thread or thin black yarn, stitch a small “W” shape for the mouth and a small inverted triangle for the nose.
- Attaching Ears: Pin the ears onto R2–R4 of the head at a slight outward angle. Sew securely around the base using the leftover yarn tails.
- Attaching Limbs:
- Pin the arms onto the sides of the body right below the neck line (around R18–R20).
- Pin the feet to the bottom front of the body so Pikachu can sit upright. Sew securely.
- Attaching Tail: Position the brown end of the lightning bolt tail at the lower back of the body and stitch it firmly in place using brown yarn.
Detailed Pattern Breakdown
1. Head & Cheek Sculpting Breakdown
The head utilizes a clever technique to create Pikachu’s signature chubby face without needing separate pieces:
- R1–R10 (Foundation Dome): Starts with standard circular growth from
7 scup to35 scto build the forehead and back of the head. - R11 (Cheek Expansion): By grouping six consecutive increases (
6 inc) separated by a4 sccentral bridge, the pattern suddenly expands from 35 to 47 stitches. This creates two distinct 3D bulges on opposite sides of the face. - R13 (Cheek Contouring): Mirroring R11, six consecutive decreases (
6 dec) on each side pull the stitches back inward, locking in the plump cheek shape permanently.
2. Body Transition & Base Closure Breakdown
- R16 to R17 (Neck Junction): After narrowing down to
14 scat R16, the pattern immediately expands with(1 sc, inc)*7to21 scat R17. This continuous construction eliminates the need to sew the head to the body later. - R23 to R25 (Belly Bulge): Increasing up to
49 scgives Pikachu a cute, rounded belly before tapering down with systematic decrease rounds ((5 sc, dec),(4 sc, dec), down to7 dec).
3. Tail Structural Geometry Breakdown
The lightning bolt tail is built using asymmetrical row extensions:
- Rows 1–6 (Brown Base): A simple
5 scstrip worked in flat back-and-forth turning rows. - Rows 9–10 (First Horizontal Step): Chaining 3 at the end of Row 9 and working back across expands the row width from 5 to 8 stitches, shifting the alignment outward.
- Rows 14–15 (Second Step Extension): Working only 4 stitches in Row 14, then chaining 5 in Row 15 creates a second offset step, building the full 9-stitch width for the upper portion of the lightning bolt.
Pattern Question:
Question: My magic ring keeps breaking when using plush/velvet yarn, and my cheeks don’t look symmetrical. How can I fix this?
Answer: Plush yarns are prone to snapping under friction when pulling a magic ring tight. To fix this, use the alternative chain-2 method: chain 2, then work your 7 initial single crochets directly into the 2nd chain from your hook. For the cheeks, ensure your stitch marker is placed precisely at the end of Round 10. When executing Round 11, the 6 inc sections must align exactly on the outer sides of the face with the 4 sc gap resting dead-center between the eyes. If your count is off by even one stitch, frog Round 11 and realign your marker before trying again!