
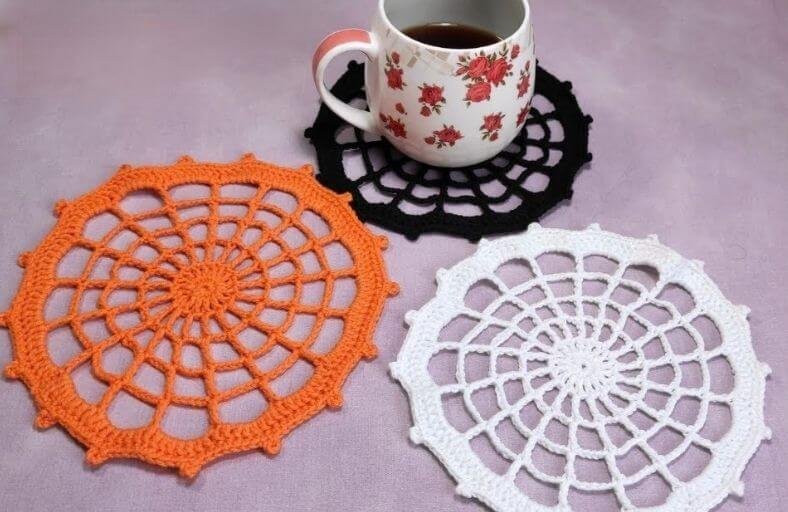
Looking for a spooky yet elegant project to elevate your Halloween decor or adding a Gothic flair to your coffee table?
This Crochet Spider Web Doily (which also works wonderfully as a spooky coaster or placemat) is an absolute delight to stitch!
Featuring an intricate web pattern built outwards in radiating rounds and finished with decorative picot peaks, this project transforms simple skeins of yarn into dramatic home accents.
Materials and Preparation
Materials:
- Yarn:
- Sport weight or DK weight yarn in classic Halloween colors such as Orange, Black, or White.
- Optional Finishings: Ironing starch or fabric stiffener if you prefer a rigid, hardened web ornament for wall or garden decor.
Tools:
- Crochet Hook: 3.0 mm crochet hook.
- Yarn Needle / Darning Needle: For weaving in ends neatly.
- Scissors: To trim yarn ends.
Preparation Notes:
- Master basic US crochet stitches including the single crochet (
sc), double crochet (dc), treble crochet (tr), chain (ch), and picot edging techniques. - Maintain consistent yarn tension so the lace network stretches evenly when blocking or steam ironing.
Abbreviations and Notes
Abbreviations:
- MR: Magic Ring
- ch: Chain
- sc: Single Crochet
- dc: Double Crochet
- tr: Treble Crochet
- sl st: Slip Stitch
- picot: Picot Stitch (ch 4, sc in the front loops of the first chain)
Pattern Notes:
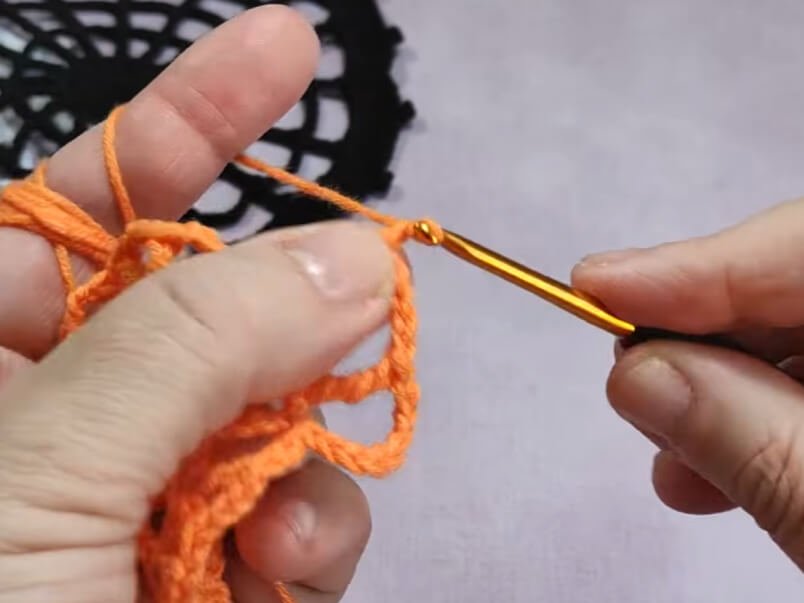
- The pattern is worked in joined rounds from the center outward.
- Each round is closed with a slip stitch (
sl st) into the starting chains of that round. - The starting chain counts as the first stitch where specified:
ch 3counts as adc.ch 6counts as1 tr + ch 3.ch 8counts as1 tr + ch 5.ch 9counts as1 tr + ch 6(in R5).ch 10counts as1 tr + ch 7.
Gauge, Approximate Size, and Pattern Notes
Gauge:
Gauge is not strictly critical for this lace project. Consistent tension ensures your web opens up beautifully during blocking.
Finished Size:
- Diameter: Approximately 8 inches to 10 inches (20 cm to 25 cm) when blocked with a steam iron.
Special Techniques:
- Center Ring Tightening: Pulling the magic ring tail securely to create a tight, seamless center core.
- Steam Blocking: Lightly applying steam from an iron (without touching the yarn directly) to shape, flatten, and expand the web structure evenly.
- Picot Peaks: Creating 4-chain picots over the central single crochets along the final edging to give each web segment its signature pointed tip.
Step-by-Step Pattern
Part 1: Center Wheel & Base Mesh
- R1: In a Magic Ring (
MR), ch 1, work 16 sc into the ring. Pull the tail tightly to close the ring. Sl st to the first sc to join. (16 sc) - R2: Ch 3 (counts as first dc), dc in the next st, ch 1, [1 dc in next st, ch 1] 14 times. Sl st to the top of the initial ch 3 to join. (16 dc, 16 ch-1 spaces)
- R3: Ch 6 (counts as 1 tr + ch 3), [tr in the next dc, ch 3] 15 times. Sl st to the 3rd ch of the starting ch-6 to join. (16 tr, 16 ch-3 spaces)
- R4: Ch 8 (counts as 1 tr + ch 5), [tr in the next tr, ch 5] 15 times. Sl st to the 3rd ch of the starting ch-8 to join. (16 tr, 16 ch-5 spaces)
- R5: Ch 9 (counts as 1 tr + ch 6), [tr in the next tr, ch 6] 15 times. Sl st to the 3rd ch of the starting ch-9 to join. (16 tr, 16 ch-6 spaces)
- R6: Ch 10 (counts as 1 tr + ch 7), [tr in the next tr, ch 7] 15 times. Sl st to the 3rd ch of the starting ch-10 to join. (16 tr, 16 ch-7 spaces)
Step-by-Step Pattern (Continued)
Part 2: Outer Frame & Picot Edging
- R7: Ch 3 (counts as 1 dc), work 7 dc in the first ch-7 space. [1 dc on top of the next tr, 7 dc in the next ch-7 space] 15 times. Sl st to the top of the initial ch-3 to join. (128 dc)
- R8: Ch 1, [work 3 sc in the next 3 dc, work 1 sc + picot (ch 4, sc in front loops) in the 4th dc, work 3 sc in the next 3 dc, work 1 sc in the dc that sits on top of the tr] 16 times. Sl st to the first sc to join. Fasten off and weave in all ends neatly using a yarn needle.
Detailed Pattern Breakdown
1. Central Core & Inner Grid Breakdown:
- R1 to R2: The project begins with a tight magic ring containing 16 single crochets (
16 sc). Round 2 expands this core into a sunburst wheel of 16 double crochets (16 dc) separated by single chain spaces (ch 1), laying down 16 radial spokes.
2. Radial Web Structure Breakdown:
- R3 to R6: The spider web effect is achieved by working taller treble crochet stitches (
tr) aligned directly above the previous round’s stitches, while progressively expanding the chain spaces between them:- R3: 3 chain spaces (
ch 3) between each treble crochet. - R4: 5 chain spaces (
ch 5) between each treble crochet. - R5: 6 chain spaces (
ch 6) between each treble crochet. - R6: 7 chain spaces (
ch 7) between each treble crochet.
- R3: 3 chain spaces (
- This mathematical expansion keeps the doily completely flat while creating wide open, dramatic geometric arches.
3. Solid Frame & Decorative Peak Edging Breakdown:
- R7: To frame the delicate web, every large
ch-7arc is filled solid with7 dc, accompanied by1 dcworked right into the top of each treble spoke. This creates a bold, solid border totaling 128 stitches around the perimeter. - R8: The final edge adds 16 decorative picots. Over each 7-dc block, 3 single crochets are placed on the right, 3 on the left, and a central 4-chain picot (
ch 4, sc) is anchored in the 4th stitch. The single crochet worked into the spoke connector anchors each arch, establishing pointed web tips.
Pattern Question:
Question 1: How do I keep the spider web doily flat and prevent the edges from curling?
Answer: Because lace crochet can pull slightly during stitching, blocking is key! Once you finish crocheting, turn the doily over to the wrong side and steam-iron it lightly without pressing the hot iron metal directly against the yarn. Use your fingers to gently pull out each picot point into a symmetrical circle while warm.
Question 2: Can I make this web larger to use as a Halloween placemat or table centerpiece?
Answer: Yes! You can easily expand the web by adding more rounds between R6 and R7. Simply continue the pattern logic by increasing the chain spaces between treble crochets on each consecutive round (e.g., ch 8 in R7, ch 9 in R8), then fill each space on your solid round with the corresponding number of double crochets before adding the final picot edging.
Question 3: How can I stiffen the spider web so it can hang in a window or outdoors as a garden ornament?
Answer: Dip your finished doily into a solution of liquid fabric starch, commercial yarn stiffener, or a mixture of equal parts PVA craft glue and water. Squeeze out the excess liquid, pin the doily flat onto a blocking board or foam mat (pulling out each picot tip with rust-proof pins), and allow it to dry completely overnight until rigid.