
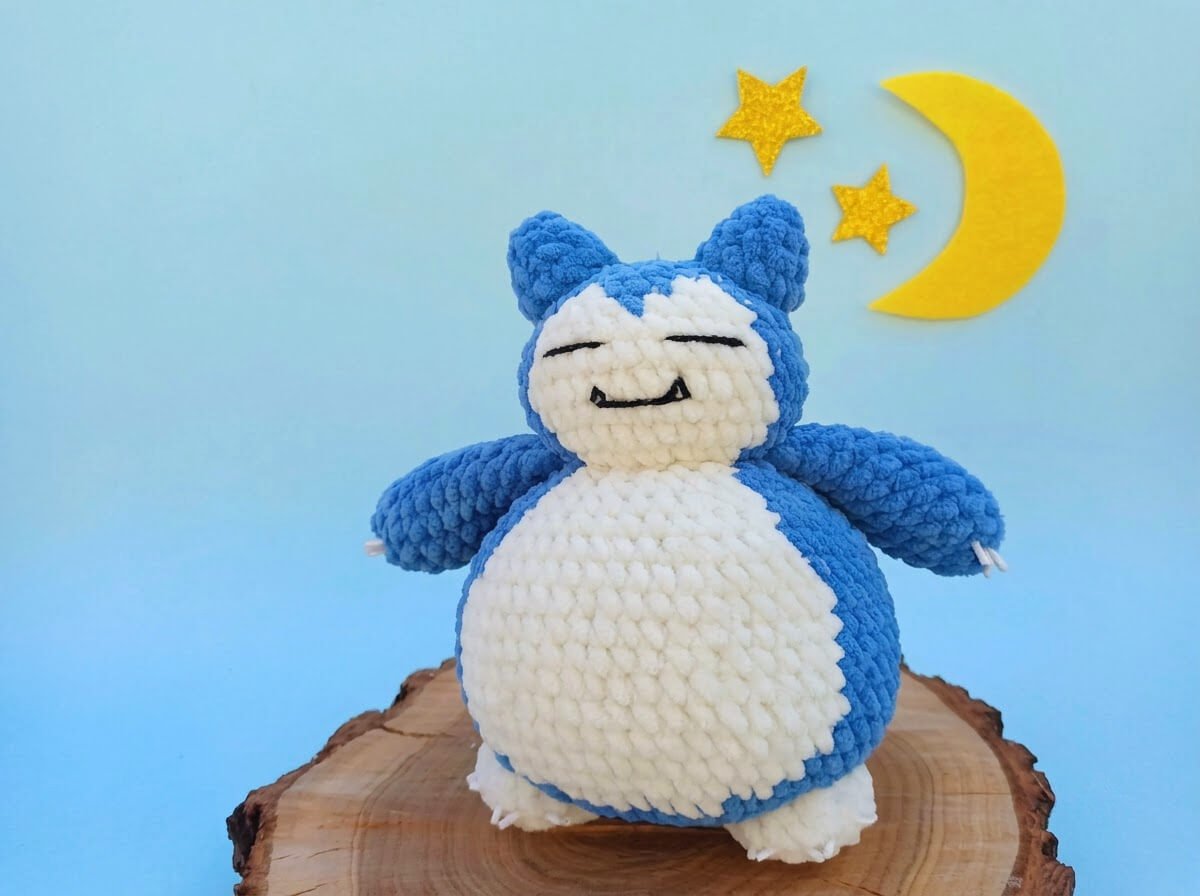
Have you ever looked at a giant, sleepy Pokémon and thought, “I need that level of unbothered cozy energy in my room right now”?
Bring everyone’s favorite lazy nap expert to life with this adorable plushie project. Grab your hook and softest yarn, because crafting this iconic sleeping giant is easier than convincing him to move off Route 12!
Materials and Preparation
Materials:
- Plush Yarn: Himalaya Dolphin Baby (100g / 120m)
- Navy Blue #341 (Body, Arms, Ears)
- Milky #308 (Face, Belly, Paws)
- Brown (Small accent for Paw bases)
- Face Details: 1 meter of black cotton yarn for embroidering the sleepy eyes and happy mouth
- Claws: Glass beads (2 pieces used per claw)
- Stuffing: Fiberfill / Holofiber stuffing
- Sewing Supplies: Sewing thread and needle
Tools:
- Crochet Hook: Size 4.0 mm (Hook #4)
- Stitch Marker: Essential for keeping track of color changes in continuous rounds
- Yarn Needle & Scissors
Preparation Notes:
- When working with plush chenille yarn, maintain a consistent tension so the stitches stay tight and prevent fiberfill from poking through.
- Pay close attention to the color changes between Navy Blue and Milky, keeping the cream belly patch centered as you work through the body rounds.
Abbreviations and Notes
Abbreviations:
- MR: Magic Ring
- sc: Single Crochet
- inc: Single Crochet Increase (2 sc in the same stitch)
- dec: Single Crochet Decrease (sc2tog)
- sl st: Slip Stitch
- BLO: Back Loop Only
- FLO: Front Loop Only
Pattern Notes:
- Work in continuous spiral rounds unless specified otherwise.
- Text inside parentheses indicates color designations (e.g.,
(blue),(milky)) or repeated stitch sequences. - Numbers in parentheses at the end of rounds indicate the total stitch count for that round.
Gauge, Approximate Size, and Pattern Notes
Gauge:
Gauge is not critical for this plushie, but stitches must be tight enough to hold stuffing securely without gaps.
Finished Size:
Approximately 6–8 inches (15–20 cm) tall when using the specified Himalaya Dolphin Baby yarn and a 4.0 mm hook.
Special Techniques:
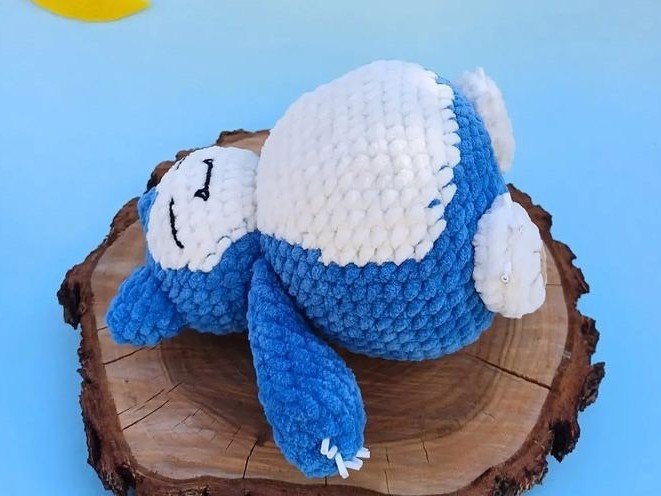
- Seamless Arm Join: In R23 of the main body, arms are crocheted directly into the body round to reduce sewing assembly later.
- Color Switching in Amigurumi: Change colors on the last yarn over of the previous stitch to ensure crisp lines between the navy body and milky belly.
Step-by-Step Pattern
Part 1: Body & Head
Worked from the bottom up in navy blue and milky white yarn:
- R1: In blue, 6 sc in MR (6)
- R2: 6 inc (12)
- R3: (1 sc, inc) x 6 (18)
- R4: 1 sc, inc, (2 sc, inc) x 5, 1 sc (24)
- R5: (3 sc, inc) x 6 (30)
- R6: 2 sc, inc, (4 sc, inc) x 5, 2 sc (36)
- R7: (5 sc, inc) x 6 (42)
- R8: 3 sc, inc, (6 sc, inc) x 2, (milky) 6 sc, inc, (blue) (6 sc, inc) x 2, 3 sc (48)
- R9: (blue) (7 sc, inc) x 2, 3 sc, (milky) 4 sc, inc, 7 sc, (blue) inc, (7 sc, inc) x 2 (54)
- R10: (blue) 20 sc, (milky) 16 sc, (blue) 18 sc (54)
- R11–R16: (blue) 19 sc, (milky) 18 sc, (blue) 17 sc (54) (6 rounds)
- R17: (blue) 20 sc, (milky) 16 sc, (blue) 18 sc (54)
- R18: (blue) (7 sc, dec) x 2, 2 sc, (milky) 5 sc, dec, 7 sc, dec, (blue) (7 sc, dec) x 2 (48)
- R19: 3 sc, dec, (6 sc, dec) x 5, 3 sc (42)
- R20: (5 sc, dec) x 6 (36)
- R21: 2 sc, dec, (4 sc, dec) x 5, 2 sc (30)
- R22: (3 sc, dec) x 6 (24)
- R23 (Attaching Arms): (blue) sc, dec, sc, attach first arm and work (sc, dec) x 2, sc through both arm and body, (milky) 5 sc, attach second arm and work (blue) (sc, dec) x 2, sc through both arm and body, sc (19)
- R24: FLO: (blue) 8 inc, (milky) 5 inc, (blue) 6 inc (38)
- R25: (blue) 15 sc, (milky) 12 sc, (blue) 11 sc (38)
- Note for R26–R29: Keep the milky spot aligned in the center of the face.
- R26–R29: (blue) 15 sc, (milky) 13 sc, (blue) 10 sc (38) (4 rounds)
- R30: (blue) 16 sc, dec, (milky) 11 sc, (blue) dec, 8 sc (36)
- R31: (blue) (4 sc, dec) x 3, (milky) continuing decrease pattern to shape top of head.
- Stuff the body and head firmly before closing.
Part 2: Arms & Ears
Arms (Make 2):
Start in blue yarn:
- R1: 6 sc in MR (6)
- R2: 6 inc (12)
- R3: (5 sc, inc) x 2 (14)
- R4–R11: 14 sc (14) (8 rounds)
- Stuff only the lower hands with fiberfill.
- Fold top edge flat in half and work 7 sc across through both layers to close.
Ears (Make 2):
Worked in blue yarn:
- R1: 6 sc in MR (6)
- R2: (1 sc, inc) x 3 (9)
- R3: (2 sc, inc) x 3 (12)
- Stuff lightly with fiberfill and sew to top sides of the head.
Part 3: Paws (Feet)
Make 2, starting with brown yarn:
- R1: In brown, 6 sc in MR (6)
- Switch to milky yarn:
- R2: 6 inc (12)
- R3: (1 sc, inc) x 5 (Round is paused here; place stitch marker to mark new round start)
- R4: BLO: 21 sc (21)
- R5: 10 dec, 1 sc (11)
- Fasten off, leaving a tail for sewing.
Part 4: Assembly & Finishing
- Ears & Paws: Sew the ears securely to the upper corners of the head. Sew the flat sides of the paws to the bottom surface of the body so Snorlax sits upright.
- Facial Expressions: With black cotton yarn, embroider two gently curved sleepy lines for eyes and a small mouth (a straight line with two tiny upward corners).
- Claws: Using sewing thread, attach glass beads (2 beads per claw) to the tips of the hands and feet to form sharp little claws.
Detailed Pattern Breakdown
1. Body & Head Construction:
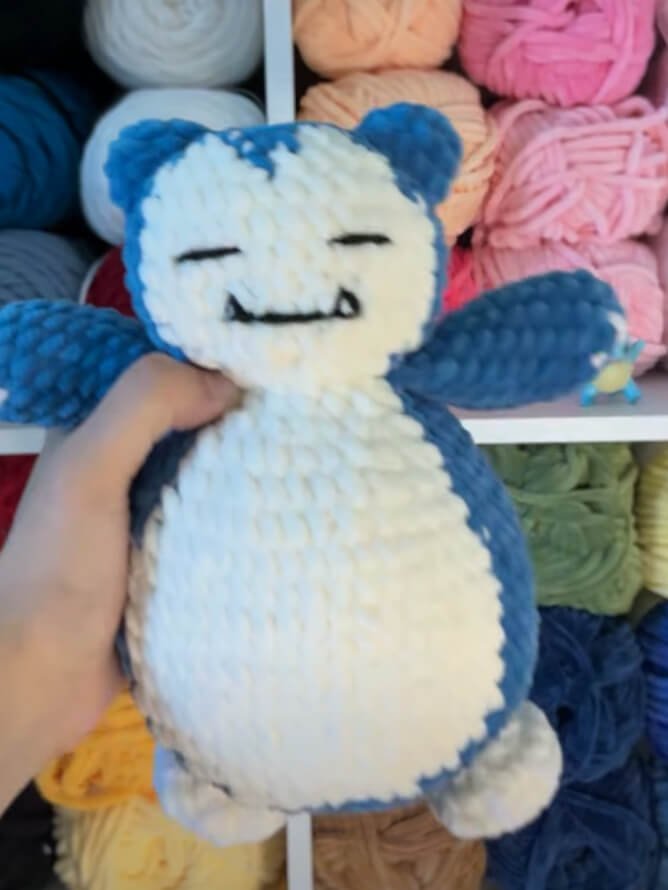
The body starts as a wide sphere built from a standard 6-sc magic ring incrementing up to 54 stitches. Color switching creates a soft, oval-shaped cream belly that spans across the front center. Rather than crocheting head and body as separate pieces, this pattern features a continuous transition: Round 23 incorporates the arms directly, and Round 24 uses Front Loop Only (FLO) increases to flare out seamlessly into the chubby head structure.
2. Limb Shaping & Attachment:
The arms are kept relatively slender and stuffed lightly only at the hands to allow them to rest naturally against the body. Crocheting them directly into Round 23 eliminates extra sewing steps. The paws utilize a BLO round (Round 4) after color-switching from brown to milky, creating a distinct flat base so the feet sit flush underneath the body.
3. Face Embroidery & Claw Accents:
Snorlax’s personality relies on facial expression and tiny details. Sleeping eyes and a relaxed mouth are stitched onto the cream facial patch using thin black yarn. Glass beads serve as a clever craft solution for Snorlax’s characteristic white claws on both hands and paws.
Pattern Question:
Question: How do I ensure the cream belly and facial patch stay perfectly centered on Snorlax’s front?
Answer: Because crochet stitches naturally tilt slightly to one side when working in continuous spirals, keep a close eye on your alignment around R26–R29. If you notice the cream patch shifting off-center relative to the arms, simply adjust the position of your first color switch by 1 stitch left or right to keep the belly patch symmetrical along the center front.