
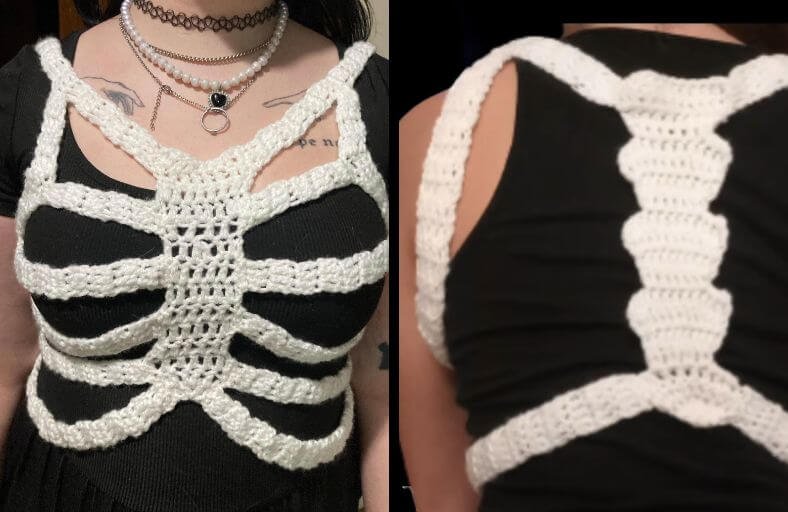
Ready to turn heads this spooky season with a handmade creation that literally glows in the dark?
Whether you are gearing up for a killer Halloween party or looking to elevate your gothic wardrobe, this Crochet Skeleton Corset Top is the ultimate statement piece!
Featuring structured rib cage panels and customizable strap sizing, this project combines dark aesthetic flair with straightforward crochet techniques.
Materials and Preparation
Materials:
- Yarn: Worsted weight or DK weight yarn in White or Off-White. (Pro tip: Using glow-in-the-dark yarn or UV-reactive acrylic yarn gives an insanely spooky glow under blacklight!)
- Bonnets/Markers: Bobby pins or stitch markers to count and track your stitches.
Tools:
- Crochet Hook: Size recommended for your yarn (e.g., 4.0 mm – 5.0 mm / US G/6 to H/8). Note that measurements in centimeters/inches are provided, so exact hook match is flexible!
- Yarn Needle: Tapestry needle for sewing bone panels together and weaving in ends.
- Measuring Tape: Essential for adjusting side panel lengths to your specific size.
- Scissors: For cutting yarn ends.
Preparation Notes:
- You should be familiar with foundational crochet stitches: Magic Ring (
MR), Chain (ch), Double Crochet (dc), Double Crochet Increase (dc inc), and Slip Stitch (sl st). - Sizing relies on measurements (cm/inches) rather than exact chain counts, making it adaptable to any body type!
- Always count your stitches at the end of every row/round to keep the bone edges symmetrical and crisp.
Abbreviations and Notes
Abbreviations:
- MR: Magic Ring
- ch: Chain
- dc: Double Crochet
- dc inc: Double Crochet Increase (2 dc in the same stitch)
- sl st: Slip Stitch
- st(s): Stitch(es)
Pattern Notes:
- The turning chain of
ch 2at the beginning of a row counts as the firstdcthroughout the pattern unless specified otherwise. - When finishing the 4th row of each rib bone, work
ch 1instead ofch 2before turning to keep edges neat for sl st transitions. - Each rib bone section consists of 4 rows.
Gauge, Approximate Size, and Pattern Notes
Gauge:
Gauge is flexible because side straps are measured in centimeters/inches to fit your exact measurements.
Finished Size:
Customizable from XS to XL based on the following rib panel widths and side strap lengths:
- Back Bone Panel Width:
- Size XS / S: 22 cm (8.7 in)
- Size M: 22 cm (8.7 in)
- Size L: 25 cm (9.8 in)
- Size XL: 28 cm (11.0 in)
- Side Strap Lengths (joining back to front):
- Size XS: 26 cm (10.2 in)
- Size M: 28 cm (11.0 in)
- Size L: 29 cm (11.4 in)
- Size XL: 30 cm (11.8 in)
- Shoulder Strap Lengths:
- Size XS: 49 cm (19.3 in)
- Size M: 53 cm (20.9 in)
- Size L: 57 cm (22.4 in)
- Size XL: 60 cm (23.6 in)
Special Techniques:
- Bone Shaping (Tapered Decreases/Increases): Increases at the base and skipping first stitches created angled flared ends for realistic skeleton ribs.
- In-line Slip Stitch Transitioning: Sl st across completed bone ends to shift work position without cutting yarn between rib segments.
Step-by-Step Pattern
Part 1: Back Rib Cage Panel (Large Ribs)
First Rib (Top Base):
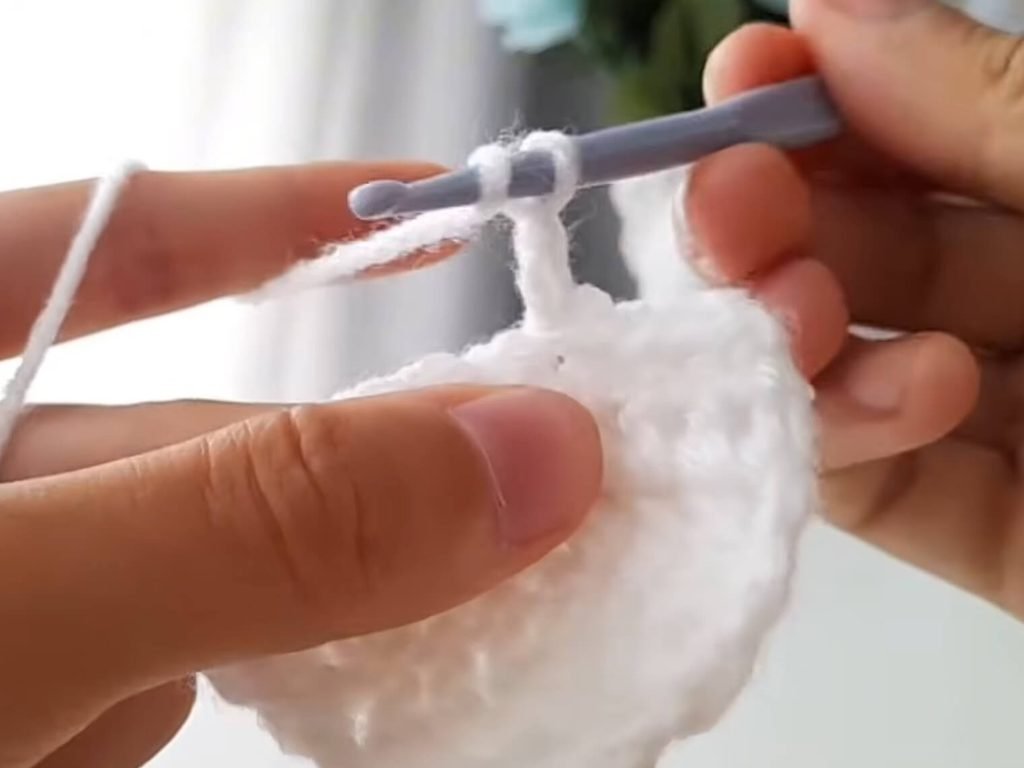
- Row 1: In a
MR,ch 2(counts as firstdc), then work 4dcinto the ring. Pull tight. Turn. (5 sts) - Row 2:
ch 2, turn.dc incin first st, 1dcin next st,dc incin 3rd st, 1dcin 4th st,dc incin last st. Turn. (8 sts) - Row 3:
ch 2, turn.dc incin first st, 1dcin each st across to last st,dc incin last st. Turn. (10 sts) - Row 4:
ch 2, turn. Skip the first st, work 1dcin each remaining st across. (10 sts) - Row 5 (Transition):
ch 1, turn. Skip first st,sl stin 2nd, ch 2, 4dc inc.
Subsequent Back Ribs (Repeat until target panel size is reached):
- Row 1:
ch 2, 1dcin same st (counts asdc inc), 1dcin each of next 6 sts, 1dc incin next st. Turn. (10 sts) - Row 2:
ch 2, turn.dc incin first st, 1dcin each of next 8 sts,dc incin last st. Turn. (12 sts) - Row 3:
ch 2, turn. 12dc. Turn. (12 sts) - Row 4:
ch 1, turn. Skip first st,sl stacross next 3 sts to position hook for the next rib segment,ch 2, 1dcin same st (counts asdc inc), 1dcin each of next 4 sts,1dc incin next st. Turn.
Repeat this 4-row rib process until your back panel reaches the desired height (22 cm for XS/M, 25 cm for L, 28 cm for XL).
Part 2: Front Sternum & Rib Panel (Narrow Ribs)
First Front Bone (Top Base):
- Row 1: In a
MR,ch 2(counts as firstdc), work 2dcinto ring. Pull tight. Turn. (3 sts) - Row 2:
ch 2, turn.dc incin first st, 1dcin middle st,dc incin last st. Turn. (5 sts) - Row 3:
ch 2, turn.dc incin first st, 1dcin each st across to last st,dc incin last st. Turn. (7 sts) - Row 4:
ch 2, turn. Skip first st, work 1dcin each remaining st across. Turn. (7 sts) - Transition:
ch 1, turn. Skip first st,sl stin 2nd and 3rd sts.
Subsequent Front Ribs:
- Row 1:
ch 2,dcin same st (dc inc), 1dcin next st,dc incin next st. Turn. (5 sts) - Row 2:
ch 2, turn.dc incin first st, 1dcin each st across to last st,dc incin last st. Turn. (7 sts) - Row 3:
ch 2, turn.dc incin first st, 1dcin each st across to last st,dc incin last st. Turn. (9 sts) - Row 4:
ch 2, turn. Skip first st, work 1dcin each remaining st across. Turn. (9 sts) - Transition:
ch 1, turn. Skip first st,sl stacross next 3 sts.
Repeat until the front panel has the matching number of rib segments as your back panel.
Part 3: Connecting Straps & Side Extension Cables
Side Connecting Straps:
- Attach yarn to the outer tip of a front rib bone across 5 stitches.
- Work rows of 5
dcback and forth until the strap reaches your size recommendation:- XS: 26 cm (10.2 in)
- M: 28 cm (11.0 in)
- L: 29 cm (11.4 in)
- XL: 30 cm (11.8 in)
- Fasten off leaving a long tail for sewing.
Shoulder Straps:
- Count 7 cm (for S/M) or 8-9 cm (for L/XL) from the center top of the front panel.
- Attach yarn across 5 stitches and crochet rows of 5
dcuntil length reaches:- XS: 49 cm (19.3 in)
- M: 53 cm (20.9 in)
- L: 57 cm (22.4 in)
- XL: 60 cm (23.6 in)
Part 4: Assembly & Finishing
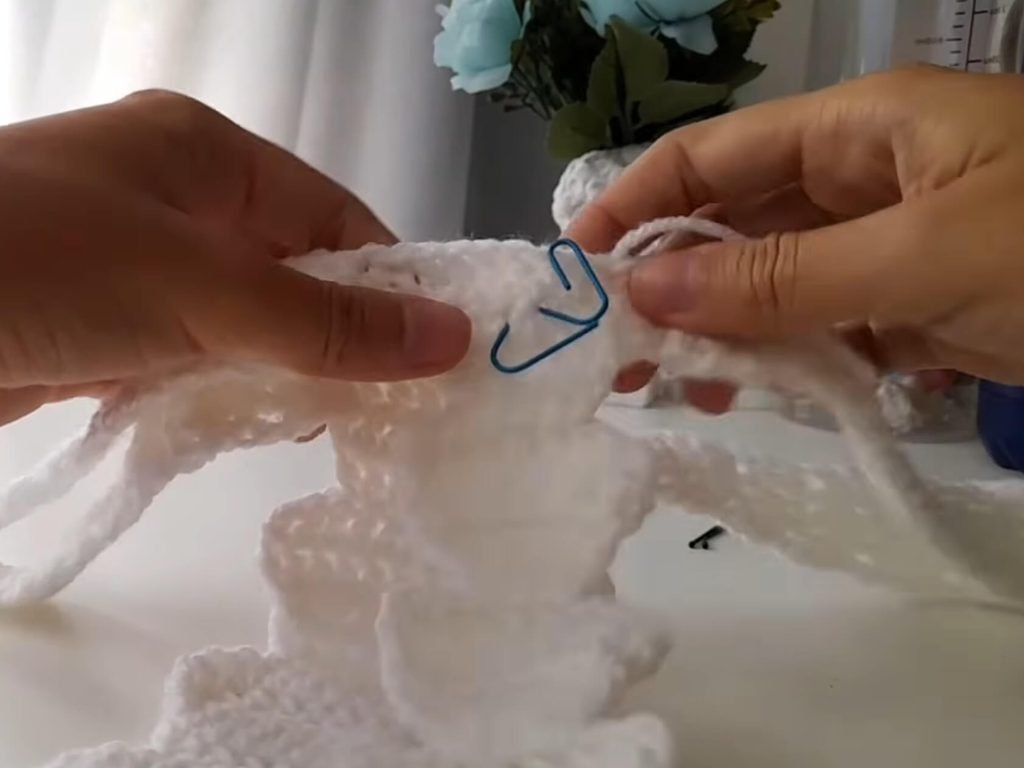
- Alignment: Place the front rib cage panel and back rib cage panel right-side facing out (the right side is marked by the starting yarn tail hanging on the left).
- Sewing Side Straps: Using a yarn needle and the long yarn tails, stitch the 5-dc side straps from the front ribs onto the corresponding rib ends of the back panel.
- Attaching Shoulder Straps: Pass the shoulder straps over the shoulders and seam securely to the top edge of the back panel.
- Spacing Between Ribs: Maintain a clean 3 cm gap (for S/M) or 4 cm gap (for L/XL) between lower rib connection points to keep anatomical spacing.
- Weave Ends: Securely weave in all loose yarn tails inside the back stitch ridges.
Detailed Pattern Breakdown
1. Back Rib Cage Panel Structural Design:
- Base Arc (MR 5 dc): The top base starts from a centered magic ring that fans out into 5 double crochets, establishing a widened spinal anchor point.
- Proportional Expansion: Rows 2 and 3 systematically widen the panel through symmetric edge increases (
dc inc) up to 10-12 stitches, creating the flared profile of human ribs. - Flat Top Ridge (Skipping 1st St): By skipping the very first stitch in Row 4, height is maintained without adding horizontal width, flattening the top edge before stepping down to the next rib segment via slip stitches.
2. Front Sternum & Rib Panel Geometry:
- Narrower Sternum Core: The front panel starts with only 3
dcin the magic ring instead of 5, producing narrower anatomical bone structures suitable for the chest/sternum area. - Compact Rib Rows: Rib expansion peaks at 9 stitches (compared to 12 on the back panel), keeping the chest structure balanced while allowing side straps to handle body circumference.
3. Strap Extensions & Assembly Mechanics:
- 5-Stitch Ribbon Straps: Working 5 continuous
dcacross rib tips creates flexible ribbon-like bands that hug body contours comfortably. - Custom Fit Flexibility: Because side strap connections rely on target length (cm/inches) rather than hardcoded stitch rows, you can seamlessly tailor this corset to fit over tops, bralettes, or directly as costume apparel.
Pattern Question:
Question: How can I ensure the skeleton corset fits snugly around my chest and waist without sagging?
Answer: Since yarn stretches over time, it is best to measure the side straps while lightly stretching them. Try on the corset top after attaching the top shoulder straps and first side straps.
If the top feels loose, reduce the side strap lengths by 1–2 cm before final seaming. Additionally, using a slightly smaller hook size than recommended creates denser dc stitches with better structural hold!