
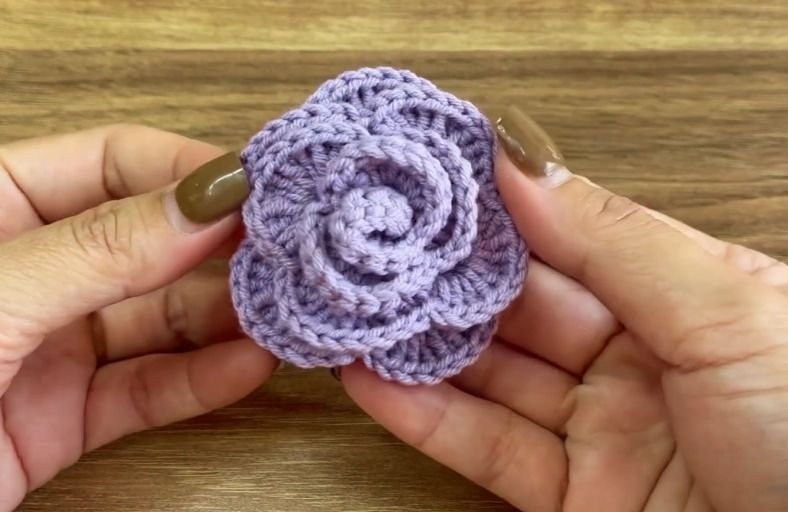
Looking to add a timeless touch of handcrafted elegance to your home or handmade gifts?
Ever wondered how a simple strip of crochet arches transforms into a stunning, velvety 3D bloom?
This romantic crochet rose pattern brings the delicate beauty of fresh garden roses straight to your crochet hook.
Perfect for standalone bouquets, hair accessories, jacket lapels, or decorative embellishments, this project is as fun to assemble as it is to craft.
Materials and Preparation
Materials:
- Petal Yarn: Worsted weight (Category 4) or DK acrylic/cotton yarn in classic red, blush pink, soft cream, or rich burgundy.
- Leaf & Sepal Yarn: Forest green or sage green yarn.
- Stem Wire (Optional for Stemmed Rose): 18-gauge floral wire (approx. 30 cm / 12 inches) or a wooden skewer.
- Craft Glue / Hot Glue (Optional): For securing the rolled flower base and stem wrapping.
Tools:
- Crochet Hook: Size 3.5 mm (US E/4) or 4.0 mm (US G/6) depending on your yarn weight.
- Yarn Needle: Tapestry needle for weaving in ends and sewing the rose layers.
- Stitch Marker: To keep track of key turning points.
- Scissors: Sharp craft scissors.
Preparation Notes:
- Focus on maintaining even tension throughout Row 1 and Row 2 so the arching spaces stay open and balanced.
- If making a bouquet, use a slightly smaller hook size to keep the stitches firm, giving the outer petals extra structure to stay upright.
Abbreviations and Notes
Abbreviations:
- ch: Chain stitch
- sc: Single crochet
- hdc: Half double crochet
- dc: Double crochet
- tr: Treble / Triple crochet
- sl st: Slip stitch
- sk: Skip stitch
- st(s): Stitch(es)
- ch-sp: Chain space
- FO: Fasten off
Pattern Notes:
- The main rose bloom is worked as a flat strip in rows. Once completed, the ruffled arches naturally curl into a spiral shape.
- The tight bud center is formed by rolling the beginning end inward, while the larger outer petals fan outwards softly.
- The sepal and leaf pieces are worked separately and joined during final assembly.
Gauge, Approximate Size, and Pattern Notes
Gauge:
Gauge is not critical for this project. Tension should be neat and firm to give petals natural structure.
Finished Size:
- Rose Bloom Diameter: Approximately 3.0 inches to 3.5 inches (7.5 cm to 9.0 cm).
- Stemmed Rose Length: Approximately 12.0 inches (30.5 cm) with wire stem attached.
Special Techniques:
- Shell Petal Shaping: Combining
sc,hdc,dc, andtrstitches in a single chain space creates a natural gradient curve mimicking real floral petals. - Spiral Assembly: Rolling the foundation chain evenly from inner core to outer edge to build dimensional depth.
Step-by-Step Pattern
Part 1: Rose Flower Bloom
Worked in flat rows using Red or Pink yarn:
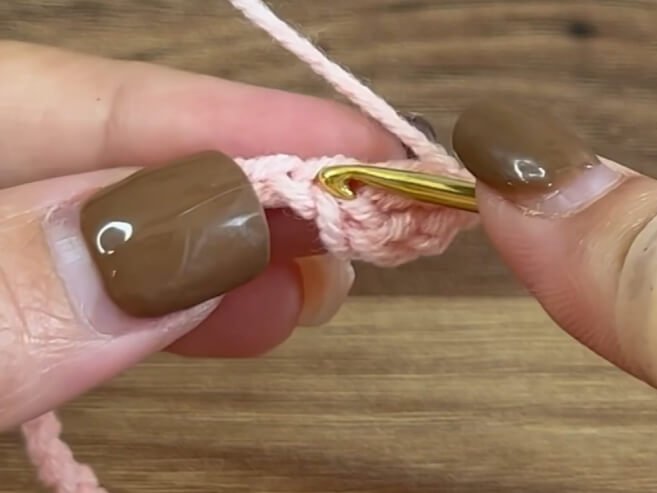
- Foundation Chain: Ch 54.
- Row 1 (RS): Dc in 4th ch from hook (counts as 1 dc, ch 4, 1 dc in same st), repeat from to.
- Row 2 (Bud & Inner Petals): Ch 2, *(1 sc, 1 hdc, 3 dc, 1 hdc, 1 sc) into first ch-1 sp, sl st between V-stitches; repeat from * 5 times total.
- Row 3 (Middle Petals): *(1 sc, 1 hdc, 5 dc, 1 hdc, 1 sc) into next ch-1 sp, sl st between V-stitches; repeat from * 8 times total.
- Row 4 (Outer Large Petals): *(1 sc, 1 hdc, 2 dc, 3 tr, 2 dc, 1 hdc, 1 sc) into next ch-1 sp, sl st between V-stitches; repeat from * across remaining ch-1 spaces.
- Finishing Bloom: Sl st in final base ch. FO, leaving a 20-inch (50 cm) tail for sewing.
Part 2: Green Sepal (Calyx)
Worked in continuous rounds using Green yarn:
- Round 1: Start with a Magic Ring (MR), ch 1, 5 sc into ring, sl st to first sc to join. (5)
- Round 2: Ch 1, 2 sc in each st around, sl st to join. (10)
- Round 3 (Sepal Points): (Ch 6, sk 1st ch, 1 sl st in 2nd ch from hook, 1 sc in next ch, 1 hdc in next ch, 1 dc in next 2 chs, sk 1 st on Round 2 base, sl st in next st); repeat 5 times total to create 5 sepal points.
- Finishing Sepal: FO, leaving a 12-inch (30 cm) tail for attachment.
Part 3: Rose Leaves
Make 2 to 3 pieces using Green yarn:
- Foundation: Ch 10.
- Round 1: Sk 1st ch, 1 sc in 2nd ch from hook, 1 hdc in next ch, 1 dc in next 4 chs, 1 hdc in next ch, 1 sc in next ch, (1 sc, ch 2, 1 sc) in last ch to turn corner.
- Working on opposite side of foundation chain: 1 sc in next ch, 1 hdc in next ch, 1 dc in next 4 chs, 1 hdc in next ch, 1 sc in last ch, sl st to first sc to join.
- Finishing Leaf: FO, leaving a long tail to bind onto the stem wire.
Part 4: Assembly & Finishing
- Rolling the Bloom: Thread the 20-inch tail through a tapestry needle. Take the inner bud end (Row 2 end) and roll it tightly inward to create the center core. Continue rolling the strip around the core, keeping the bottom edge aligned while allowing the outer petals to flare naturally.
- Securing the Base: Flip the flower upside down. Insert your needle back and forth through all layers at the base multiple times to lock the spiral firmly in place. Knot securely.
- Attaching Sepal: Thread the floral wire through the center hole of the green sepal, then bend the tip of the wire into a small hook. Apply a small dab of hot glue to the hook and pull it firmly up against the bottom of the rose base. Slide the sepal up against the flower base and stitch or glue it in place.
- Wrapping the Stem: Wrap green yarn continuously down the floral wire stem, securing the leaves onto the stem midway down, and seal the yarn end at the base with glue.
Detailed Pattern Breakdown
1. Flower Bloom Construction:
- The foundation chain of 51 stitches sets up a modular base divided into 24 V-stitch anchor points.
- Row 1 uses the
1 dc, ch 1, 1 dcV-stitch pattern separated by skipped chains to create room for petal volume without pulling the base tight. - Row 2 builds three distinct petal sizes in sequence:
- Inner Bud Petals (6 spaces): Uses
hdcanddcclusters to form tight, upright curves that wrap snugly into a central bud. - Middle Petals (8 spaces): Expands to
5 dcper shell to widen the opening bloom. - Outer Petals (10 spaces): Incorporates
trstitches at the peak of each shell, creating tall, dramatic outer petals that fan out away from the stem.
- Inner Bud Petals (6 spaces): Uses
2. Green Sepal Architecture:
- Starts from a 5-sc magic ring expanded to 10 stitches, matching the floral base circumference.
- The sepal points use a steep stitch ladder (
sl strightarrowscrightarrowhdcrightarrowdc) over a chain of 6, creating sharp triangular star points that cradle the underside of the rose petals realistically.
3. Leaf Geometry & Wiring:
- Leaves are worked symmetrically in a oval loop around a central foundation chain.
- The sequence
scrightarrowhdcrightarrow4 dcrightarrowhdcrightarrowscgives the leaf its widest swelling in the middle. - The
(1 sc, ch 2, 1 sc)point at the tip forms a crisp, realistic botanical apex.
Pattern Question
Question: How can I keep my crocheted rose from unravelling or flattening over time when used in a bouquet?
Answer: The key lies in base stitching and petal tension. When securing the rolled base, ensure your tapestry needle pierces through every single layer of the foundation chain on each pass, making crisscross stitches across the entire bottom circle.
Additionally, using a slightly smaller hook size than recommended for your yarn weight ensures the stitches remain rigid, keeping the outer petals upright and preventing the bloom from drooping.