
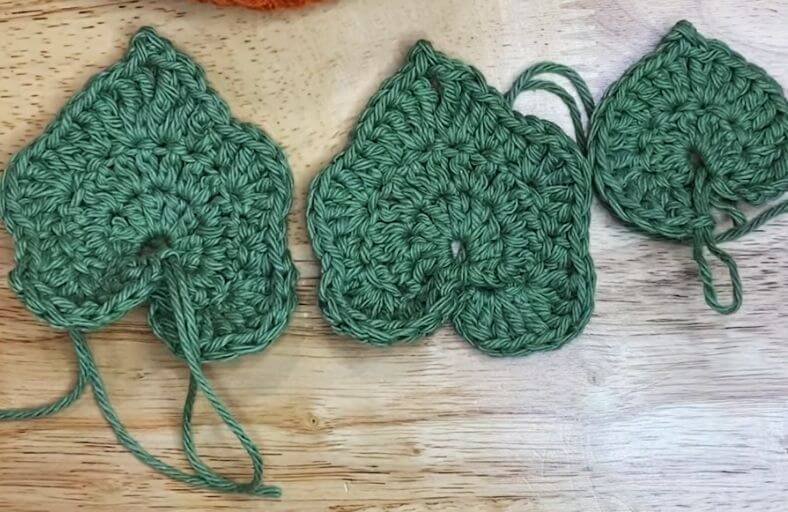
Did you know that real pumpkin leaves naturally feature a distinctive open notch near the stem?
Nature has given us the ultimate crocheting shortcut: by starting with a simple chain ring instead of a magic circle, we can easily mimic that botanical gap while crafting these gorgeous, textured leaves!
Whether you are topping off a cozy seasonal hat, embellishing a plush pumpkin, or creating autumn garlands, learning how to crochet a realistic pumpkin leaf in both small and large versions will elevate your fall crafting game.
Materials and Preparation
Materials:
- Yarn: Worsted weight cotton or acrylic yarn in medium olive green, forest green, or pumpkin leaf green.
- Stuffing: None required (these are flat, textured leaf appliqués).
Tools:
- Crochet Hook: Size 3.5 mm – 4.0 mm (US E-4 or G-6) or size matching your yarn weight.
- Yarn Needle: Tapestry needle with a large eye for weaving ends and sewing leaves onto projects.
- Stitch Marker: Optional, useful for tracking rounds.
- Scissors: Craft scissors for trimming yarn tails.
Preparation Notes:
- You should be comfortable with basic crochet stitches including single crochet (
sc), half double crochet (hdc), double crochet (dc), and treble crochet (tr). - Split yarn happens to everyone, especially when working with cotton. Keep your tension relaxed and do not worry about tiny imperfections, as natural leaves are wonderfully irregular!
Abbreviations and Notes
Abbreviations:
- ch: Chain stitch
- sl st: Slip stitch
- sc: Single crochet
- hdc: Half double crochet
- dc: Double crochet
- dc inc: Double crochet increase (2 dc in the same stitch)
- tr: Treble crochet
- st(s): Stitch(es)
- Picot / Leaf Point:
ch 2,sl stin 1st chain made (or 2nd chain from hook)
Pattern Notes:
- The initial
ch 4at the start of Row 1 counts as the firstdcof the row. - Instead of joining in a closed circle or pulling a magic loop tight, you will
sl stdirectly into the open central chain hole at the end of rounds to maintain the characteristic open stem notch. - The small version consists of 2 rounds, while the large version expands into 3 rounds featuring intricate peaks and valleys using varied stitch heights.
Gauge, Approximate Size, and Pattern Notes
Gauge:
Exact gauge is not critical for this project. Tension should be moderate so that the leaf holds its flat structure without curling excessively.
Finished Size:
- Small Leaf: Approximately 2.0 – 2.5 inches (5.1 – 6.4 cm) across at the widest point.
- Large Leaf: Approximately 4.0 – 4.5 inches (10.2 – 11.4 cm) across at the widest point.
Special Techniques:
- Center Hole Foundation: Working all foundational stitches into the first chain stitch to create a natural botanical gap without a magic ring.
- Picot Point: Creating sharp leaf tips by chaining 2 and slip-stitching back into the first chain before continuing the symmetry.
- Height Gradation: Transitioning smoothly from
sctohdc,dc, andtrto form natural leaf lobes and scalloped edges.
Step-by-Step Pattern
Part 1: Small Pumpkin Leaf
- Row 1:
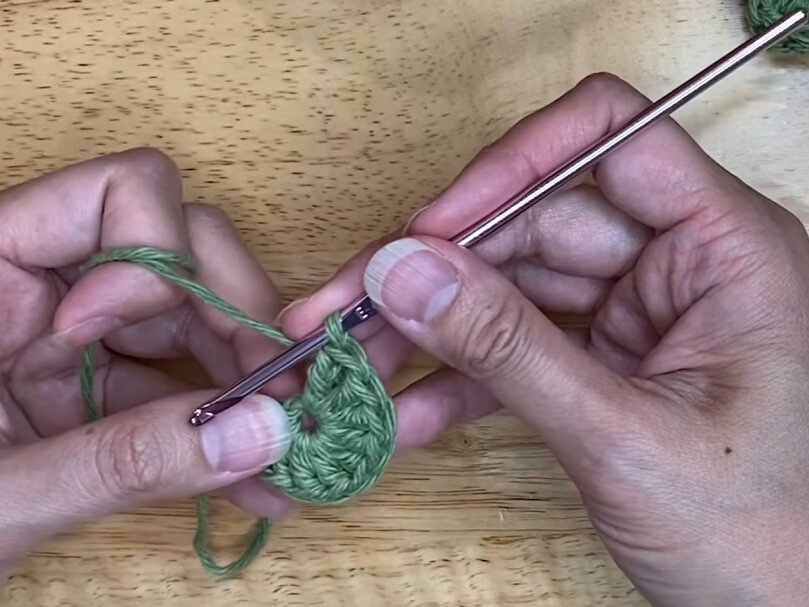
ch 4(counts as 1stdc). Work 8dcdirectly into the very first chain stitch made (9dctotal in the ring). Insert hook into the central chain hole andsl st(do not pull closed; preserve the stem hole). - Row 2:
ch 3(counts as 1stdc), turn work.1 dcback into the exact same 1st stitch (2dctotal in 1st st).2 dcin 2nd st,2 dcin 3rd st (dc inc). In 4th st work3 dc, thench 2,sl stinto 2nd chain from hook (leaf point made). In 5th st work3 dc. In 6th, 7th, and 8th sts work2 dcin each st (dc inc). In top of 9th st (the initialch 3/4), work2 dc(20 sts total). Insert hook into the central stem hole andsl st. Fasten off, leaving a long tail for sewing.
Part 2: Large Pumpkin Leaf
- Row 1:
ch 4(counts as 1stdc). Work 8dcinto the very first chain stitch (9dctotal). Insert hook into the center stem hole andsl st. - Row 2:
ch 3(counts as 1stdc), turn work.1 dcin the same 1st st. Work2 dc(dc inc) into every remaining st across (18dctotal). Insert hook into the center stem hole andsl st. - Row 3:
ch 2, turn work. Skip thesl st.- Into 1st st:
1 hdc,3 dc(4 sts total in same st). - Into 2nd st:
4 tr. - Into 3rd st:
1 hdc. - Into 4th st:
1 sc. - Into 5th st:
1 hdc. - Into 6th st:
4 dc. - Into 7th st:
1 hdc. - Into 8th st:
1 hdc,1 dc. - Into 9th st:
1 dc,2 tr. - Tip Point:
ch 2,sl stinto 1st chain made (2nd chain from hook). - Into 10th st:
2 tr,1 dc. - Into 11th st:
1 dc,1 hdc. - Into 12th st:
1 hdc. - Into 13th st:
4 dc. - Into 14th st:
1 hdc. - Into 15th st:
1 sc. - Into 16th st:
1 hdc. - Into 17th st:
4 tr. - Into 18th st (top of turning chain):
3 dc,1 hdc(4 sts total in same starting area). - Insert hook into the center stem hole and
sl stto anchor the leaf. Fasten off and leave a long tail for attachment.
- Into 1st st:
Part 3: Stems and Details
Attachment Tails:
- When fastening off each leaf, pull the final loop through cleanly and leave a 10–12 inch (25–30 cm) tail of yarn.
Curling and Shaping:
- Gently cup the leaf lobes inward with your fingers to simulate natural garden leaf curling before stitching down.
Part 4: Assembly & Finishing
- Finishing Steps:
- Thread the long yarn tail onto your tapestry needle.
- If attaching to a pumpkin hat or project, position the central open hole right where the vine or pumpkin stem originates.
- Stitch through the outer peaks or along the back ridge of the leaf to secure it flat or slightly angled for a 3D effect.
- Weave in any remaining loose ends neatly on the wrong side.
Detailed Pattern Breakdown
1. Small Pumpkin Leaf Breakdown:
- Foundational Arch: Starts with
ch 4where 8 additionaldcare worked into the 1st chain. By anchoring into the open center with asl st, the leaf retains its natural stem notch. - Symmetrical Lobe Expansion: Row 2 uses gradual increases (
dc inc) on both sides. The central tip is created at Stitch 4 with a cluster of3 dc, ach 2 picot, and3 dcin Stitch 5, creating a neat point.
2. Large Pumpkin Leaf Breakdown:
- Round 1 & 2 Base Expansion: Expands from 9
dcin Row 1 to 18dcin Row 2 by working2 dcinto every stitch. This builds a broad, circular canvas necessary for complex botanical shaping. - Wave and Lobe Contour (Row 3): Combines multiple stitch heights in single stitches to create realistic ruffled edges:
- Tall peaks are formed using clusters of
4 trand4 dc. - Valleys are created by stepping down into
1 hdcand1 sc. - The center apex features a
2 trand1 dccombination capped with ach 2 picot point, mirrored in reverse for complete symmetry.
- Tall peaks are formed using clusters of
Pattern Question:
Question: My leaf edges are curling up too much, or my stitch count is off by one or two stitches on Row 3 of the large leaf. Do I need to frog my work?
Answer: Not at all! Botanical leaves in nature are rarely symmetrical or completely flat. If your leaf curls slightly, you can gently steam-block it or let the natural cupping add 3D realism to your project.
If you miss a stitch count by one or two stitches in Row 3, simply adjust by placing your next stitch cluster into the adjacent stitch. The organic arrangement of sc, hdc, dc, and tr will still create gorgeous scalloped edges without any visible mistakes.