
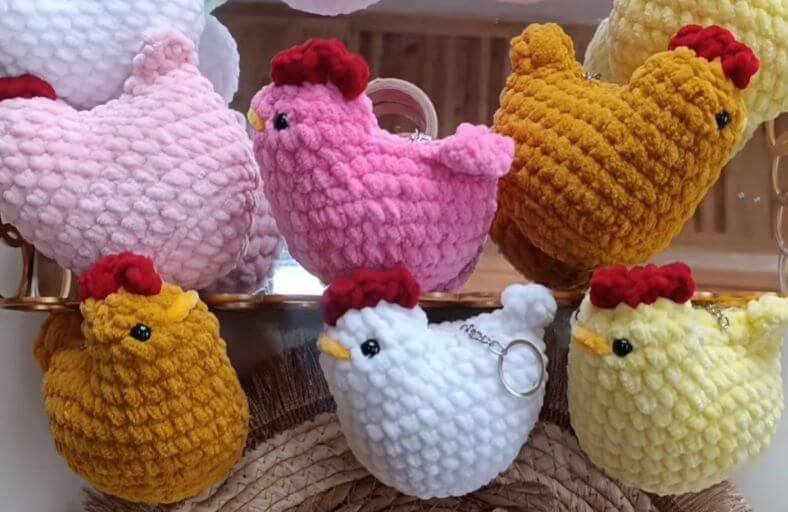
Ever wondered how quickly you can transform a single skein of plush velvet yarn into the most adorable, squishy barnyard friend?
Say goodbye to endless hours spent sewing tiny limbs together!
This plush crochet chicken comes together seamlessly in one continuous work of art, making it the ultimate instant-gratification project for market stalls, quick gifts, or keychains.
Materials and Preparation
Materials:
- Yarn: Chunky plush velvet yarn in your primary body color (White, Yellow, Pink, Red, or Mustard). Small amounts of Red velvet yarn for the comb/top crest and Orange yarn for the beak.
- Safety Eyes: 1 pair of 8 mm safety eyes.
- Stuffing: Fiberfill polyester stuffing (Polyfill).
Tools:
- Crochet Hook: Size 4.0 mm crochet hook.
- Yarn Needle: Tapestry needle for closing up and weaving ends.
- Stitch Marker: To keep track of rounds.
- Scissors: Sharp craft scissors.
Preparation Notes:
- Work with a steady, firm tension so that no stuffing peeps through the stitches.
- If using a thinner plush yarn, you may start Round 1 with 8 single crochets instead of 7 to maintain optimal proportions.
Abbreviations and Notes
Abbreviations:
- MR: Magic Ring
- ch: Chain stitch
- sc: Single Crochet
- inc: Single Crochet Increase (2 sc in the same stitch)
- dec: Single Crochet Decrease (sc2tog)
- hdc: Half Double Crochet
- dc: Double Crochet
- sl st: Slip Stitch
- BLO: Back Loop Only
Pattern Notes:
- The body and head are worked in continuous spiral rounds without joining, unless otherwise specified.
- The entire project features zero sewing for the main components, transitioning directly from the tail and body upward into the head structure.
Gauge, Approximate Size, and Pattern Notes
Gauge:
Gauge is not critical for this project, but stitches should remain snug enough to secure the fiberfill stuffing.
Finished Size:
Approximately 3.5 to 4 inches (8.89 to 10.16 cm) in height when made with recommended 4.0 mm hook and plush velvet yarn.
Special Techniques:
- BLO Working: Working into the back loop only in Round 5 creates a sharp, defined base rim that allows the chicken to sit flat.
- Integrated Tail Shell: Created directly at the transition between body and head using a combination of hdc and dc stitches worked into the same point.
Step-by-Step Pattern
Part 1: Main Body Base
Start with main body yarn color:
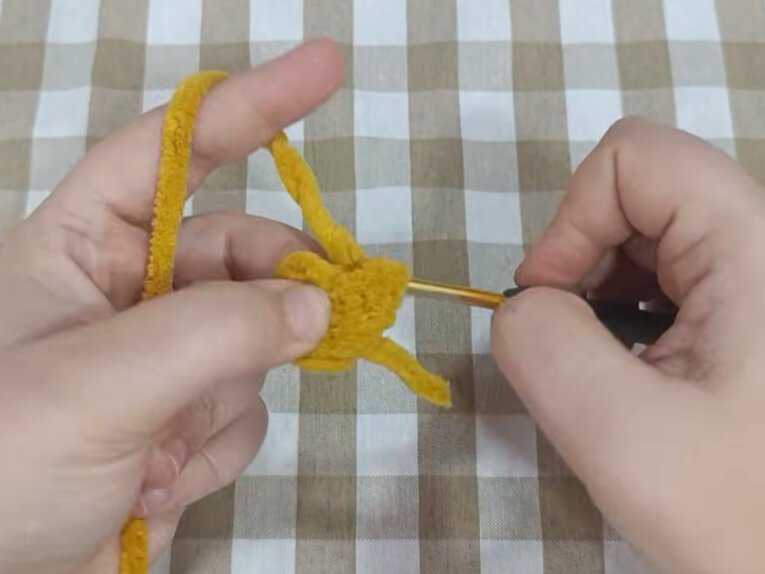
- R1: (MR 7 sc) (7)
- R2: 7 inc (14)
- R3: (1 sc, inc)*7 (21)
- R4: (2 sc, inc)*7 (28)
- R5: BLO 28 sc (28)
- R6–R10: 28 sc (28) (5 rounds total)
Part 2: Tail Shell & Head Transition
Continuing directly with main body yarn color without cutting:
- Tail Shell Row: Insert hook into the first stitch of R10 and the opposite last stitch to join the back opening edge: 1 ch, 1 hdc in same space, 2 dc in same space (forms tail fan), followed by 6 sl st along the back edge, ch 1.
- R11 (Head Foundation): Working into the remaining open front loop stitches to form the head ring: 16 sc (16)
- R12: 16 sc (16)
- R13: (2 sc, dec)*4 (12)
- Stuff the body base firmly with fiberfill at this point.
- R14: 12 sc (12)
- Attach 8 mm safety eyes between R13 and R14, spaced 4 stitches apart.
- R15: (1 sc, dec)*4 (8)
- Add final stuffing to the head.
- Fasten off, weave tail through front loops of remaining 8 stitches, pull tight to close, and tie off.
Part 3: Facial Details & Comb
Head Crest / Comb:
Attach Red yarn at the top crown of the head:
- Join with sl st, (ch 3, sl st in next stitch)*3 across the top head ridge to form a 3-bump comb structure. Fasten off and weave in ends inside the head.
Beak:
Using Orange yarn:
- Thread orange yarn onto tapestry needle, pass between the two eyes across R13/R14 twice to form a neat triangular beak. Knot securely inside body and trim.
Part 4: Edging, Assembly & Finishing
- Ensure all yarn tails are pulled inside the main body shell using your tapestry needle.
- Gently squeeze the base to flatten the BLO bottom ridge so your chicken sits upright smoothly.
- Optional: Attach a keychain ring through the red comb ridge for an instant backpack charm!
Detailed Pattern Breakdown
1. Base and Body Formation Breakdown:
- The chicken starts with a flat circular disc (R1 to R4) expanding uniformly from 7 to 28 stitches.
- Round 5 utilizes Back Loop Only (BLO) single crochet to create a crisp 90 degree angle, transitioning the flat bottom base smoothly into vertical side walls without needing stiff inserts.
- Rounds 6 through 10 build up height uniformly to create a sturdy, rounded body bucket capable of holding ample fiberfill.
2. Seamless Head and Tail Transition Breakdown:
- Instead of cutting yarn and sewing separate parts, the back portion of Round 10 is joined using slip stitches, while simultaneously working a textured shell (hdc and dc stitches in one space) to pop out as a tail feather.
- The remaining 16 unjoined front stitches are worked in rounds upward, transforming into the neck and head structure seamlessly.
3. Shaping, Facial Placement, and Closure Breakdown:
- Strategic single crochet decreases (dec) taper the head upward from 16 to 12 stitches, creating a defined neck curve before placing safety eyes.
- The top crest utilizes a chain-and-slip-stitch cluster method directly surface-crocheted onto the crown, avoiding any loose components or extra sewing work.
Pattern Question:
Question: How do I make sure the base of the chicken sits completely flat and doesn’t roll over after stuffed?
Answer: The secret lies in Round 5! By working Round 5 strictly into the Back Loops Only (BLO), you create a distinct ridge that acts as a natural rim for the bottom.
When stuffing, push fiberfill sideways toward the outer walls first, keeping the flat circular bottom smooth. Squeezing the bottom gently against a flat table surface after finishing will lock the flat shape into place.