
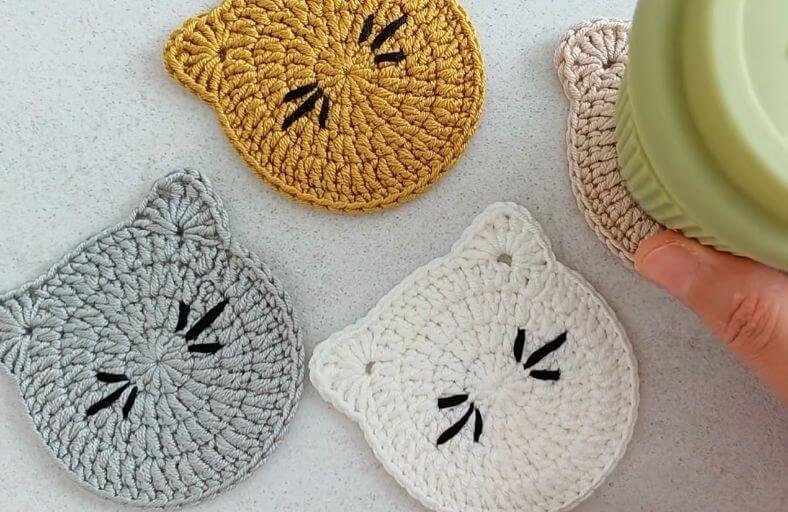
Are your coffee mugs feeling a little lonely, or are you looking for the ultimate quick gift for the feline lover in your life?
These adorable crochet cat coasters are here to bring a touch of handmade charm to your desk!
Working up in just a few quick rounds, this project transforms simple stitches into sleeping cat faces with cute ears and embroidered sleepy eyes.
Materials and Preparation
Materials:
- Yarn: Medium weight acrylic yarn in gray, mustard yellow, cream white, pink, or any color of your choice. Black yarn or embroidery floss for the embroidered eyes and whiskers.
- Felt Backing (Optional): Craft felt sheet cut to size for extra durability and tabletop protection.
Tools:
- Crochet Hook: 3.0 mm crochet hook.
- Yarn Needle: Tapestry needle for sewing in ends and embroidering facial details.
- Scissors: Sharp craft scissors.
- Stitch Marker: Optional marker to trace round starts.
Preparation Notes:
- Master basic stitches including double crochet (
dc), treble crochet (tr), single crochet (sc), slip stitch (sl st), and working into a magic ring (MR). - Maintain even tension so your coaster lays flat without cupping or curling at the edges.
Abbreviations and Notes
Abbreviations:
- MR: Magic Ring (Vòng tròn ma thuật)
- ch: Chain stitch
- sc: Single Crochet
- dc: Double Crochet
- tr: Treble / Triple Crochet
- inc: Increase (2 stitches worked into the same stitch)
- sl st: Slip Stitch
- st(s): Stitch(es)
Pattern Notes:
- Joining chains (
ch 3) at the beginning of rounds count as the first double crochet stitch. - Each round ends with a slip stitch into the top of the initial turning chain or stitch to join.
- Cat ears are created in Round 4 using treble crochet stitches to form defined triangular points.
- Original design and pattern credit belongs to Poplar Crochet.
Gauge & Approximate Size
Gauge:
Not critical for this project, but stitches should be firm enough so liquid does not pass through easily.
Finished Size:
Approximately 4.0 inches x 4.5 inches (10 cm x 11.5 cm) across the main body and ear points.
Special Techniques:
- Treble Crochet Ear Shaping: Combining
tr,ch, anddcin specified stitches creates sharp, upright cat ears without cutting yarn. - Facial Embroidery: Simple straight stitches create closed, resting eyes and whiskers for a cozy aesthetic.
Step-by-Step Pattern
Part 1: Main Circular Body
Worked in continuous joining rounds using your primary yarn color:
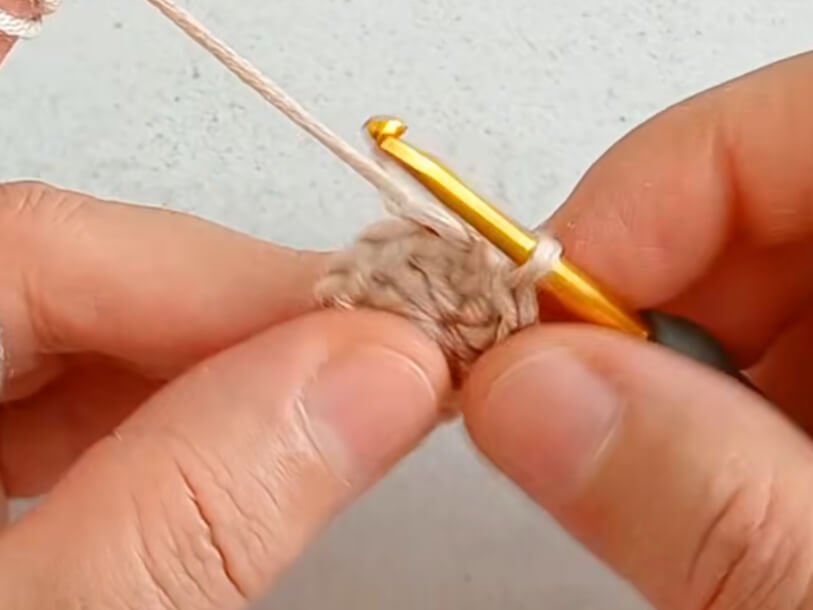
- R1: Start with a Magic Ring (MR). Ch 3 (counts as 1 dc), work 11 dc into the ring. Join with sl st to the 3rd ch of starting ch 3 (12 sts).
- R2: Ch 3, 1 dc in the same stitch. Work 2 dc in each st around. Join with sl st to top of starting ch 3 (24 sts).
- R3: Ch 3, 2 dc in next st. (1 dc in next st, 2 dc in next st) repeat around. Join with sl st to top of starting ch 3 (36 sts).
Part 2: Outer Border and Cat Ears
Creating the ear shapes and outer edging in Round 4:
- R4: Ch 3, 1 dc in same st. (1 dc in next st, 2 dc in next st) repeat for 2 times.
- First Ear: Skip 2 sts, into the 3rd st work: (1 tr, ch 1, 1 tr, 3 dc) all in the same st.
- Top of Head: Skip 2 sts, work 1 sc into the 3rd st. Work 1 sc in each of the next 7 sts (8 sc total across top of head).
- Second Ear: In the next 3rd st work: (1 tr, ch 1, 1 tr, 3 dc) all in the same st.
- Chin & Outer Border: Skip 2 sts, work 1 sc into the 3rd st. Work 1 sc in each remaining stitch around the coaster until reaching the start.
- Join with sl st, ch 1, fasten off and weave in loose ends.
Part 3: Facial Embroidery & Finishing Details
Face Embroidery:
- Thread a tapestry needle with black yarn or embroidery thread.
- Embroider two downward-curving arcs for sleepy closed eyes near the upper center of Round 2.
- Add 2 to 3 short diagonal stitches on each cheek for whiskers.
Felt Backing (Optional):
- Cut a circular piece of craft felt slightly smaller than the coaster circumference.
- Glue or hand-sew the felt to the back for extra stability and non-slip coaster protection.
Detailed Pattern Breakdown
1. Main Base Circle Construction (Rounds 1–3):
- The coaster foundation starts with a standard flat circle geometry using double crochet stitches (
dc). - Round 1 establishes 12 base double crochets from a magic ring (
MR). - Round 2 doubles the stitch count (24 sts) by placing 2 double crochets in each stitch (
inc). - Round 3 expands the diameter to 36 stitches by alternating between single
dcand2 dcincreases. This creates a smooth, flat base surface suitable for cup stability.
2. Cat Ear and Profile Shaping (Round 4):
- Ear points use tall treble crochets (
tr) combined with a chain space (ch 1). The extra height of treble crochet creates pointed triangular ears directly on the outer edge. - Spacing 8 single crochet stitches (
sc) between ears defines the flat forehead area between the ears. - The remaining perimeter is finished with a round of single crochet stitches (
sc) to give a neat border and smooth chin contour.
3. Assembly and Finishing:
- Minimal assembly is required since ears are crocheted directly into Round 4.
- Surface embroidery creates personality using simple line stitches without heavy 3D elements, allowing drink glasses to rest flat on top.
Pattern Question:
Question: Why is my cat coaster curling up at the edges instead of laying flat, and how can I fix it?
Answer: Edge curling usually happens if your tension is too tight or if stitches were missed during Round 3 or Round 4. Make sure your dc and tr stitches are pulled up to full height so they do not pull the edges inward.
If curling still occurs, gently steam block your finished coaster using an iron held a few inches away (do not touch acrylic yarn directly with hot metal) and flatten it with your hands. Adding an optional felt backing also helps keep the coaster crisp and flat.