
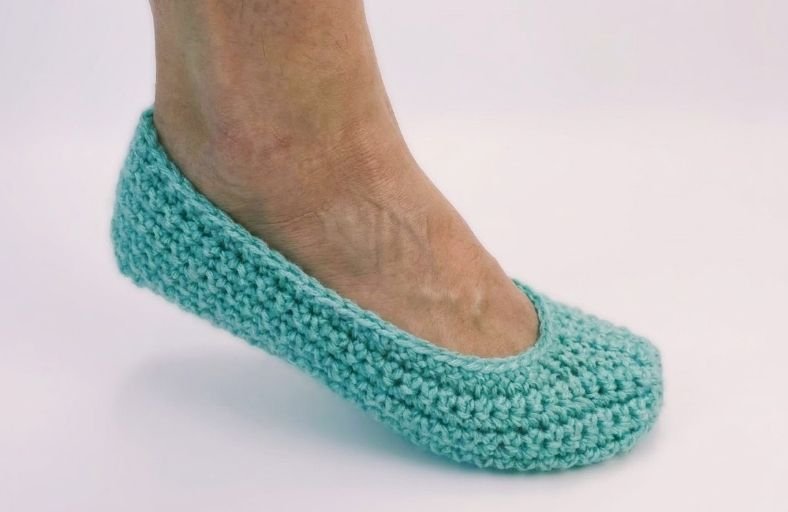
Ever caught yourself staring at a cozy pair of hand-crocheted slippers, thinking you need advanced wizardry skills and five different shaped pieces to make them?
Think again! Today, we are busting that myth wide open. You can stitch up the comfiest, snuggliest slipper socks using literally just one simple rectangular panel.
If you can make a plain dishcloth, congratulations, you already have 90% of the skills needed to complete this cozy project.
Grab your favorite hook, pour yourself a hot cup of tea or coffee, and let’s turn a humble rectangle into your new favorite pair of loungewear!
Materials and Preparation
Materials:
- Yarn: Red Heart Super Saver (or any Medium Weight #4 / Worsted Weight yarn) in your favorite color.
- Tapestry / Yarn Needle: A sturdy blunt needle for cinch-closing the toe section and seaming the heel.
Tools:
- Crochet Hook: 5.0 mm (US H/8) crochet hook.
- Scissors: Basic craft scissors for cutting yarn tails.
- Measuring Tape: Helpful for verifying gauge and measuring foot length if customizing sizes.
Preparation Notes:
- Leave a generous 12-inch tail at the very beginning of your starting chain. You will use this long tail later to cinch the toe and sew the front seam.
- This project is beginner friendly! You only need to know how to create a basic foundation chain (
ch) and worked rows of single crochet (sc). - Maintain a steady, comfortable tension throughout to ensure your two slippers turn out identical in size.
Abbreviations and Notes
Abbreviations:
- ch: Chain stitch
- sc: Single Crochet
- st(s): Stitch(es)
- sl st: Slip Stitch
- rem: Remaining
Pattern Notes:
- Sizing Options: Instructions are given for US Women’s sizes S (6:7), M (8:9), and L (10:11). Numbers for larger sizes are indicated inside parentheses as
Small (Medium, Large). - Working into Back Bumps: For Row 1, work into the back ridge (back bumps) of the foundation chain rather than the front loops. This gives a neat, elastic edge that makes seaming and border finishing much cleaner.
- Row Counting Tip: Single crochet rows can sometimes be tricky to count! Look closely at your fabric: every ridge or “block” created by the texture equals 2 rows of single crochet.
- Original design and pattern credit belongs to Littlejohn’s Yarn.
Gauge, Approximate Size, and Pattern Notes
Gauge:
- Gauge Measurement: 8 stitches and 8 rows = 2 inches (5 cm) in single crochet.
- Gauge Tip: If your gauge is slightly off, adjust your hook size up or down accordingly. However, because this is an adaptable flat rectangle pattern, minor gauge variances can easily be adjusted by measuring directly against the wearer’s foot.
Finished Size:
- Small (US Women’s 6:7): Fits foot length approx. 8.5–9 inches (21.5–23 cm).
- Medium (US Women’s 8:9): Fits foot length approx. 9.5–10 inches (24–25.5 cm).
- Large (US Women’s 10:11): Fits foot length approx. 10.5–11 inches (26.5–28 cm).
- Custom Fit Rule: To adapt for kids or custom adult sizes, start with a foundation chain that measures approximately 0.5 inches (1.3 cm) longer than the actual foot length.
Special Techniques:
- Back Bump Foundation: Flipping the chain to stitch into the central ridge on the back.
- Gathered Toe Cinch: Weaving a yarn tail through the edge stitches of the short end and pulling tight like a drawstring to create a rounded toe box.
- Simple Whipstitch: Hand-sewing method to join folded edges together neatly on the wrong side.
Step-by-Step Pattern
Part 1: The Main Rectangular Panel
Start by leaving a 12-inch yarn tail before making your slip knot.
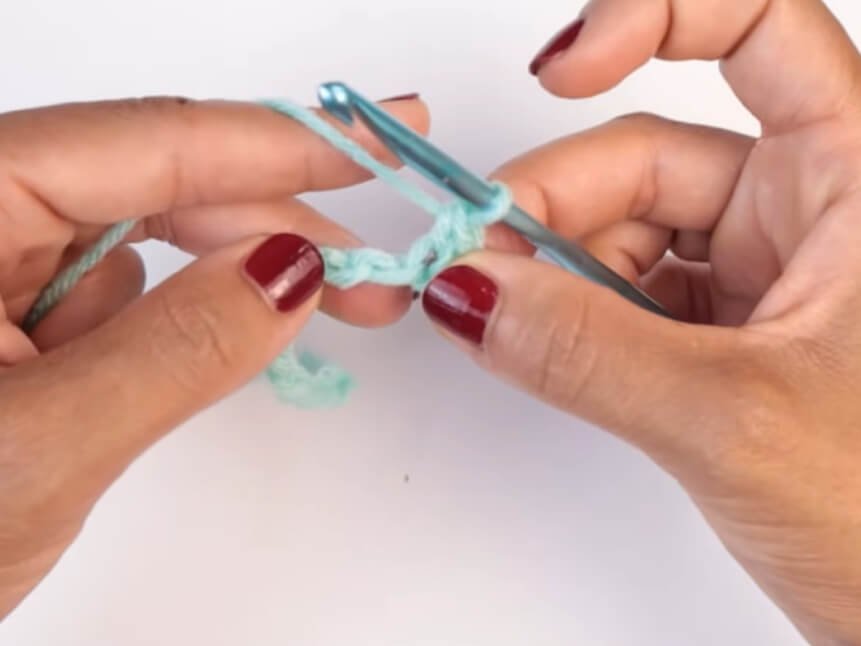
- Foundation Chain: Ch 34 (36, 38).
- Row 1: Turn chain over to locate the back bumps. Sc in the 2nd back bump from hook and in each back bump across. Turn. [33 (35, 37) sts]
- Row 2: Ch 1, sc in each st across. Turn. [33 (35, 37) sts]
- Rows 3–26 (27, 28): Repeat Row 2.
- Size Small: End on Row 26.
- Size Medium: End on Row 27.
- Size Large: End on Row 28.
Do NOT fasten off your main working yarn! Remove your hook and place a stitch marker or large safety pin in the working loop to keep it secure.
Part 2: Toe Cinching and Front Seam
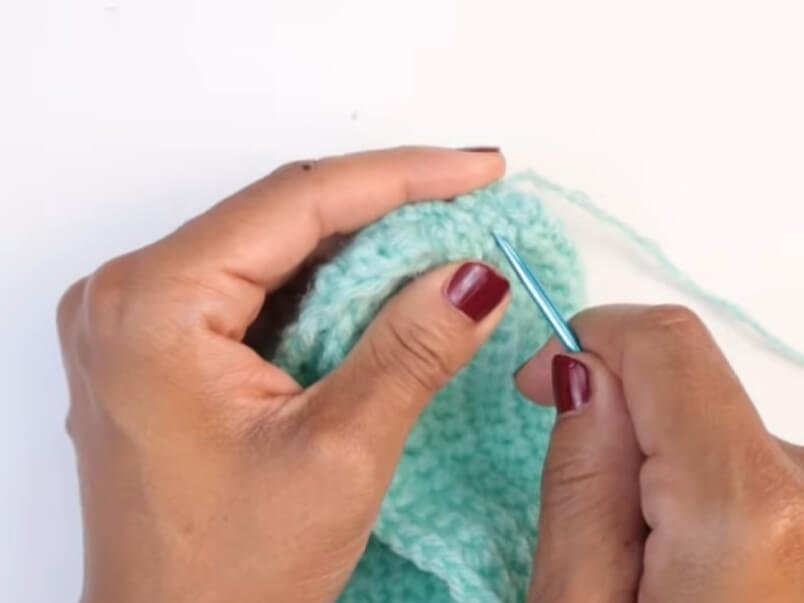
Use the 12-inch tail left from your foundation chain and attach your tapestry needle.
- Cinch the Toe: Weave the tapestry needle in and out through the edge of the short side of your rectangular panel (the end of the row edges).
- Pull the yarn tail firmly to cinch the entire short end tightly closed like a drawstring bag.
- Insert the needle into the opposite side corner to lock the cinch in place.
- Sew Upper Foot Seam:
- Fold the rectangle lengthwise.
- Whipstitch the two long sides together starting from the cinched toe and working back toward the ankle.
- Stitch Count for Upper Seam:
- Size Small: Sew the next 7 sts together.
- Size Medium: Sew the next 8 sts together.
- Size Large: Sew the next 9 sts together.
- Secure the thread with a double knot on the inside/wrong side and weave in this tail.
Part 3: Top Ankle Opening and Border
Pick your working loop back up with your 5.0 mm hook.
- Final Collar Row: Ch 1, turn work to crochet along the top open edge (foot opening). Sc evenly in each st all the way around the opening. When you reach the front seam join, simply sc across to the opposite side and continue around to where you started.
- Fasten off yarn, leaving an 18-inch tail for seaming the heel.
Part 4: Heel Seam Assembly and Finishing
- Sew Heel Seam:
- Match the two unsewn back edges of the rectangle together at the heel.
- Thread your tapestry needle with the 18-inch tail.
- Whipstitch down the vertical edges from top opening to bottom sole.
- Secure with a firm knot at the base of the heel.
- Turn the slipper right-side out (hiding all whipstitched seams inside).
- Repeat the entire process to create your second matching slipper sock!
Detailed Pattern Breakdown
1. Main Rectangular Panel Construction Breakdown:
- Foundational Logic: Unlike traditional slippers that require working in rounds with heel flaps and gusset decreases, this method builds a flat 2D geometric shape (a rectangle).
- Back Bump Technique: Working Row 1 into the back ridge bumps creates a clean “braided” bottom edge. This ensures smooth tension when you go back to gather the toe and sew the top seam.
- Ridge Counting: Working continuous rows of
scwithch 1turns generates horizontal ribs. Counting 1 block/ridge as 2 rows keeps your height measurements exact without getting lost in individual rows.
2. Toe Cinching and Seam Shaping Breakdown:
- Converting Flat to 3D: By gathering the end of a flat rectangle using a drawstring weave technique, the corner points collapse inward to form a seamless, rounded 3D toe cup.
- Instep Proportions: Whipstitching only a fraction of the remaining length (7 to 9 sts depending on size) converts the closed tube into a fitted toe box while leaving an opening large enough for your foot to slide in comfortably.
3. Top Rim & Heel Finishing Breakdown:
- Opening Stabilization: The continuous
scround worked around the raw opening binds the row ends together. This prevents the ankle opening from stretching out or sagging after repeated wear. - Heel Seaming: Joining the straight rear edges via whipstitch forms a clean vertical heel line on the inside out, providing a snug fit around the Achilles tendon without requiring complex heel shaping.
Pattern Question:
Question: My slipper fits a bit loose around the ankle, or I want to adjust this pattern for children or extra-large adult feet. How can I customize the sizing accurately?
Answer: Customizing this single-piece pattern is extremely easy! Follow these simple adjustments:
- Adjusting Length: Measure the foot from heel to the tip of the big toe. Make your foundation chain long enough so it measures about 0.5 inches (1.3 cm) longer than the actual foot length.
- Adjusting Width / Height: Work your single crochet rows until the panel width, when folded over the foot, comfortably wraps from side to side across the top of the instep.
- Snug Ankle Opening: If the opening feels too wide, add 1 or 2 extra whipstitches when seaming the front upper foot (Part 2), or work a row of single crochet decreases (
sc2tog) around the heel section during Part 3.