
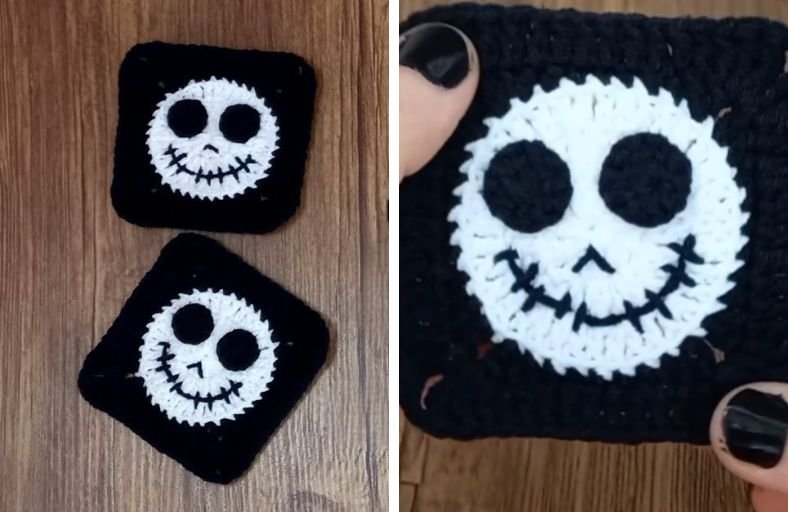
Ready to add a spooky yet charming touch to your Halloween crochet projects?
This Jack Skellington Halloween Granny Square brings the Pumpkin King straight from Halloween Town to your yarn basket!
Combining a classic circular face motif with a clean, sharp granny square border, this pattern is perfect for making Halloween blankets, spooky tote bags, coasters, or festive wall hangings.
Materials and Preparation
Materials:
- Yarn:
- White yarn (Medium/Aran weight) for Jack’s face.
- Black yarn (Medium/Aran weight) for the square background, eyes, and embroidered details.
- Stuffing: None required (this is a flat motif project).
Tools:
- Crochet Hook: 3.5 mm – 4.0 mm hook (or size matching your yarn weight).
- Yarn Needle: Tapestry needle for invisible joins, embroidering facial features, and weaving in ends.
- Scissors: Sharp craft scissors.
- Stitch Markers: Optional, but helpful for marking corner spaces.
Preparation Notes:
- Master basic stitches such as single crochet (
sc), half double crochet (hdc), double crochet (dc), and treble crochet (tr). - Pay close attention to working in the back loop and third loop (BLO + 3rd loop) when transitioning from the white circular face to the black square frame; this creates a crisp 3D border around Jack’s head.
Abbreviations and Notes
Abbreviations:
- MR: Magic Ring
- ch: Chain
- sl st: Slip Stitch
- sc: Single Crochet
- hdc: Half Double Crochet
- dc: Double Crochet
- tr: Treble Crochet (Yarn over twice)
- inc: Increase (2 stitches in the same stitch)
- BLO: Back Loop Only
- 3rd loop: The horizontal bar directly behind/below the back loop in crochet stitches.
Pattern Notes:
- The head center is worked in continuous joined rounds.
- Chains at the beginning of rounds count as stitches (
ch 3counts as1 dc,ch 4counts as1 tr). - Embroidery for the mouth and stitching details can be customized to make Jack as spooky or friendly as you like!
Gauge, Approximate Size, and Pattern Notes
Gauge:
Gauge is not critical for this motif. Keep your tension consistent throughout both the face and the border so the square lays perfectly flat.
Finished Size:
Approximately 4.5 in x 4.5 in (11.5 cm x 11.5 cm) when using standard worsted weight yarn with a 3.5 mm hook.
Special Techniques:
- Back Loop + Third Loop Combined Stitch: When changing color to black, insert your hook under both the back loop AND the third loop behind it. This creates a solid ridge on the front and gives the square structural firmness.
- Needle Join / Invisible Join: Used when finishing the white circle for a seamless edge before framing.
Step-by-Step Pattern
Part 1: Jack Skellington’s Face (White Yarn)
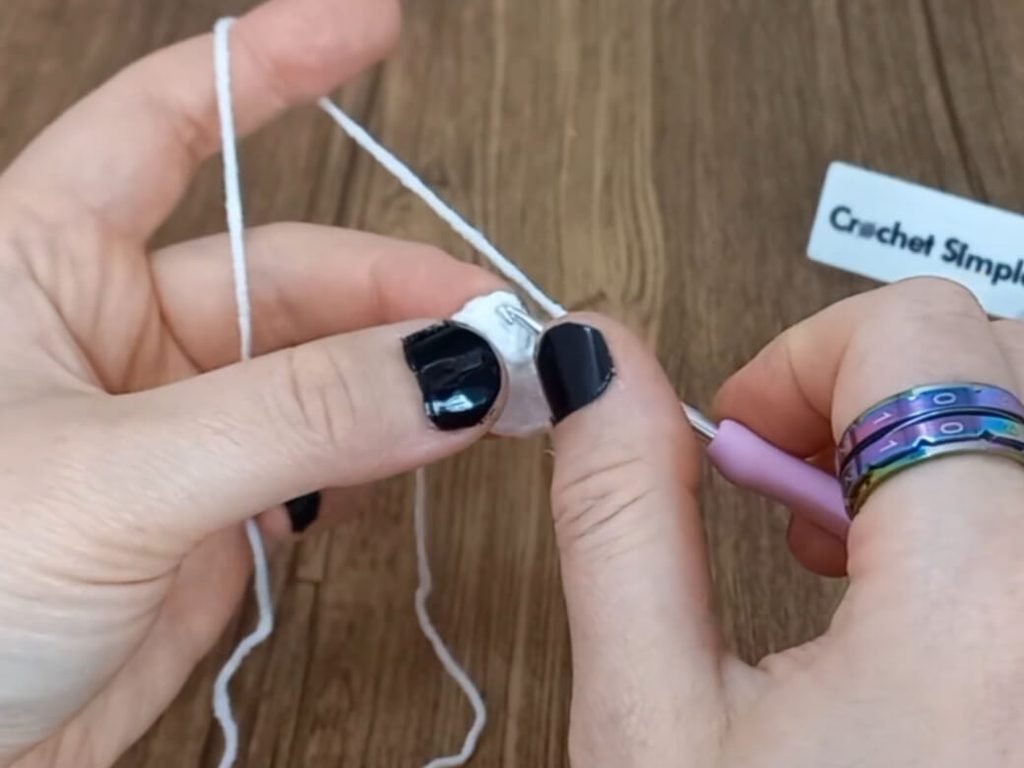
- R1: In a MR, ch 3 (counts as 1 dc), make 11 dc into the ring. Join with sl st to top of ch 3 (12 dc).
- R2: Ch 3 (counts as 1 dc), 1 dc in same stitch. Make 2 dc in each remaining stitch around. Join with sl st to top of ch 3 (24 dc).
- R3: Ch 3 (counts as 1 dc), 1 dc in same stitch. 1 dc in next stitch, 2 dc in next stitch. Repeat from * to * around until last stitch, 1 dc in last stitch. Join with sl st to top of ch 3 or perform an invisible needle join (36 dc).
- Fasten off white yarn, weave in ends securely.
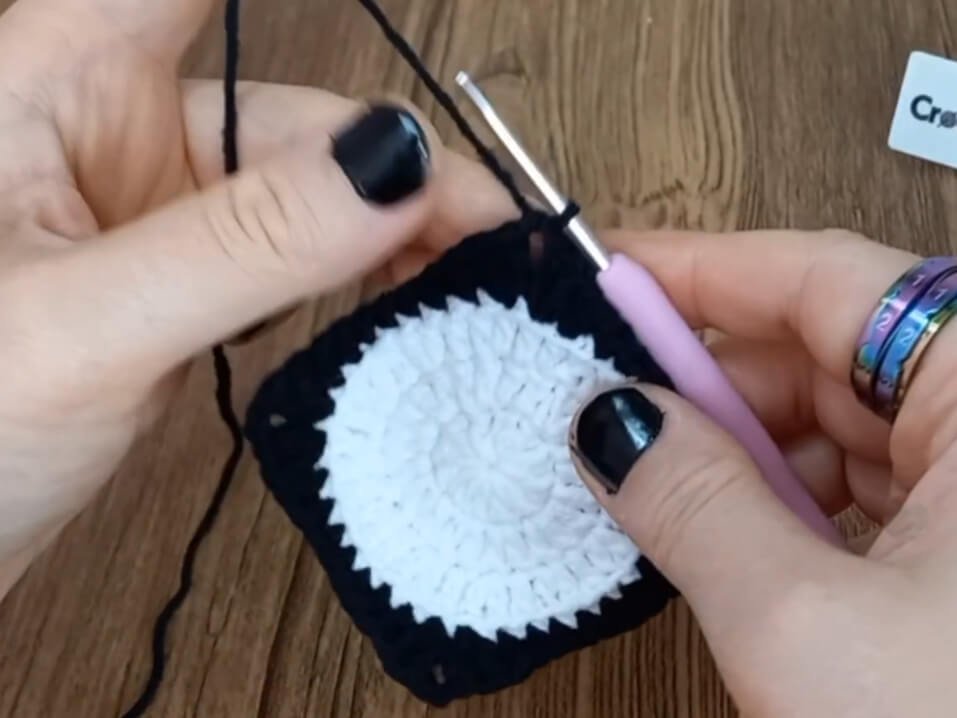
Part 2: Framing the Square (Black Yarn)
Attach black yarn with a slip knot to any stitch, inserting hook into both the Back Loop and Third Loop.
- R4: Ch 3 (counts as 1 dc), ch 2, 2 dc in next stitch (Corner built).
- 1 hdc in next 2 stitches, 1 sc in next 3 stitches, 1 hdc in next 2 stitches.
- 2 dc in next stitch, ch 2, 2 dc in next stitch (Corner built).
- Repeat around for all 4 sides.
- At the end of the round, place 1 dc in the same space as the starting ch 3 to complete the first corner. Join with sl st to the 3rd chain of starting ch 3. (44 stitches total + 4 corner ch-2 spaces).
- R5: Sl st into the corner ch-2 space. Ch 6 (counts as 1 tr + ch-2 space), 2 tr in same space.
- 1 dc in each of the next 11 stitches across the side.
- In corner ch-2 space: 2 tr, ch 2, 2 tr.
- Repeat around for all 4 sides.
- On the last corner, work 1 tr into the corner space, then join with sl st to the 4th chain of starting ch 6.
- Fasten off black yarn, weave in ends.
Part 3: Facial Details (Eyes, Nose & Stitched Smile)
Eye Circles (Make 2 – Black Yarn):
- R1: In a MR, ch 2 (counts as 1 hdc), make 11 hdc into the ring. Join with sl st to top of ch 2 (12 hdc).
- Fasten off, leaving a long tail for sewing.
Assembly & Embroidery:
- Position the two eye circles on the white face (tilted slightly inward for Jack’s signature look) and sew down securely or attach using fabric adhesive.
- Using a yarn needle and black yarn tail, embroider two small vertical lines in the center of the face for the nostrils.
- Embroider a long curved line across the lower half of the face from cheek to cheek for the smile.
- Add short vertical stitch lines across the smile line to complete Jack’s iconic stitched mouth.
Part 4: Edging, Assembly & Finishing
- Block your finished square using a blocking board and steam or water to square off the corners and ensure it sits flat.
- Your Jack Skellington Granny Square is now ready to be joined into a blanket, bag, or cardigan!
Detailed Pattern Breakdown
1. White Head Base Breakdown
- R1 to R3 Circle Growth: The head uses standard circular math (
12rightarrow$24rightarrow36dc). Starting with 12 double crochets in the magic ring guarantees a flat, non-cupping circle that serves as the canvas for Jack’s face.
2. Squaring the Circle (Color Transition) Breakdown
- BLO + 3rd Loop Technique: Working into both the back loop and 3rd loop simultaneously anchors the black background firmly behind the white face without stretching the top loops.
- Height Graduation for Square Edges: To turn a round circle into a flat-sided square, the stitch heights are varied strategically:
- Corners use higher stitches (
dcin R4,trin R5) paired withch-2spaces. - Sides drop down in height using
hdcandscin the center to compensate for the circular curve of the head.
- Corners use higher stitches (
3. Eye Circles & Facial Expression Breakdown
- 12 hdc Eye Motif: Using half double crochets in a magic ring creates slightly oval, dense eye patches that mirror Jack’s sunken socket look.
- Embroidered Details: The stitched smile line wraps along Round 2 of the white circle, giving structure and guidelines for keeping the smile symmetrical.
Pattern Question:
Question: Why does my granny square look round or wavy around the edges after finishing Round 4?
Answer: If your square is curling or bowing, double-check your stitch counts along the sides and corners. Round 4 relies on a specific sequence of stitch heights (dc corners transitioning down to hdc and sc along the sides) to level out the round shape of the white face.
If your tension is naturally tight, make sure your treble crochets in Round 5 are pulled up tall to give the corners enough height. Lightly steam blocking the finished square will also crisp up the corners and flatten out any minor tension waves!