
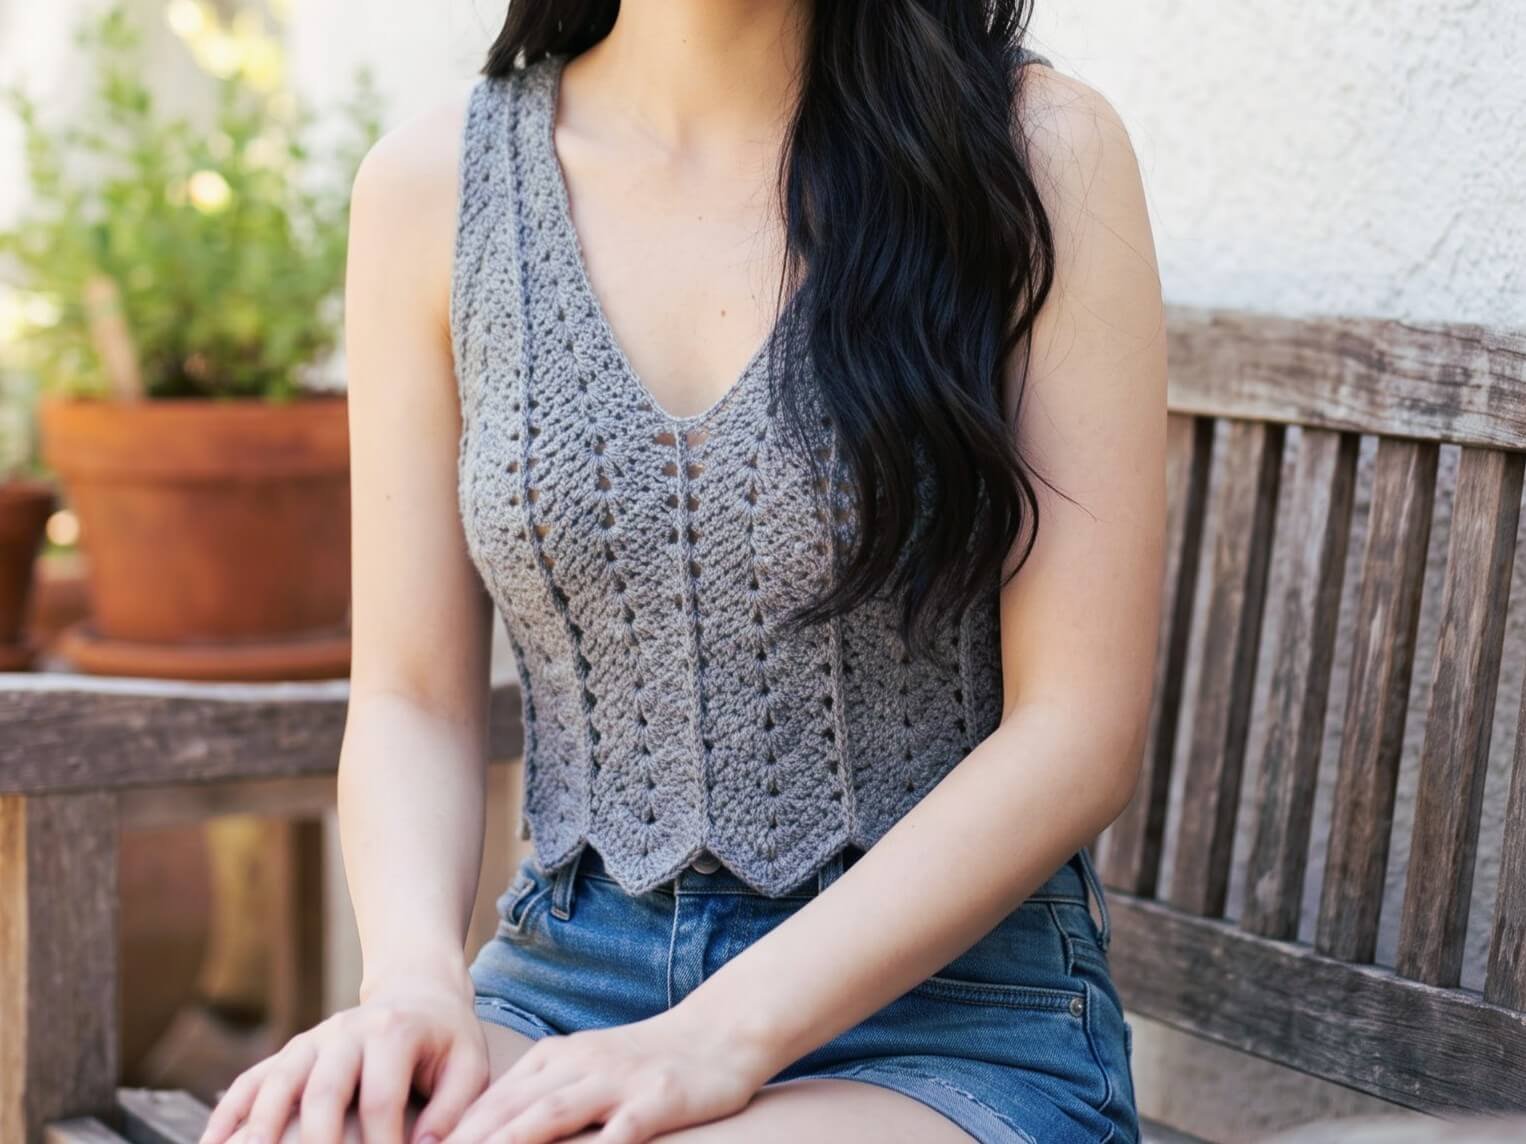
Ever stared at a beautiful ball of yarn and wondered if it could magically transform into a stylish, vintage-inspired summer top before your evening coffee date?
With this light, breezy V-neck tank top featuring gorgeous scalloped hems and textured raised ridge lines, that dream is surprisingly close to reality.
Designed with customizable sizing options and a repetitive, soothing rhythm, this project is perfect whether you are looking for a quick weekend crop top or a elegant full-length camisole.
Materials and Preparation
Materials:
- Yarn: Double Knitting (DK / Light Worsted / Category 3) yarn.
- Crop top length: 1 skein (approx. 100 g / 330 m / 360 yds).
- Standard / Medium length: 2 skeins.
- Large / Longer length: 2 to 3 skeins.
- Notions: Tapestry needle for sewing seams and weaving in ends, stitch markers, and sharp scissors.
Tools:
- Crochet Hook: 4.0 mm (US G/6) crochet hook (used across all sizes).
Preparation Notes:
- Sizing Versatility: This garment is constructed by creating two identical vertical panels (a right half and a left half) starting from the shoulder/neck line and expanding outward before joining for the body.
- Tension & Drape: Ensure a consistent, relaxed gauge so the double crochet shells drape comfortably against the body.
- Fit Customization: You can easily adjust total width by adding or reducing increase rounds, and customize length by adjusting the body round count.
Abbreviations and Notes
Abbreviations:
- ch: Chain
- st(s): Stitch(es)
- sl st: Slip stitch
- sc: Single crochet
- dc: Double crochet
- tr: Treble crochet
- FPdc: Front Post double crochet
- BPdc: Back Post double crochet
- ch-sp: Chain space
- shell: Shell stitch combination (e.g., 2 dc, ch 2, 2 dc into same space)
- picot: Ch 3, sl st into front loops of sc
- dc3tog: Double crochet 3 stitches together (Decrease)
Pattern Notes:
- The upper cup/shoulder panels are worked flat in rows going back and forth.
- Turning chains (ch 3) count as the first double crochet throughout the pattern unless specified otherwise.
- Post stitches (FPdc and BPdc) create the signature raised vertical ridges along the front and back of the garment.
- The lower body is joined and worked in seamless rounds around the full circumference.
- Original design and pattern credit belongs to Craft & Crochet.
Gauge, Approximate Size, and Pattern Notes
Gauge:
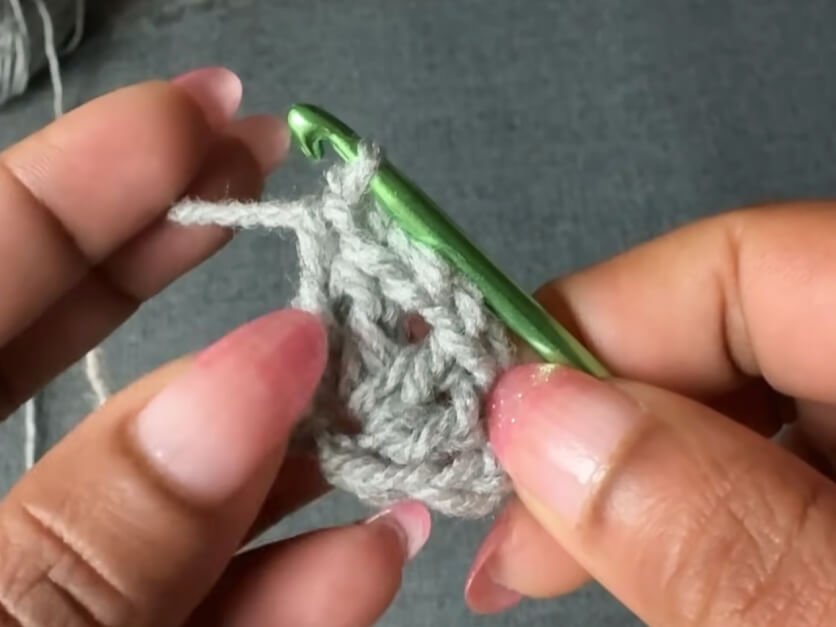
- First 6 rows of upper panel measure approximately 3.5 inches (9 cm) in length.
Finished Size:
- Small (30 in / 76 cm bust): Stop upper panel increases at Row 16 (5 dc shell side).
- Medium (32–34 in / 81–86 cm bust): Complete upper panel through Row 18 (6 dc shell side), measuring 8 inches (20.3 cm) width per cup panel / 16 inches (40.6 cm) across flat front panel.
- Large (36–38 in / 91–96.5 cm bust): Continue upper panel increases through Rows 19–20 (7–8 dc shell side).
- Total Length: Crop top approx. 12.5 inches (32 cm); Full length top approx. 21 inches (54 cm).
Special Techniques:
- Post Stitches (FPdc / BPdc): Alternating Front Post and Back Post double crochets across turning rows ensures the 3D ridge always pops out on the right side of the fabric.
- Picot Edging: Used on the final scalloped hem for a crisp, professional finish.
Step-by-Step Pattern
Part 1: First Shoulder & Cup Panel (Worked Flat)
Ch 13 to start (all sizes begin with 13 chains).
- Row 1: Turn chain to back loops. Skip 4 ch, into 5th ch work (2 dc, ch 2, 2 dc). Skip 2 ch, 1 dc in next ch. Skip 2 ch, into next ch work (2 dc, ch 2, 2 dc). Skip 1 ch, 1 dc in last ch. Turn. [2 shells, 1 center dc]
- Row 2: Ch 3, skip 2 dc, in ch-2 sp work (2 dc, ch 2, 2 dc). Skip 2 dc, BPdc around center dc. Skip 2 dc, in ch-2 sp work (2 dc, ch 2, 2 dc). Skip 2 dc, 1 dc in top of turning chain. Turn.
- Row 3: Ch 3, skip 2 dc, in ch-2 sp work (2 dc, ch 2, 2 dc). Skip 2 dc, FPdc around post st. Skip 2 dc, in ch-2 sp work (2 dc, ch 2, 2 dc). Skip 2 dc, 1 dc in last st. Turn.
- Row 4: Repeat Row 2 (BPdc on center ridge).
- Row 5: Repeat Row 3 (FPdc on center ridge).
- Row 6: Repeat Row 2.
Panel Expansion & Increases:
- Row 7: Ch 3, in ch-2 sp work (2 dc, ch 2, 2 dc). Work 1 FPdc, ch 2, 1 FPdc around center post st. In next ch-2 sp work (2 dc, ch 2, 2 dc). 1 dc in last st. Turn.
- Row 8: Ch 3, shell in ch-2 sp. BPdc around first post st, (1 dc, ch 2, 1 dc) in ch-2 sp, BPdc around second post st. Shell in ch-2 sp. 1 dc in last st. Turn.
- Row 9: Ch 3, shell in ch-2 sp. FPdc around post st, shell in central ch-2 sp, FPdc around post st. Shell in ch-2 sp. 1 dc in last st. Turn.
- Row 10: Ch 3, shell in ch-2 sp, BPdc around post, shell in ch-2 sp, BPdc around post, shell in ch-2 sp, 1 dc in last st. Turn.
- Row 11: Ch 3, skip 1 dc, 1 dc in next, in ch-2 sp work (2 dc, ch 2, 2 dc), 1 dc in next dc. FPdc around post st. Repeat shell pattern across. 1 dc in last st. Turn. [3 dc per shell side]
- Row 12: Repeat Row 11 with BPdc on post lines.
- Row 13: Ch 3, skip 1 dc, 1 dc in next 2 sts, in ch-2 sp work (2 dc, ch 2, 2 dc), 1 dc in next 2 sts. FPdc around post st. Repeat across. 1 dc in last st. Turn. [4 dc per shell side]
- Row 14: Repeat Row 13 with BPdc on post lines.
- Row 15: Ch 3, skip 1 dc, 1 dc in next 3 sts, in ch-2 sp work (2 dc, ch 2, 2 dc), 1 dc in next 3 sts. FPdc around post st. Repeat across. 1 dc in last st. Turn. [5 dc per shell side – Stop here for Size Small]
- Row 16: Repeat Row 15 with BPdc on post lines.
- Row 17: Ch 3, skip 1 dc, 1 dc in next 4 sts, in ch-2 sp work (2 dc, ch 2, 2 dc), 1 dc in next 4 sts. FPdc around post st. Repeat across. 1 dc in last st. Turn. [6 dc per shell side – Medium Size]
- Row 18: Repeat Row 17 with BPdc on post lines. Fasten off.
Part 2: Second Shoulder Panel & Back Panel Mirroring
- Back Panel Extension: Join yarn with a node to the starting foundation chain of Part 1. Work Rows 1–18 in the opposite direction off the foundation chain to complete the back shoulder half.
- Second Side Piece: Repeat Part 1 and Part 2 to create the second complete side unit (Right Hand and Left Hand pieces).
Part 3: Joining Body Round & Length Expansion
- Joining Round 1: Align Right and Left side pieces. Join yarn at side seam. Ch 3, work established shell pattern (6 dc, ch 2, 6 dc) across first panel. To join panels at center front/back underarm gap: 1 dc through both edge stitches together. Continue shell pattern across next panel. Sl st to top of starting ch-3 to close round.
- Body Rounds 2–14 (or desired length): Sl st to post st, (FPsc, ch 2) to form starting post st. Work established 6-dc shell patterns into every ch-2 space, FPdc around every post ridge line across rounds.
- For Crop Top: Work 7 rounds total.
- For Standard Top: Work 14 rounds total.
Part 4: Scalloped Picot Hem & Finishing
- Final Round (Hem): Sl st in next dc, sc in next dc, ch 2, 1 dc in next st, 2 dc in ch-2 sp. Work Picot: Ch 3, sc in front loops of previous dc. 2 dc in same ch-2 sp, 1 dc in next 4 sts.
- Decreasing Valley Join: Work dc3tog across last 2 sts of shell, central FPdc line, and first 2 sts of next shell. Repeat scalloped picot hem pattern across all lower points. Sl st to start, fasten off, and weave in all yarn tails.
Detailed Pattern Breakdown
1. Shoulder & Neckline Construction Breakdown:
- Construction begins from a narrow 13-chain foundation corresponding to the top of the shoulder strap.
- Working flat in alternating rows, the initial 6 rows establish a constant 2-shell foundation with a central spine line.
- Alternating FPdc on right-side rows and BPdc on wrong-side rows forces the post ridge to remain entirely on the front surface of the garment, creating a sharp 3D accent line.
2. Panel Expansion Breakdown:
- Starting at Row 7, a V-shaped branch extension is created by inserting a (FPdc, ch 2, FPdc) combination into the single central post stitch.
- Over Rows 8–10, this central ch-2 space is populated with a new full shell, expanding the garment width from 2 shells to 3 full shells.
- From Rows 11 through 18, graceful diagonal widening is achieved by increasing the stitch count of each shell wing from 2 dc up to 6 dc per side.
3. Lower Body Integration & Decorative Edging Breakdown:
- Left and right constructed halves are positioned side by side. In Round 1 of the body, panels are seamlessly joined by crocheting single double crochet stitches across overlapping edge loops under the armholes and central neck join.
- The continuous circular body maintains the 3D post lines down the entire torso.
- The decorative edging binds the bottom valley folds together via a dramatic multi-stitch decrease (dc3tog/dc5tog variation), while crowning each chevron peak with a soft picot tip.
Pattern Question:
Question: How can I adjust the bust fit or armhole opening if the top feels too tight or loose under the arms?
Answer: To modify the bust width, simply add or remove increase rows on the upper cup panels before joining. For example, stopping at Row 16 (5 dc per shell side) yields a smaller size, while continuing to Rows 19–20 (7–8 dc per shell side) accommodates larger bust sizes.
If the armhole opening feels too deep or wide after joining, use a tapestry needle and matching yarn to seam together 2 to 3 rows along the underarm side edges prior to working the body rounds.