
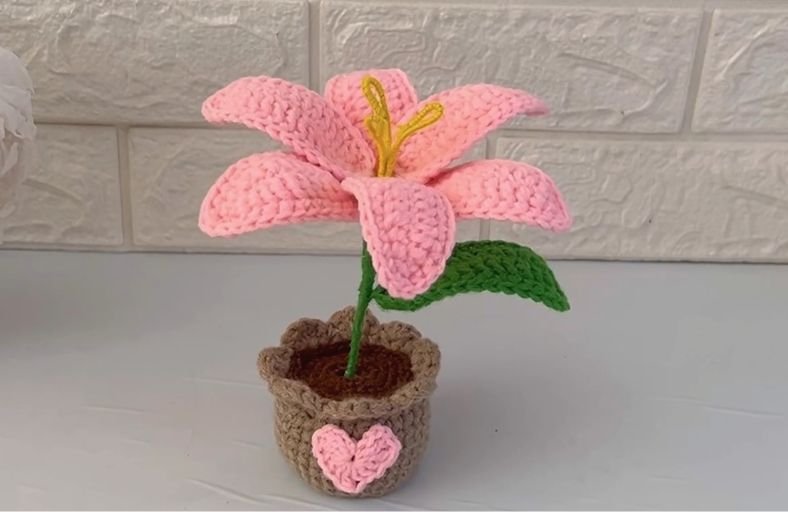
Looking for a charming, everlasting floral project that will brighten up any desk or window sill?
This crochet lily pot is an absolute dream to make and serves as a sweet handmade gift for anyone you love.
Featuring a blooming pink lily complete with wire-shaped petals, a cozy brown pot decorated with a heart motif, and a leafy stem, this project combines simple stitches into a captivating piece of home decor.
Materials and Preparation
Materials:
- Yarn:
- Pink yarn (3-ply yarn doubled up, or 4-ply/5-ply single strand) for the flower petals and heart emblem.
- Brown yarn (3-ply yarn doubled up, or 4-ply/5-ply single strand) for the flower pot and soil base.
- Green yarn for the leaf and stem wrapping.
- Yellow yarn for wrapping the flower stamens.
- Craft Wire: 0.4 mm craft wire for shaping the petals so they hold their lush curve.
- Floral Wire / Skewer Sticks: 3 small sticks or wire pieces for the center stamens and 1 sturdy stem stick.
- Glue: Craft glue or hot glue for securing wrapped yarn.
Tools:
- Crochet Hook: 3.5 mm crochet hook.
- Yarn Needle: For weaving in ends and sewing the heart emblem onto the pot.
- Stitch Marker: To keep track of rounds.
- Scissors: Craft scissors for trimming yarn and wire.
Preparation Notes:
- If you are using thin 3-ply yarn, hold two strands together throughout the project. If you are using standard 4-ply or 5-ply yarn, a single strand is sufficient.
- Prepare your wire lengths ahead of time so you can easily lay the wire along your work during the edging round of each petal.
Abbreviations and Notes
Abbreviations:
- MR: Magic Ring
- ch: Chain
- sc: Single Crochet
- hdc: Half Double Crochet
- dc: Double Crochet
- tr: Triple (Treble) Crochet
- inc: Increase (2 sc in the same stitch)
- dec: Decrease (2 sc worked together)
- sl st: Slip Stitch
- BLO: Back Loop Only
Pattern Notes:
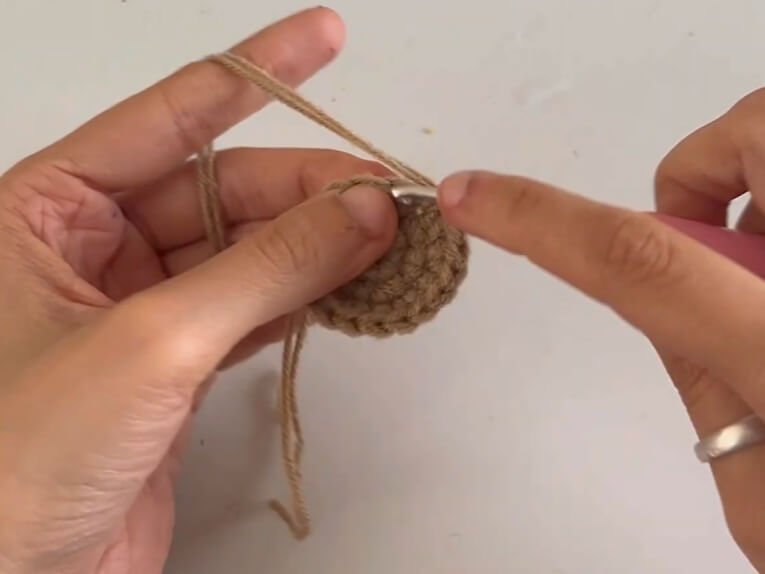
- The pot and base are worked in continuous rounds, with a transition into BLO to construct the vertical walls.
- The petals are worked around both sides of a foundation chain, followed by a wire-embedded sc edging round.
- Make a total of 6 lily petals to build the full flower head.
Gauge, Approximate Size, and Pattern Notes
Gauge:
Gauge is not critical for this project. Keep a firm, even tension so the pot holds its structure and the petals support the shaping wire neatly.
Finished Size:
The completed lily pot stands approximately 6–7 inches (15–18 cm) tall, with a pot diameter of about 2.5–3 inches (6–8 cm).
Special Techniques:
- Working with Wire: During Round 2 of the petals, place the 0.4 mm craft wire along the edge of your stitches and work your single crochets directly over it. This encapsulates the wire seamlessly inside the edging.
- BLO (Back Loop Only): Used on the pot base to create a crisp 90-degree fold for the pot walls.
Step-by-Step Pattern
Part 1: Flower Pot & Soil Base
Work with brown yarn:
- R1: MR 6 sc (6)
- R2: 6 inc (12)
- R3: (sc, inc)*6 (18)
- R4: (2 sc, inc)*6 (24)
- R5: (3 sc, inc)*6 (30)
- R6: sl st, BLO (4 sc, inc)*6 (36)
- R7–R11: 36 sc (36) (5 rounds)
- R12: (4 sc, dec)*6 (30)
- R13 (Ruffle Rim): sl st, *ch 1, skip 1 st, 4 dc in next st, skip 1 st, sl st in next st; repeat from * around to form the decorative scalloped edge. Fasten off and weave in ends.
Part 2: Lily Petals (Make 6)
Work with pink yarn:
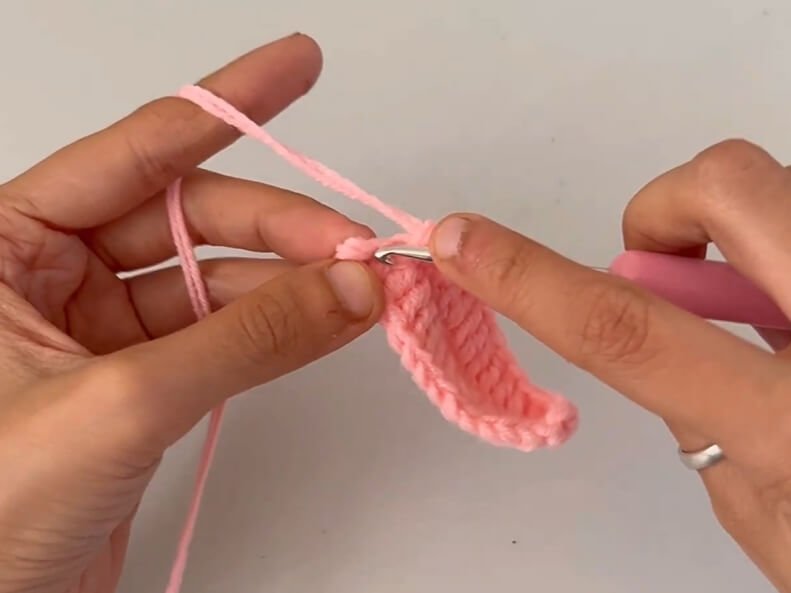
- Foundation: Ch 15
- R1: Starting in the 2nd ch from hook: sc, 2 hdc, 8 dc, 2 hdc, 3 sc in the last ch (working around the tip to the opposite side of the chain); working down the other side: 2 hdc, 8 dc, 2 hdc, sc (30 sts total)
- R2 (Wire Edging): Sl st into the first st. Place your 0.4 mm craft wire along the edge of the petal. Work sc in each st around over the wire. At the top center st of the petal tip, work 3 sc over the wire to create a neat point. Continue with 1 sc in each st down the opposite side.
- Finishing Petal: Sl st to join, fasten off, and leave a yarn tail for assembly. Repeat to create 6 identical petals.
Part 3: Heart Emblem, Stamens & Leaves
Heart Emblem:
Work with pink yarn:
- R1: MR, ch 3, 2 tr, 3 dc, 1 tr, 3 dc, 2 tr, ch 3, sl st into MR. Pull the magic ring tight to form a sweet heart shape, knot the yarn tails, and fasten off.
Center Stamens:
- Take 3 small sticks or wire pieces.
- Apply a small dab of craft glue near the top and wrap yellow yarn tightly around each stick to cover it completely.
Stem & Leaf:
- Leaf: With green yarn, ch 16. Work sc in 2nd ch from hook, 2 hdc, 9 dc, 2 hdc, 3 sc in last st. Working back along the other side: 2 hdc, 9 dc, 2 hdc, sc. Sl st to join and fasten off.
- Stem Assembly: Wrap green yarn firmly around your main stem stick, securing with glue as you go.
Part 4: Assembly & Finishing
- Attach Heart: Sew the pink heart emblem onto the front face of the brown pot using a yarn needle.
- Assemble Flower: Group the 3 yellow stamens in the center. Arrange the 6 pink petals evenly around the stamens (3 inner petals, 3 outer petals overlapping slightly). Secure the petal bases tightly to the main wrapped stem using green yarn or floral tape.
- Attach Leaf: Secure the green leaf halfway down the stem.
- Planting: Fill the pot with stuffing or a round foam base. Insert the stem firmly into the center of the pot soil, securing with hot glue at the base.
- Shape Petals: Gently bend the wired edges of the pink petals outward to give your lily a realistic bloom shape.
Detailed Pattern Breakdown
1. Flower Pot Construction
- Base Circle (R1–R5): The pot starts with a standard flat circle expanding by 6 stitches per round until reaching 30 stitches.
- Transition & Walls (R6–R12): Working R6 in BLO creates a defined right angle, transitioning the piece from a flat circular base into vertical pot walls. After working 5 straight rounds of 36 sc, R12 tapers slightly inward with decreases to support the ruffle rim.
- Scalloped Rim (R13): The decorative rim utilizes 4-dc shell clusters separated by skipped stitches and slip stitches, giving the top of the pot a charming ruffled planter look.
2. Petal Geometry and Wire Integration
- Foundation & Tapering (R1): The petal structure creates a natural leaf/petal curve by stepping up stitch heights: starting with short sc at the base, expanding into hdc, reaching peak width with 8 central dc, and tapering back down through hdc and sc.
- 3D Wire Edging (R2): Encapsulating 0.4 mm craft wire directly under sc stitches locks the wire into place without messy adhesives. The 3-sc increase at the petal tip creates a sharp, natural botanical apex, allowing full poseability.
3. Heart Emblem Geometry
- The heart motif is constructed entirely within a single Magic Ring round by utilizing stitch height contrast: tall tr stitches form the rounded top lobes, descending to dc stitches, a central tr st at the bottom point, and ch-3 lengths that anchor back into the center ring.
Pattern Question
Question: How do I ensure the craft wire stays hidden while edging the lily petals, and how do I prevent the lily stem from drooping inside the pot?
Answer: To keep the wire neatly concealed, hold the wire flat against the top edge of your R1 stitches and insert your hook underneath both the stitch loops and the wire itself as you make each sc. Pull your yarn through under the wire so the stitch wraps completely around it.
To ensure your stem remains upright inside the pot, insert a small block of floral foam or styrofoam inside the pot beneath the fiberfill stuffing, then push the stem stick directly into the center of the foam secured with hot glue.