
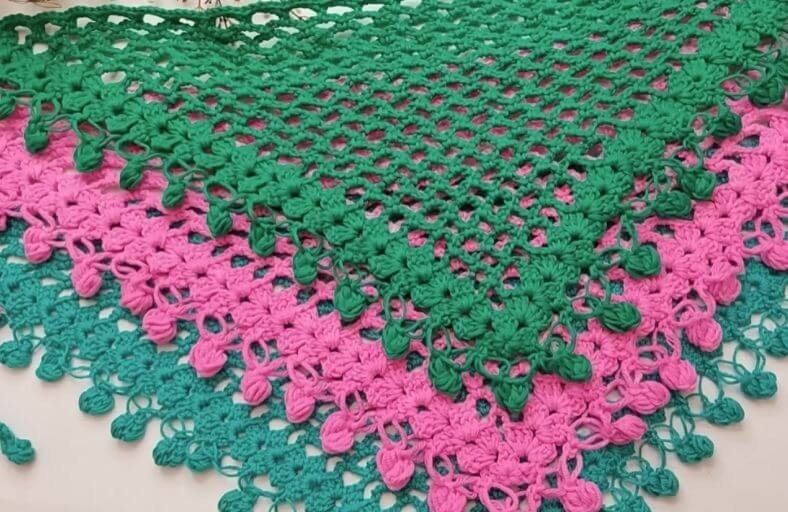
Ready to add a touch of handmade cottagecore charm to your hair collection, or perhaps whip up the ultimate quick weekend gift?
This airy, lacy crochet bandana combines a lightweight mesh stitch body with a dreamy, whimsical pom-pom tassel edging (crafted using Solomon’s knots and puff stitches).
Whether you are pairing it with your favorite summer sundress or scaling it up into a cozy triangle shawl, this project comes together surprisingly fast and uses minimal yarn.
Materials and Preparation
Materials:
- Yarn: Approximately 35–40 grams (1.2–1.4 oz) of medium-thick cotton yarn or fine fingering/sport weight yarn (such as Alize Cotton Gold or Alize Diva).
- Option for Shawl: Medium-thick or chunky wool yarn if expanding the design into a full-sized triangular shawl.
Tools:
- Crochet Hook: 3.0 mm – 3.5 mm crochet hook (or sized appropriately for your chosen yarn weight).
- Yarn Needle: Tapestry needle for weaving in loose ends.
- Scissors: Sharp craft scissors.
- Stitch Markers: Optional, for keeping track of turning chains or shells.
Preparation Notes:
- Practice your basic stitches (chains, single crochets, double crochets, and slip stitches).
- The mesh body stretches slightly after blocking or washing, so keep a relaxed, even tension throughout your stitches.
Abbreviations and Notes
Abbreviations:
- ch: Chain
- sc: Single Crochet
- dc: Double Crochet
- sl st: Slip Stitch
- sk: Skip
- sp: Space
- ch-sp: Chain Space
- puff st: Puff Stitch (pulling up loops 3 times in the same chain/stitch and closing together)
- Solomon’s Knot: Love Knot / Extended loop single crochet stitch used for edging
Pattern Notes:
- The main bandana body starts at the bottom peak/center point and grows outward row by row.
- Side shell edges remain fixed at the start and end of every row, while the open mesh ch-5 spaces increase by 1 in every row.
- The top band ties are worked directly onto the finished edge before adding the decorative pom-pom tassels.
- Original design and pattern credit belongs to Crochet Princess.
Gauge, Approximate Size, and Pattern Notes
Gauge:
Gauge is not critical for this accessory. Adjust your hook size according to your yarn weight to achieve a soft, flexible drape.
Finished Size:
- Bandana Width: Approximately 18–20 inches (45–50 cm) across the top edge, excluding side ties.
- Bandana Length: Approximately 10–12 inches (25–30 cm) from top center to bottom point.
- Tie Length: Customisable; approximately 4–12 inches (10–30 cm) per side.
Special Techniques:
- Solomon’s Knot (Love Knot): An extended loop pulled up to a desired length, anchored with a single crochet under the single back thread.
- Cluster Puff Tassels: Two small puff stitches joined back-to-back using Solomon’s knots to form dangling pom-pom accents.
Step-by-Step Pattern
Part 1: Main Triangle Mesh Body
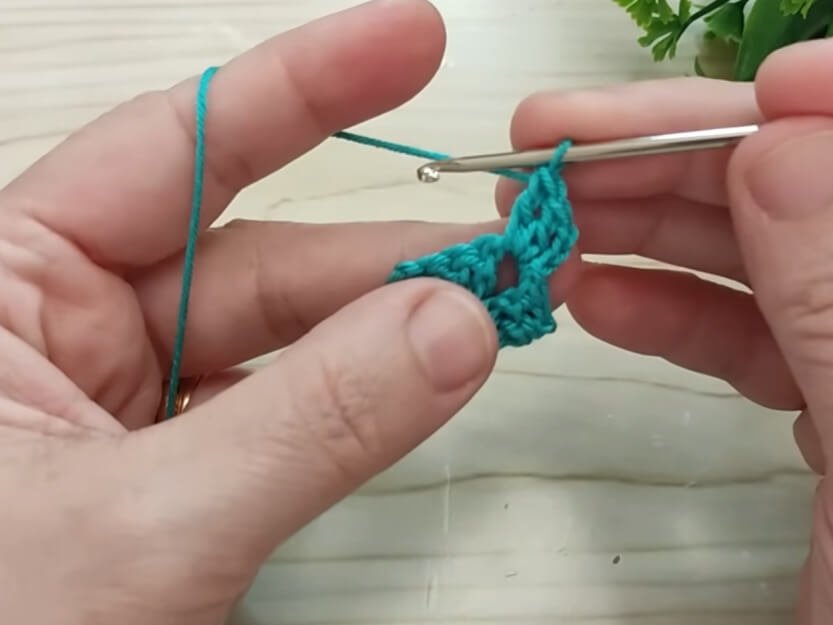
- Foundation: Ch 4, sl st in the 1st ch to form a center ring.
- Row 1: Ch 3 (counts as 1 dc), 2 dc into ring, ch 2, 3 dc into ring. Turn.
- Row 2: Sl st across the first 2 dc and into the ch-2 sp. Ch 3 (counts as 1 dc), 2 dc, ch 2, 3 dc into the same ch-2 sp (Side Shell created). Ch 5, [3 dc, ch 2, 3 dc] into the base ring / turning space (End Side Shell). Turn.
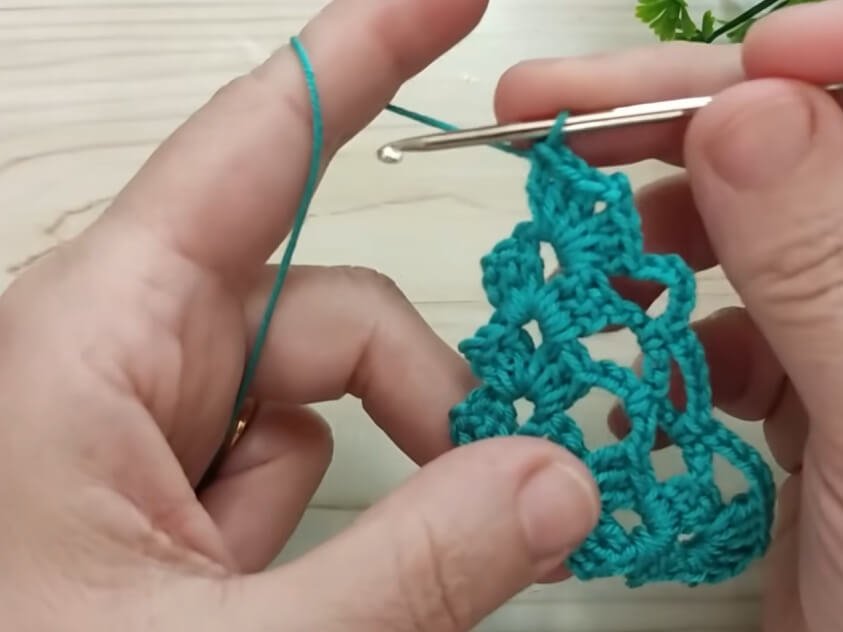
- Row 3: Sl st into the ch-2 sp of the first shell. [Ch 3, 2 dc, ch 2, 3 dc] in same ch-2 sp. Ch 5, 1 sc in the next ch-5 sp, ch 5. [3 dc, ch 2, 3 dc] in the ch-2 sp of the end shell. Turn.
- Row 4: Sl st into the ch-2 sp of the first shell. [Ch 3, 2 dc, ch 2, 3 dc] in same ch-2 sp. *Ch 5, 1 sc in next ch-5 sp; repeat from * across all ch-5 spaces. Ch 5, [3 dc, ch 2, 3 dc] in the end shell ch-2 sp. Turn.
- Row 5 – Row 15 (or desired length): Repeat Row 4. Each row increases the number of central ch-5 mesh loops by 1. Fasten off or proceed directly to the border once your bandana reaches desired width.
Part 2: Headband Strap & Top Border
- Row 1 (First Tie): Attach yarn or continue from top corner ch-2 sp. Ch 60 (or desired length for tie strand).
- Row 2 (Tie Bobble/Ring Accent): Sk 2 ch from hook. In the 3rd ch from hook, [yarn over, insert hook, pull up loop] 3 times into the same stitch. Yarn over, pull through all loops on hook, ch 1 to secure. Sl st back into the same chain stitch to form a decorative ring/bobble tip.
- Row 3 (Working back along First Tie): 1 sc in each chain stitch along the tie strap until you reach the bandana top corner.
- Row 4 (Top Edge Border): 2 sc in corner ch-2 sp. 1 sc in each of the 3 dc of the shell. *5 sc into each ch-5 mesh space across the top straight edge. 1 sc in each of the 3 dc of the opposite end shell, 2 sc in corner ch-2 sp.
- Row 5 (Second Tie): Ch 60. Repeat Row 2 and Row 3 to complete the second side strap. Sl st into the corner. Do not cut yarn.
Part 3: Pom-Pom Tassel Edging (Solomon’s Knot & Puff Border)
Worked along the two sloped bottom edges of the triangle bandana:
- Step 1 (First Stem): Pull working loop up long (approx. 1.5 cm / 0.6 in). Yarn over, pull through long loop. Insert hook under the single back strand of the long loop, yarn over, pull up a loop, yarn over and pull through both loops (Solomon’s Knot formed).
- Step 2 (Top Puff): Pull loop up slightly. [Yarn over, insert hook into single crochet base of Solomon’s knot, pull up loop] 3 times. Yarn over, pull through all loops, ch 1 to lock.
- Step 3 (Bottom Puff): Pull another long loop up. [Yarn over, insert hook into same base space, pull up loop] 3 times. Yarn over, pull through all loops, ch 1 to lock.
- Step 4 (Closing Pom-Pom): Fold the two puff stitches together and sl st into the single crochet base of the first Solomon’s knot to join them into a round pom-pom/cluster.
- Step 5 (Second Stem): Pull loop up long to make a second Solomon’s Knot.
- Step 6 (Anchor): Sk 1 shell or 1 ch-5 loop space along the bandana sloped edge. 1 sc into the center dc of the next shell or into the middle of the next ch-5 loop.
- Repeat: Repeat Steps 1 to 6 all the way along both sloped sides down to the bottom peak and up to the opposite top corner.
Part 4: Assembly & Finishing
- Fasten off yarn securely with a final slip stitch at the end of the edging.
- Weave in all loose yarn tails neatly using your tapestry needle on the back side of the work.
- Lightly steam or wet-block your bandana flat to open up the mesh lattice and pop out the tassel pom-poms.
Detailed Pattern Breakdown
1. Main Triangle Mesh Construction Breakdown:
- The project opens from a small center ring (ch 4 joined) working outwards in an expanding triangle shape.
- The two side shells (
3 dc, ch 2, 3 dc) act as fixed anchor borders throughout the entire body, maintaining clean, straight diagonal edges. - Each successive row introduces an additional
ch 5, 1 scmesh loop between the side shells, expanding the fabric exponentially with zero complicated stitch counting.
2. Straps and Top Edge Flattening Breakdown:
- After achieving the desired triangle drop depth, the straight top edge is reinforced with solid single crochets (
5 scper ch-5 pocket) to prevent the delicate mesh from sagging when worn. - Continuous foundation chains (
ch 60) are added on both top corners, finished with a textured bobble tip, and worked back with single crochet stitches to create durable, comfortable head ties.
3. Solomon’s Knot Pom-Pom Tassel Border Breakdown:
- The decorative edging transforms a standard net scarf into a boho statement piece.
- By combining extended Solomon’s knots with a pair of back-to-back 3-loop puff stitches, a small lightweight yarn pom-pom is created directly onto the border without requiring separate tassel wrapping or sewing.
- Anchoring each tassel with a single crochet across alternating shells/loops maintains an even, fluttering fringe along the entire triangular silhouette.
Pattern Question:
Question: How do I enlarge this bandana pattern into a full-sized winter wrap or triangle shawl, and what yarn changes should I make?
Answer: To convert this bandana into a large shawl, simply continue repeating Row 4 of the main pattern until the triangle reaches your desired wingspan across your shoulders.
When scaling up to a shawl, switch from light cotton thread to a sport, worsted, or bulky wool/acrylic yarn with a matching larger hook size (such as 5.0 mm to 6.5 mm).
Omit the top tie straps (Part 2) and work single crochets straight across the top edge before working the pom-pom tassel edging along the bottom sides.