

Ever looked at a bulky skein of t-shirt yarn and wondered how to turn it into a chic, trendy shoulder bag in just an afternoon?
This project is the ultimate answer for anyone who loves quick, stylish, and amazingly sturdy handmades.
Crafted with chunky t-shirt yarn and simple stitches, this minimalist bag holds its structured shape perfectly while giving off effortless street-style vibes.
Materials and Preparation
Materials:
- T-Shirt Yarn: Chunky size 6 yarn (such as YarnArt T-shirt yarn or equivalent bulky cotton tape yarn) in your favorite neutral tone.
- Hardware: 2 metal clips or D-rings/O-rings for attaching the shoulder strap.
Tools:
- Crochet Hook: 6.0 mm (US J-10 or size appropriate to achieve a firm tension with your chunky yarn).
- Yarn Needle: Large tapestry needle suited for thick t-shirt yarn.
- Stitch Markers: 2 to 4 locking stitch markers to keep track of key turning points and corners.
- Scissors: Sharp craft scissors.
Preparation Notes:
- Work with a light and relaxed tension during the initial chain setup so it is easy to work back into the back bumps later.
- Keep your stitch tension consistent and firm throughout the main body of the bag to give the bag structure without needing a fabric lining.
Abbreviations and Notes
Abbreviations:
- ch: Chain stitch
- sc: Single crochet
- sl st: Slip stitch
- BLO: Back loop only
- st(s): Stitch(es)
Pattern Notes:
- The bag base is worked in flat rows of single crochet, then bordered with a single crochet outline round to smooth out the edges.
- The bag body is built in continuous seamless rounds, starting with 1 round in BLO to create a defined bottom edge, followed by regular single crochet rounds worked through both loops.
- Always mark the first stitch of every continuous round with a stitch marker to ensure correct stitch count.
- The shoulder strap is worked directly onto the metal rings using foundation chains and back-bump single crochets.
Gauge, Approximate Size, and Pattern Notes
Gauge:
Gauge is not strictly critical for this project, but a dense stitch work is encouraged so that items inside the bag remain completely secure.
Finished Size:
- Base dimensions: Approximately 9.0 inches x 4.7 inches (23 cm x 12 cm).
- Bag body height: Approximately 15 rounds tall (customizable to any preferred height).
Special Techniques:
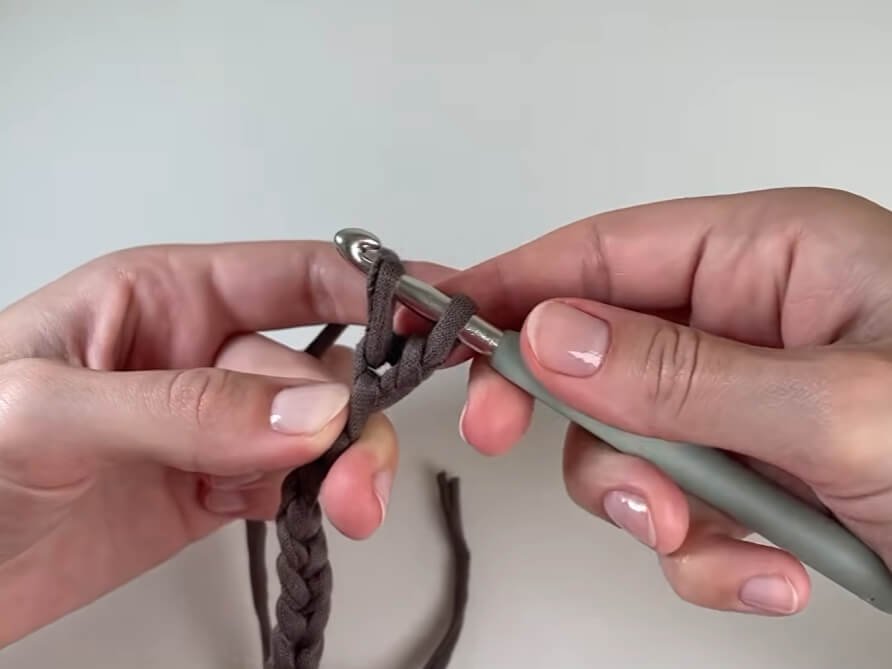
- Back Bump Single Crochet: Moking single crochet into the ridge bump on the back of a chain creates a polished, braid-like edge.
- Invisible Join: A finishing technique using a yarn needle to recreate a seamless top stitch, eliminating harsh knots when fastening off.
Step-by-Step Pattern
Part 1: Main Body
Base of the Bag (Worked in Flat Rows)
- Foundation Row: Make a slip knot, ch 10 + ch 1 for turning (11 ch total).
- Row 1: Turn chain to expose back bumps. Skip the 1st bump from hook, work 1 sc into each of the next 10 back bumps. (10)
- Row 2–21: Ch 1, turn. Work 1 sc into each st across. (10 sts per row, 21 rows total).
Smoothing Base Border (Worked in a Continuous Outer Round)
- Round 1 (Border): Ch 1, turn.
- Work 10 sc across top edge (1 sc per st).
- Work 21 sc along the side edge (1 sc into each row end).
- Work 10 sc across bottom edge.
- Work 21 sc along the remaining side edge (crochet over starting yarn tail to weave in).
- Join to the first st of the round with a sl st. (62 sts total around base perimeter).
Building Bag Height
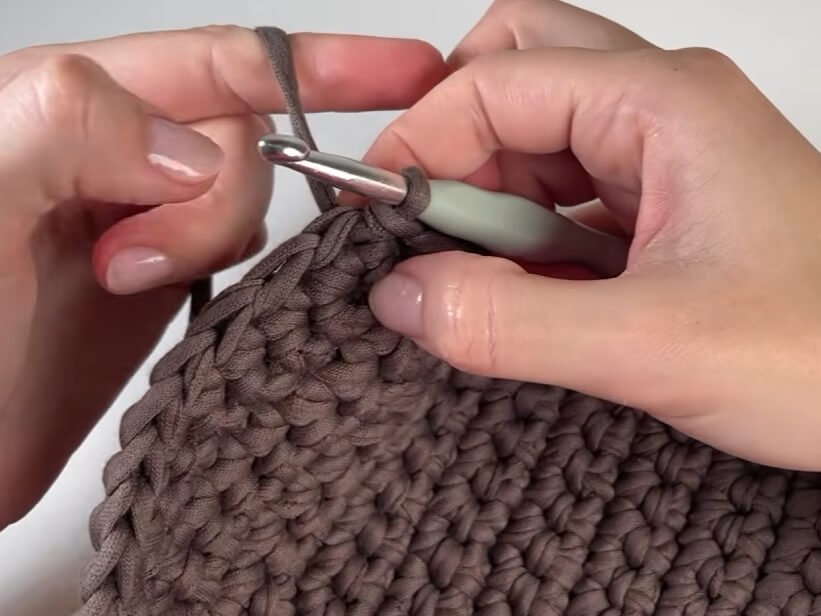
- Round 1 (Body Ridge): In the same st where sl st was made, work 1 sc in BLO. Work 1 sc in BLO in every st around. Mark the 1st st with a stitch marker. (62)
- Round 2–15: Work 1 sc through both loops of every st around continuously. Move the stitch marker to the 1st st of each new round. (62 sts per round).
- Cut yarn leaving an 8-inch tail. Fasten off using an Invisible Join across the top edge and weave in the end securely inside the bag.
Part 2: Body / Arms / Straps
Side Shaping and Ring Placement
- Fold the bag flat and divide the total stitches equally (31 sts per side).
- Push the side edges inwards to create deep side tucks.
- Clip 1 metal ring through the folded layers on each side, securing the tucks in place.
Shoulder Strap Construction
- Step 1: Make a slip knot on hook. Insert hook through the first metal ring, pull yarn through and ch 1 to attach.
- Step 2: Work 50 ch (or desired length for shoulder strap).
- Step 3: Insert hook through the second metal ring on the opposite side and sl st to join chain to ring. Ch 1.
- Step 4: Turn chain to expose back bumps. Skip ring connection, work 1 sc into each back bump along the length of the chain back to the starting ring.
- Step 5: Sl st into the starting ring to anchor strap. Fasten off leaving a long tail.
Part 3: Edging, Assembly & Finishing
- Thread yarn tails onto a yarn needle.
- Wrap tail end around the base of each metal ring and through adjacent stitches to reinforce strap attachment points.
- Weave all remaining ends neatly through the inner stitches of the bag and trim excess yarn.
Detailed Pattern Breakdown
1. Base Construction and Structural Border
- The foundation uses a 10-stitch width worked over 21 rows in traditional single crochet. Working into the back bumps of the foundation chain creates a clean starting edge.
- The border round converts flat rows into a continuous oval shape by placing 1 sc per stitch on the short ends (10 sts) and 1 sc per row end on the long sides (21 sts). This creates a clean total perimeter of 62 stitches ready for seamless vertical growth.
2. Transition and Vertical Height Progression
- Round 1 in BLO turns the flat base 90 degrees upward. By picking up only the back loops, the unworked front loops form a distinct horizontal ridge around the base, giving the bottom a crisp, structured frame.
- Rounds 2 through 15 transition back to standard full-loop single crochet worked in a continuous spiral. This eliminates visible seams running up the side of the bag while maintaining maximum fabric density.
3. Side Tucking, Hardware Mounting, and Strap Mechanics
- Inward side folds convert a basic box shape into an elegant trapezoidal tote. The metal clips/rings act as structural pinch points that lock the folded silhouette without requiring complex shaping decreases.
- The shoulder strap relies on back-bump single crochet worked over a 50-chain foundation, producing a thick, non-stretch strap that comfortably supports weight.
Pattern Question
Question: How can I adjust the size of this bag to make a larger tote or a smaller mini bag?
Answer: Customizing this pattern is effortless because it relies on simple geometric ratios. To make a wider or deeper base, simply increase your foundation chain length or work more rows for the base.
Remember to calculate your border round stitches by adding (2 x base width stitches) + (2 x total base rows). The body height can be extended to as many continuous rounds as you like before fastening off and mounting your shoulder hardware.