
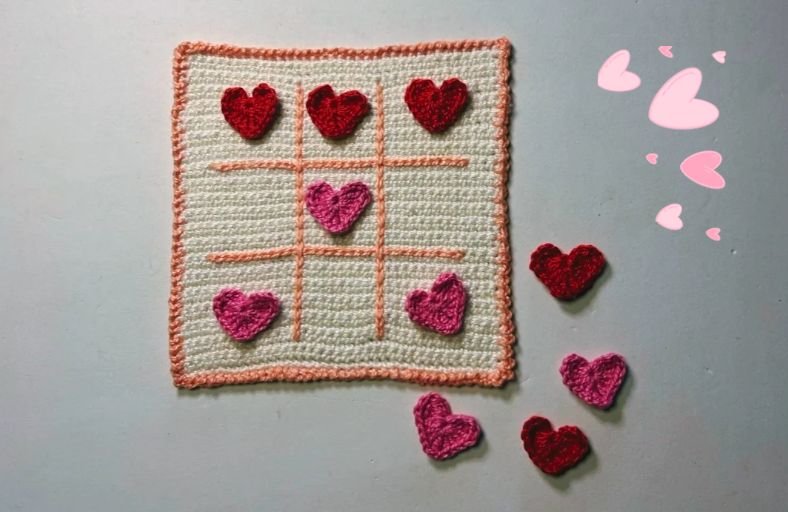
Who said Valentine’s Day gifts need to be predictable chocolates or perishable flowers? Why not challenge your special someone to a cozy, competitive game of love where everybody wins?
This adorable, portable crochet Tic-Tac-Toe game features a flexible game board that rolls up neatly and sweet little heart game pieces instead of boring Xs and Os. It is fast, functional, and guaranteed to steal hearts!
Materials and Preparation
Materials:
- Yarn: 100% Cotton Yarn in 3 complementary shades (e.g., Cream/Off-White for the board, Light Pink for set 1 of hearts, and Deep Red for set 2 of hearts/border).
- Sewing Thread: Matching thread (optional, for securing ends or heart placement).
- Craft Glue: Fabric glue or craft glue (optional, for securing yarn tails).
Tools:
- Crochet Hook: 2.0 mm crochet hook.
- Tapestry Needle: For weaving in yarn tails seamlessly.
- Scissors: Sharp craft scissors.
- Sewing Pins & Ruler: For measuring grid sections and blocking.
- Foam Board or Iron: Optional for blocking the board flat.
Preparation Notes:
- Keep your tension consistent throughout the board to prevent warping.
- Practice surface slip stitching on a small swatch beforehand if you are new to decorative surface crochet.
Abbreviations and Notes
Abbreviations:
- MR: Magic Ring
- ch: Chain
- sc: Single Crochet
- dc: Double Crochet
- tr: Treble Crochet
- sl st: Slip Stitch
- st(s): Stitch(es)
- BLO: Back Loop Only
Pattern Notes:
- The main board is worked in flat rows of single crochet.
- The grid lines are created directly on top of the finished board using surface slip stitches.
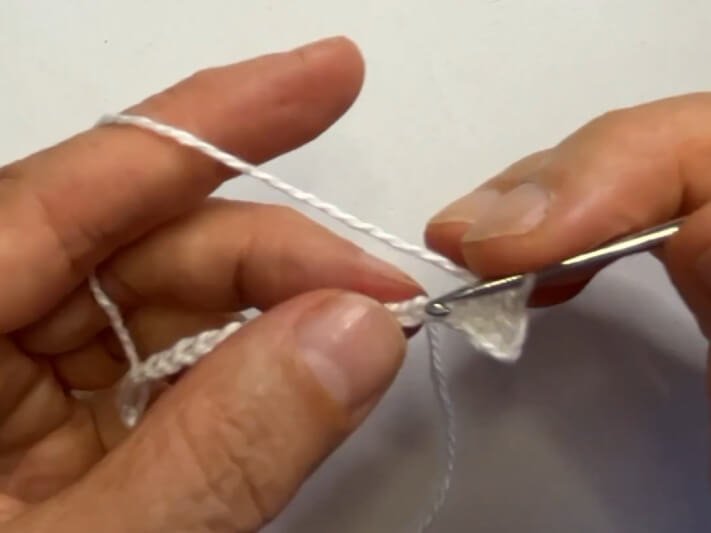
- The heart game pieces are worked in a single round out of a Magic Ring.
Gauge, Approximate Size, and Pattern Notes
Gauge:
- Approximately 26 stitches and 28 rows = 4 inches (10 cm) in single crochet.
Finished Size:
- Board: Approx. 5.6 x 5.6 inches (14 x 14 cm).
- Grid Squares: Approx. 1.4 x 1.4 inches (3.6 x 3.6 cm) each.
- Wrapping Cords: Approx. 12 – 14 inches (30 – 35 cm) long.
Special Techniques:
- Surface Slip Stitch (Surface sl st): Working slip stitches on top of existing crochet fabric to create clean, straight accent lines.
- Blocking: Pinning the piece down on foam or steam ironing to ensure crisp 90-degree corners.
Step-by-Step Pattern
Part 1: Main Game Board
Worked in flat rows using the main base color (e.g., Cream/Off-White):
- Foundation: Slip knot, ch 37.
- Row 1: Starting in the 2nd ch from the hook, work 1 sc in each ch across, turn (36 sc).
- Row 2–40: Ch 1, turn, work 1 sc in each st across (36 sc).
- Finishing Base: Ch 1, pull yarn through and cut, leaving a tail to weave in.
Part 2: Grid Lines & Border
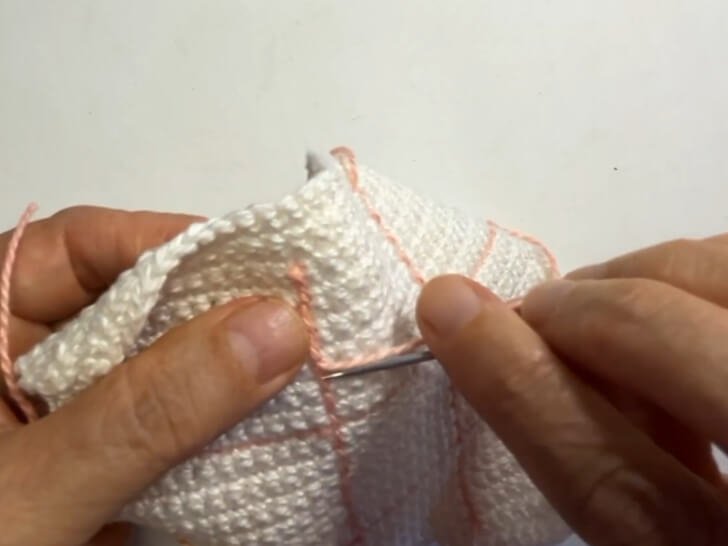
Surface Grid Lines (Cross Stripes)
Measure and mark your grid to ensure straight lines. Leave a 0.6 inch (1.5 cm) margin on all four outer edges. Divide the inner 4.3 inch (11 cm) area into 3 equal columns and rows of about 1.4 x 1.4 inches (3.6 x 3.6 cm) each.
- Step 1: Mark the two vertical and two horizontal lines using pins, a light pencil line, or guiding thread.
- Step 2: Keep the working yarn on the back of the board and your hook on the front.
- Step 3: Insert hook at the start of your marked line (0.6 inches / 1.5 cm from the edge), yarn over from behind, pull up a loop, and work surface slip stitches across following the line of stitches straight.
- Step 4: Repeat for all 2 vertical and 2 horizontal lines.
- Step 5: Fasten off and weave in tails securely at the back (a dab of craft glue is optional for extra security).
Decorative Board Border
Join border yarn with a slip knot in any corner st:
- Round 1: Ch 1, sl st in each st evenly around the perimeter of the board. Work 2 sl st into each of the 4 corner points for a smooth turn.
- Finishing Border: Sl st to join, ch 1, cut yarn, and weave in ends.
Part 3: Game Pieces & Accessories
Heart Game Pieces (Make 10 Total – 5 in Color A, 5 in Color B)
Worked in one continuous round inside a Magic Ring:
- Round 1: In a MR, ch 2, 3 tr, 3 dc, ch 1, 1 tr, ch 1, 3 dc, 3 tr, ch 2, sl st into the ring.
- Finishing: Ch 1, cut yarn leaving a short tail. Pull both the magic ring center tail and closing tail tightly to close the center hole completely. Tie a secure double knot at the back and trim.
Wrapping Cords (Make 2)
Worked in long chain strips:
- Foundation: Ch 135.
- Row 1: Work 2 sl st in each of the first 3 or 4 ch sts (creates a gentle curved end cap), then 1 sl st in each ch st across until 3 or 4 sts remain, work 2 sl st in each of the last 3 or 4 ch sts.
- Finishing: Fasten off and weave in ends.
Part 4: Assembly, Blocking & Finishing
- Blocking: Stretch the finished square board onto a piece of foam board, secure the edges with sewing pins, and mist lightly with water, or iron lightly over a damp cloth to achieve a flat, square finish.
- Packing & Rolling Up: Place all 10 heart pieces inside the grid area of the board, roll the board up into a scroll, and tie the two wrapping cords around the rolled bundle.
Detailed Pattern Breakdown
1. Main Game Board Breakdown:
- Foundation & Geometry: The board relies on a simple square construction formed by 36 stitches over 40 rows. Single crochet stitches are slightly wider than they are tall, which is why 40 rows created with 36 stitches produce a perfect 1:1 square ratio.
- Tension Control: Keeping your single crochet stitches firm and uniform ensures the board maintains clean 90-degree corners and flat edges without curling up.
2. Surface Grid Line & Border Breakdown:
- Surface Crochet Technique: By holding the yarn behind the fabric and pulling loops up to the front, surface slip stitches sit neatly on top of the single crochet rows like embroidered chain stitches.
- Symmetry Measurement: Leaving 0.6 inches (1.5 cm) around the outer perimeter creates an elegant frame. Dividing the remaining central area into three 1.4 inch (3.6 cm) columns ensures each heart piece sits comfortably in its designated square.
- Corner Turning: Adding 2 slip stitches in each corner during the border round prevents the corners from curling inward and maintains a crisp square outline.
3. Hearts & Wrapping Cords Breakdown:
- Heart Shaping via Stitch Heights: The distinct heart silhouette is engineered in a single round by varying stitch heights around the Magic Ring. Treble crochets (
tr) form the tall upper lobes, double crochets (dc) taper down the sides, and the central treble crochet (1 tr) flanked bych 1creates the sharp bottom point. - Ergonomic Wrapping Cords: Working double slip stitches in the first and last few chains adds slight weight and curvature to the tips of the cords, making them easier to tie and hold.
Pattern Question:
Question: My surface slip stitch grid lines are causing the board to pucker and buckle. How can I keep the board completely flat?
Answer: Puckering usually happens when your surface slip stitches are worked with too tight a tension. To fix this, use a hook half a size larger (e.g., 2.5 mm) specifically for the surface crochet lines, or pull each loop up slightly higher than usual before working the next stitch.
Additionally, blocking your finished board with pins on a foam board or steam-ironing it through a thin pressing cloth will instantly flatten out minor tension inconsistencies.