
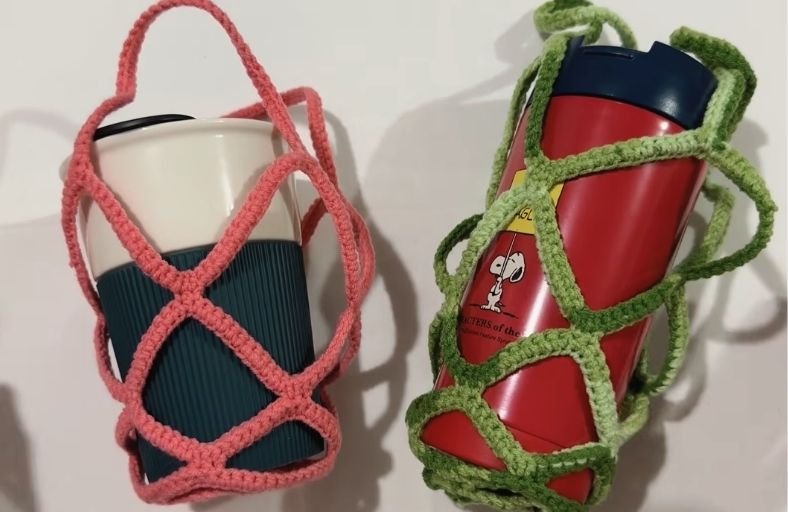
Have you ever held a warm cup of coffee on a chilly morning and wished your drink cozy looked as fabulous as your outfit?
Say goodbye to plain cardboard sleeves and hello to this brilliant, eco-friendly Flower Cup Holder!
When laid flat, this clever creation unfolds into an intricate, geometric blooming rose.
Pick it up by the handles, and it instantly transforms into a sturdy, stretchy net tote that cradles your favorite coffee or boba cup with style.
Materials and Preparation
Materials:
- Yarn: 100% Acrylic yarn (Worsted or DK weight) in your favorite flower color (such as vibrant pink, soft red, or bright coral).
- Yarn Tails: A small tapestry needle to weave in ends cleanly.
Tools:
- Crochet Hook: 2.5 mm crochet hook (or size needed to obtain a firm, neat stitch texture).
- Tapestry / Yarn Needle: For weaving in loose ends.
- Scissors: Sharp craft scissors.
- Stitch Markers: Useful for keeping track of skipping stitches during expanding chain rounds.
Preparation Notes:
- Master basic US crochet stitches including magic ring (
MR), chain (ch), single crochet (sc), and slip stitch (sl st). - Maintain a consistent, firm tension during the solid base rounds so your cup rests securely, and keep your chain loops even so the net expands symmetrically.
Abbreviations and Notes
Abbreviations:
- MR: Magic Ring
- ch: Chain stitch
- sc: Single Crochet
- sl st: Slip Stitch
- sk: Skip (stitch or chain)
- st(s): Stitch(es)
Pattern Notes:
- The body of the cup holder is worked in joined rounds from the center out. Each round finishes with a slip stitch into the starting stitch of that round.
- The design uses a clever sequence of slip stitches across previous chain loops combined with anchor
scstitches and expandingchbridges. This builds the concentric petals that form the net structure. - The handles are created in two symmetric parts, worked directly onto the top edge and reinforced with a row of single crochet for durability.
Gauge, Approximate Size, and Pattern Notes
Gauge:
Gauge is not strictly critical for this project, as the open chain-net construction naturally stretches to accommodate various cup sizes (from standard coffee cups to tall boba cups).
Finished Size:
- Flat (Rose Form): Approximately 8.5–9.5 inches (21.5–24 cm) in diameter when laid flat on a table.
- In Use: Fits standard takeout cups ranging from 12 oz to 24 oz (350 mL to 700 mL).
Special Techniques:
- Expanding Chain Net: Progressively increasing the number of skipped stitches and chain loop counts to create a flexible 3D lattice.
- Top-Edge Handle Anchoring: Turning work after anchoring chains to double back with solid single crochet rows for comfortable, sturdy carrying handles.
Step-by-Step Pattern
Part 1: Solid Base Center
Work with main flower color yarn:
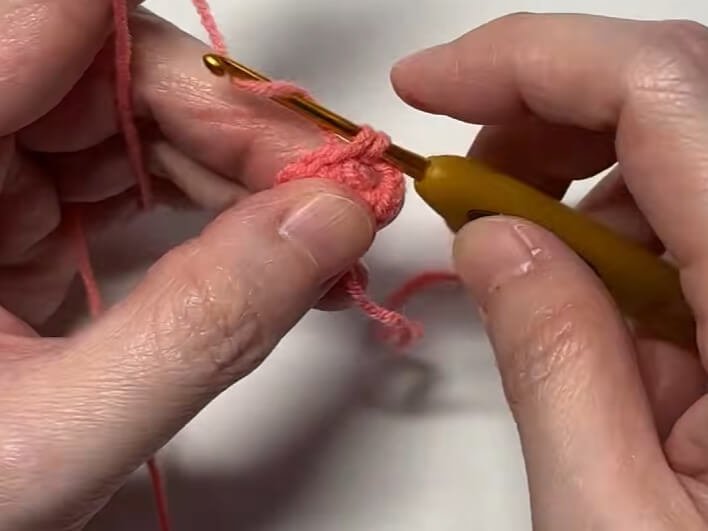
- R1: Into a MR, ch 1, work 8 sc. Pull ring tight. Sl st to first sc (8 sc)
- R2: Ch 1, sc in same st, [ch 3, sk 1 st, sc in next st] 3 times, ch 3, sl st to first sc (4 sc, 4 ch-3 spaces)
- R3: Ch 1, 2 sc in first sc space, [1 sc in each of the next 3 chs, 2 sc in next sc space] 3 times, 1 sc in each of the next 3 chs, sl st to first sc (20 sc)
Part 2: Inner Petal Net Expansion
- R4: Sl st in next st, 1 sc in next 2 sts, [ch 7, sk 3 sts, 1 sc in next 2 sts] 3 times, ch 7, sk 3 sts, sl st to first sc
- R5: Ch 1, 1 sc in each sc st and 1 sc in each ch st around, sl st to first sc
- R6: Sl st in next 4 sts, 1 sc in next 2 sts, [ch 9, sk 7 sts, 1 sc in 8th and 9th sts] 3 times, ch 9, sk 7 sts, sl st to first sc
- R7: Ch 1, 1 sc in each sc st and 1 sc in each ch st around, sl st to first sc
Part 3: Outer Petal Body
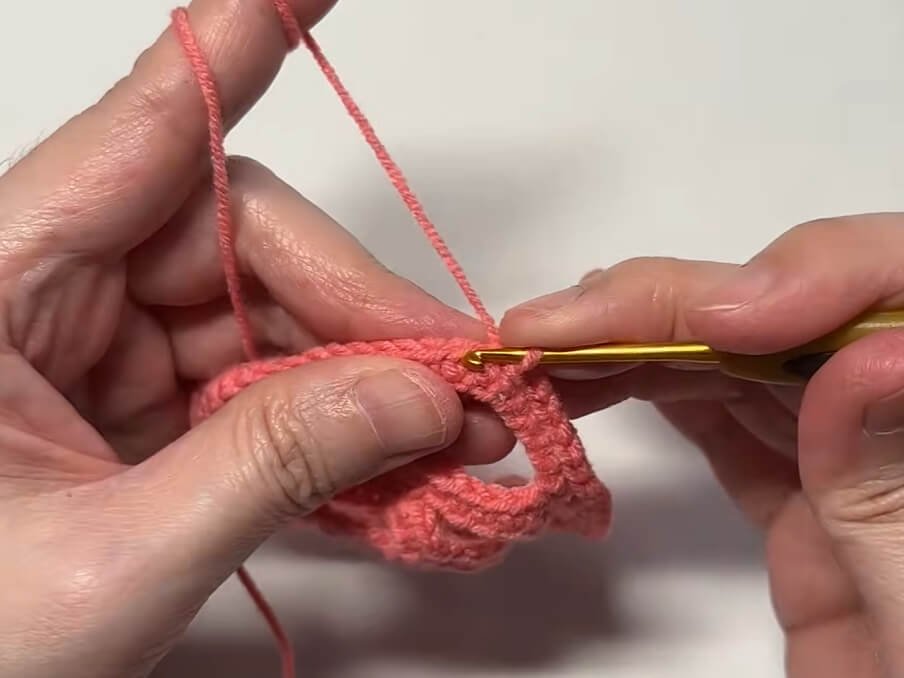
- R8: Sl st in next 5 sts, 1 sc in next 2 sts, [ch 13, sk 9 sts, 1 sc in 10th and 11th sts] 3 times, ch 13, sk 9 sts, sl st to first sc
- R9: Ch 1, 1 sc in each sc st and 1 sc in each ch st around, sl st to first sc
- R10: Sl st in next 7 sts, 1 sc in next 2 sts, [ch 17, sk 13 sts, 1 sc in 14th and 15th sts] 3 times, ch 17, sk 13 sts, sl st to first sc
- R11: Ch 1, 1 sc in each sc st and 1 sc in each ch st around, sl st to first sc
- R12: Sl st in next 9 sts, 1 sc in next 2 sts, [ch 23, sk 17 sts, 1 sc in 18th and 19th sts] 3 times, ch 23, sk 17 sts, sl st to first sc
- R13: Ch 1, 1 sc in each sc st and 1 sc in each ch st around, sl st to first sc
- R14–R15: Repeat the expanding chain and solid sc foundation sequence to finalize the outermost mesh flower outline. Fasten off.
Part 4: Handles & Assembly
- R16 (First Handle):
- Sl st in next 17 sts to reach the apex of the outer loop.
- 1 sc in next st, then ch 40 (creating the first handle loop).
- Sk 32 sts across the top arc (ensuring chain is not twisted), 1 sc in next st, sl st in next st.
- Turn work, ch 1, 1 sc in the sl st, then work 1 sc in each of the 40 ch sts along the handle.
- 1 sc into base st, sl st to finish first handle strap. Fasten off.
- Second Handle:
- Count 32 sts from the first handle to locate the exact center opposite side. Attach yarn with a sl st.
- 1 sc in base st, ch 40.
- Sk 32 sts, 1 sc in next st, sl st in next st.
- Turn work, ch 1, 1 sc in the sl st, work 1 sc in each of the 40 ch sts along the handle.
- 1 sc in base st, sl st to complete strap. Fasten off.
- Finishing: Weave in all loose yarn tails securely on the wrong side of the work using a tapestry needle.
Detailed Pattern Breakdown
1. Solid Base Construction (R1 – R3)
- The foundation begins with a compact center ring (
MR 8 sc) that serves as the sturdy resting pad for the bottom of your cup. - Round 2 introduces small chain bridges (
ch 3) anchored by single crochets to create 4 initial loop anchors. - Round 3 solidifies this base by working full single crochets into every chain and stitch, expanding the circle to 20 stitches while maintaining a dense, non-sagging pad.
2. Expanding Chain Petal Mesh (R4 – R15)
- The illusion of concentric blooming petals is achieved through a rhythmic sequence: traveling along the previous round with slip stitches, placing 2 anchor
scstitches, and stretching long chain bridges over skipped stitches. - Every odd-numbered round works solid
scstitches into every single chain of those long bridges, transforming simple string loops into thick, defined petal outlines. - As the pattern progresses from
ch 7(skipping 3) up toch 23(skipping 17), the overall diameter grows outwards flat while maintaining flexible vertical stretch when suspended.
3. Dual Handle Architecture (R16 & Finishing)
- The dual handles are positioned symmetrically across 32 skipped stitches to ensure balanced weight distribution when carrying a full beverage.
- By chaining 40 and returning with a complete row of single crochet stitches, the straps gain structural integrity, preventing excessive stretching under the weight of liquid.
Pattern Question:
Question 1: Why does my flower cup holder look flat like a mandala coaster instead of a bag when I finish it?
Answer: That is the magic of this design! When placed on a flat surface, the cup holder naturally lies completely flat in a geometric rose pattern. Once you place a cup in the center solid base and lift the handles upward, gravity pulls the concentric chain rings into a 3D netting bag that wraps snugly around your cup.
Question 2: Can I adjust the length of the carrying handles?
Answer: Absolutely! If you prefer a short wristlet handle, reduce the chain count from ch 40 to ch 25 or ch 30. If you want a longer strap to slip over your forearm or elbow, increase the chain count to ch 50 or ch 55. Just make sure to work 1 single crochet into every chain on the return row.
Question 3: What type of yarn works best to prevent the holder from stretching out too much when holding a heavy drink?
Answer: 100% Cotton or 100% Acrylic yarns with low elasticity are ideal. Cotton is especially recommended for cup holders because it is strong, absorbent (catches cold cup condensation), and holds structural shape without sagging excessively under weight.