
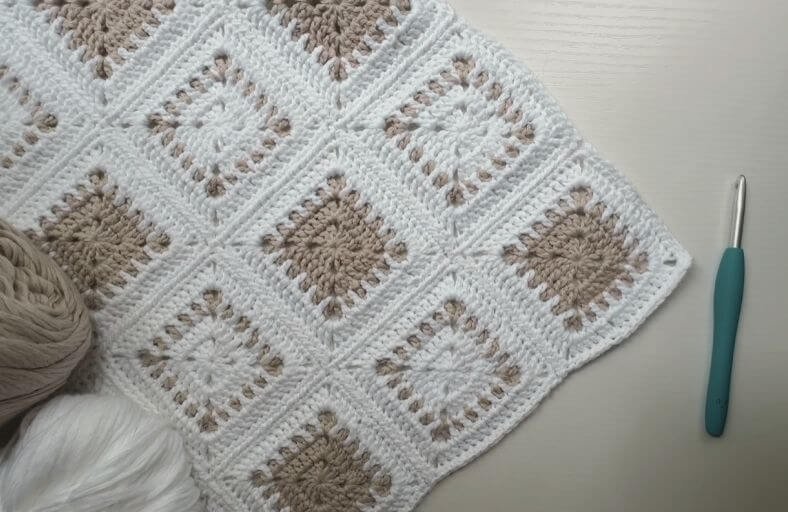
Ever looked at a gorgeous two-tone crochet blanket and immediately thought, “Nope, too many ends to weave in, my sanity can’t take it”?
What if you could achieve a mesmerizing, clean color-changing effect without swapping yarn every single stitch or leaving behind a tangled web of threads?
Welcome to the magic of the skip-stitch color work technique!
This project pairs classic solid granny squares with a clever layered construction and a seamless join-as-you-go method, making it a breezy, relaxing blanket project you will actually finish.
Materials and Preparation
Materials:
- Yarn: DK weight yarn in two contrasting shades (for this project, a soft Cotton/Merino chainette yarn in Off-White and Natural Tan/Beige was used).
- Care Note: Choose a super soft, breathable DK weight yarn suitable for sensitive baby skin.
Tools:
- Crochet Hook: 5.0 mm (US H/8) crochet hook (e.g., Clover Amour).
- Yarn Needle: Tapestry needle for weaving in the few remaining yarn tails.
- Scissors: Craft scissors.
Preparation Notes:
- Basic familiarity with double crochet, single crochet, chain stitches, and magic ring techniques is recommended.
- Keeping a consistent, comfortable tension ensures all individual granny squares remain uniform in size for seamless joining.
Abbreviations and Notes
Abbreviations:
- MR: Magic Ring
- ch: Chain
- sc: Single Crochet
- dc: Double Crochet
- sl st: Slip Stitch
- sk: Skip
- ch-sp: Chain Space
- JAYG: Join-As-You-Go
Pattern Notes:
- No Mid-Row Yarn Cutting: The two-tone round works by creating a mesh round in the first color with skipped stitches, then dropping it forward or back to work the second color into those skipped stitches from the previous round.
- Two Square Variants: Version A starts with the main tan center (2 solid rounds + 1 color change round + 1 solid joining round). Version B starts with a white center and uses an offset start position so corner motifs align perfectly.
Gauge, Approximate Size, and Pattern Notes
Gauge:
- Each completed 5-round square measures approximately 4.5 in x 4.5 in (11.5 cm x 11.5 cm). Gauge is not strictly critical, but consistent square size is important for assembly.
Finished Size:
- Baby Blanket Size: Approx. 32 in x 40 in (81 cm x 102 cm) depending on your row/column grid layout.
Special Techniques:
- Skip-Stitch Color Work: Working a mesh grid of
dc, ch 1, sk 1in Color A, then layering Color B into the skipped stitches from the row below, sandwiching the two layers together in the following round. - Flat Join-As-You-Go (JAYG): Joining squares on the final single crochet border round by dropping the working loop, inserting the hook into the corresponding stitch of the adjacent square, pulling the loop through, and executing the next stitch.
Step-by-Step Pattern
Part 1: Solid Granny Square – Version A (Tan Center)
Crochet the center part using tan (beige) yarn.
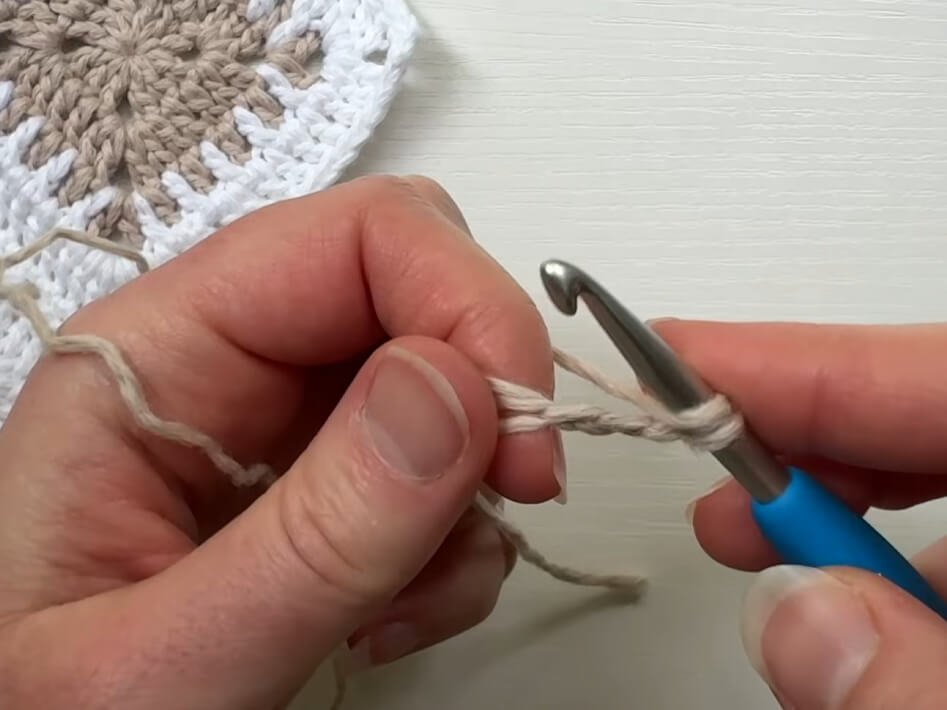
- R1: In MR: ch 3 (counts as dc), 2 dc, ch 2, (3 dc, ch 2)*3. Sl st to join round. Pull tail to cinch ring tight. (12 dc, 4 ch-2 corner spaces)
- R2: ch 3, 1 dc in each of next 2 stitches, (2 dc, ch 2, 2 dc) in corner ch-sp, *1 dc in each of next 3 stitches, (2 dc, ch 2, 2 dc) in corner ch-sp; repeat from * 2 more times. Sl st to top of starting ch-3 to join. (7 dc per side)
- R3 (Color Mesh Layer 1 – Tan): ch 4 (counts as dc + ch 1), sk 1, dc in next st, ch 1, dc in last st before corner, ch 1, (1 dc, ch 2, 1 dc) in corner ch-sp, *ch 1, dc in first st of side, (ch 1, sk 1, dc in next st)*3, ch 1, (1 dc, ch 2, 1 dc) in corner ch-sp; repeat from * 2 more times, ch 1, dc in first st, ch 1, sl st to 3rd ch of starting ch-4. Fasten off.
- R4 (Color Mesh Layer 2 – White): Attach White yarn in any skipped stitch of R2 by folding R3 forward. ch 4 (counts as dc + ch 1), sk the worked dc of R3, dc in next skipped st of R2, ch 1, dc in corner ch-2 sp between the corner stitches of R3, ch 4 (corner turn), dc in same corner ch-sp, ch 1, (dc in skipped st of R2, ch 1) to corner, (1 dc, ch 4, 1 dc) in corner ch-sp; repeat around. Join to start with sl st through both R4 ch-sp and R3 ch-sp behind it to lock layers.
- R5 (Sandwich Joining Round – White): ch 3. Working across side: when encountering a White st, work a dc into that st while catching the ch-1 sp of Tan behind; when encountering a Tan st, work a dc through the White ch-1 sp into the Tan st head behind. In corners: work (2 dc, ch 2, 2 dc) through both corner ch-sps simultaneously. Sl st to join.
Part 2: Solid Granny Square – Version B (White Center, Accent Round)
Crochet the center part using white yarn (start off-center to match the angle):
- R1: In MR: ch 3, 1 dc, ch 2, (3 dc, ch 2)*2, 3 dc, ch 2, 1 dc. Sl st to join in center of side. (12 dc, 4 corner spaces)
- R2: ch 3, 1 dc in next st, (2 dc, ch 2, 2 dc) in corner, *1 dc in each of next 3 sts, (2 dc, ch 2, 2 dc) in corner; repeat from * around. Sl st to join. (7 dc per side)
- R3 (White Mesh Layer): ch 4, sk 1, dc in next st, ch 1, dc in corner ch-2 sp, ch 4 (corner), dc in corner ch-sp, ch 1, sk first st after corner, dc in next st, (ch 1, sk 1, dc in next st) to corner, ch 1, (1 dc, ch 4, 1 dc) in corner; repeat around. Do not join yet; leave long loop.
- R4 (Tan Mesh Layer Behind): Attach Tan yarn in skipped st of R2, folding White layer forward. (1 dc, ch 1, sk 1)* across side. In corner: work (1 dc, ch 2, 1 dc) in corner space between the two White corner sts. Repeat around. Sl st to join Tan round and fasten off Tan.
- R5 (Sandwich Joining Round – White): Pick up White loop from R3. Sl st through White ch-sp and Tan ch-sp behind. Repeat sandwiching technique: work dc through both layers (front st with back space / front space with back st head). Corners: (2 dc, ch 2, 2 dc) through both layers. Sl st to join.
Part 3: Border & Assembly Details
Square Border (Single Crochet Round):
- R6 (Edge & JAYG Round): Attach White yarn (or continue from R5). ch 1, 1 sc in each st across side. In corners: (1 sc, ch 2, 1 sc).
Blanket Assembly (Join-As-You-Go Method):
- Step 1: Work R6 along non-adjacent sides normally.
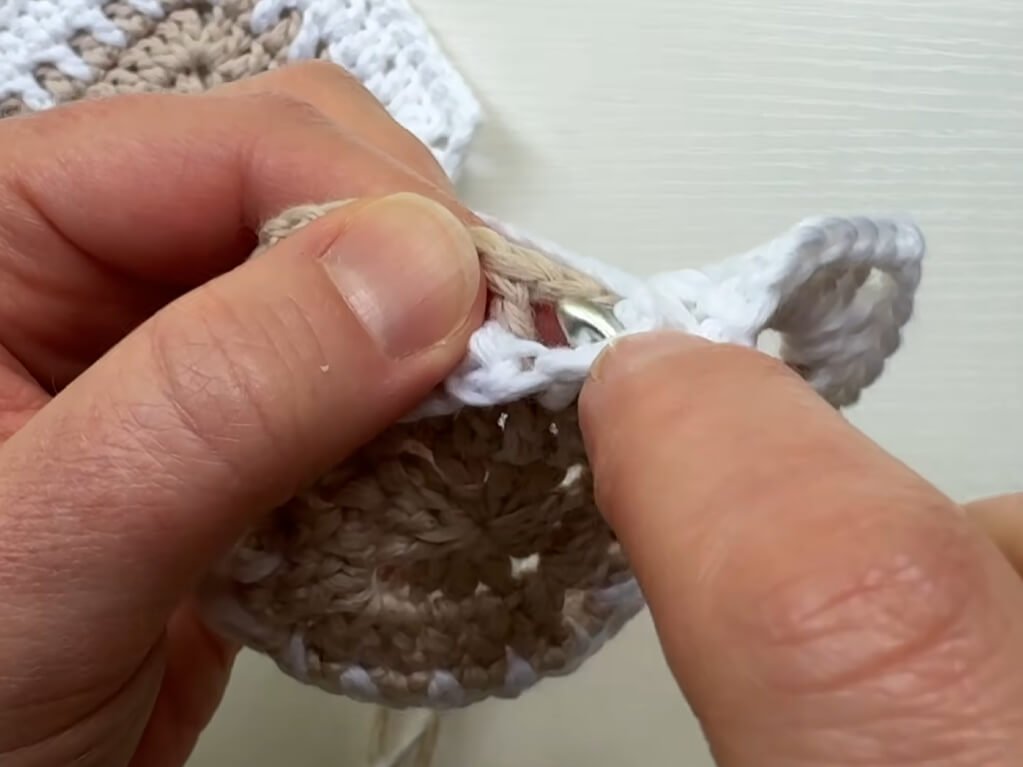
- Step 2: At a corner to be joined: 1 sc in corner ch-sp, ch 1, drop loop from hook, insert hook into corresponding corner ch-sp of completed adjacent square, pull working loop through, ch 1, 1 sc in corner ch-sp.
- Step 3: For each side st: drop loop, insert hook into corresponding st of adjacent square, pull loop through, work 1 sc into current square st. Repeat across edge.
Part 4: Edging, Assembly & Finishing
- Assembly Layout: Arrange Version A and Version B squares in an alternating checkerboard grid.
- Final Blanket Border: Once all squares are joined with JAYG, join White yarn at any outer corner of the blanket.
- Round 1: Work sc evenly around entire outer perimeter, working (1 sc, ch 2, 1 sc) in each 90-degree outer corner and 1 sc at each seam junction.
- Round 2: Work 1 dc in each st with (2 dc, ch 2, 2 dc) in four outer corners.
- Round 3: Optional decorative accent round using the skip-stitch technique along the blanket perimeter.
- Finishing: Fasten off all threads. Since yarn was carried within two-layer mesh rounds and worked over during R5, only 2-3 loose tails remain per square to weave in.
Detailed Pattern Breakdown
1. Version A Center & Mesh Layer Breakdown:
- Base Solid Block (R1–R2): Traditional solid granny construction where each side grows from 3 dc to 7 dc by adding 2 dc increases into each corner space (4 stitches gained per side per round).
- Two-Layer Color Construction (R3–R4): R3 creates a open lattice grid (
dc, ch 1, sk 1) in Tan. R4 creates an identical open lattice grid in White directly behind/in front by working exclusively into the skipped stitches of R2. - Interlocking Sandwich Round (R5): Re-joins the two floating mesh planes into a single unified fabric. Every stitch captures one front element (stitch or chain) and one back element (chain or stitch head), creating a solid, rich texture without bulk on the right side.
2. Version B Offset Alignment Breakdown:
- Offset Start (R1): Moving the join position to the middle of a side rather than near a corner ensures that when the accent color mesh is worked, the color pops align symmetrically in every corner across both A and B square types.
- Layer Positioning: Folding the White mesh forward while working the Tan mesh behind allows the single-round contrast accent color to peek subtly through the White background grid.
3. Join-As-You-Go (JAYG) & Finishing Breakdown:
- Flat Seam Mechanics: Connecting stitches on the fly avoids raised ridges or bulky seams on the back of the blanket. Dropping the loop and pulling it through from front-to-back creates an attractive twisted link between neighboring square borders.
- Minimal Ends Advantage: Because color changes are executed in continuous concentric rounds rather than stitch-by-stitch cut threads, end-weaving is reduced by over 80% compared to standard multi-color granny squares.
Pattern Question:
Question: Why do my two mesh rounds feel completely separated and floppy before Round 5, and how do I prevent the double crochet stitches in Round 5 from looking twisted or misaligned?
Answer: Don’t panic if Round 3 and Round 4 feel like two loose, independent grids sitting on top of each other! They are designed to float independently until Round 5.
To keep Round 5 neat and aligned: always ensure you are inserting your hook from front to back through both layers simultaneously. When working into a front stitch, pass your hook through its top loops AND under the chain-1 space directly behind it.
When working into a front chain space, pass your hook under the chain space AND through the top two loops of the stitch head behind it. This locks the two layers in perfect alignment, creating a clean, solid fabric.