

Ever lost your wireless earbuds at the bottom of a tote bag or wished your tech gear looked a little more tropical?
Say hello to your new favorite stash pouch: a sweet, texture-packed crochet pineapple earphone bag!
With a quick drawstring closure, an adjustable cord lock, and a cute little leaf top, this project is as functional as it is adorable.
Whether you are crafting your very first pouch or looking for a fast weekend gift project, this complete guide will walk you through every single stitch from base to leaves.
Materials and Preparation
Materials:
- Yarn:
- Yellow yarn (DK / light worsted weight boneless cotton yarn) for the pineapple body.
- Forest green yarn for the leafy top trim and drawstring ball.
- Stuffing: A tiny pinch of polyfill stuffing for the drawstring ball end.
- Accessories: 1 spring-loaded cord lock toggle (pig-nose buckle) for easy opening and closing.
Tools:
- Crochet Hook: 3.0 mm size hook.
- Yarn Needle: Tapestry needle for weaving in ends and cinch-closing the ball.
- Scissors: Sharp craft scissors.
- Stitch Marker: To keep track of rounds, especially during the small 3D ball assembly.
Preparation Notes:
- Master basic stitches such as chain (
ch), single crochet (sc), double crochet (dc), and slip stitch (sl st). - Keep your tension consistent throughout the V-stitch rounds so the pouch maintains a uniform waffle-like pineapple texture.
- Make sure to keep the center loop snug when working the Magic Ring (
MR) base to prevent small accessories or earbud cases from slipping through.
Abbreviations and Notes
Abbreviations:
- MR: Magic Ring (Magic Circle)
- ch: Chain stitch
- sc: Single crochet
- dc: Double crochet
- sl st: Slip stitch
- inc: Single crochet increase (2 sc in the same stitch)
- dec: Single crochet decrease (sc2tog)
- [dc, ch 1, dc]: V-stitch cluster
- ST / STS: Stitch / Stitches
Pattern Notes:
- The base (R1–R2) is worked in flat circular join rounds using double crochet stitches.
- The body walls (R3–R8) feature a textured V-stitch pattern worked directly into the
ch-1spaces of the previous round. - The drawstring cord is created separately using a long chain strand, threaded through the V-stitch mesh, and secured with a mini 3D leaf ball.
- Original design and pattern credit belongs to anxin_crochet.
Gauge, Approximate Size, and Pattern Notes
Gauge:
Gauge is not critical for this project, but stitches should be firm enough to hold the earphone case securely inside the bag.
Finished Size:
Approximately 3.5 inches x 2.8 inches (9 cm x 7 cm), perfect for fitting standard wireless earbud cases, lip balms, or small coins.
Special Techniques:
- V-Stitch Mesh: Created by working
[dc, ch 1, dc]into a single space, forming the signature pineapple diamond pattern. - Drawstring Threading: Inserting the cord in and out of the upper V-stitch holes for a smooth, single-pull closure.
- Cinched Spherical Assembly: Decreasing rounds and cinching the front loops to create a neat toggle stopper ball.
Step-by-Step Pattern
Part 1: Pineapple Body (Yellow Yarn)
Work in joined rounds:
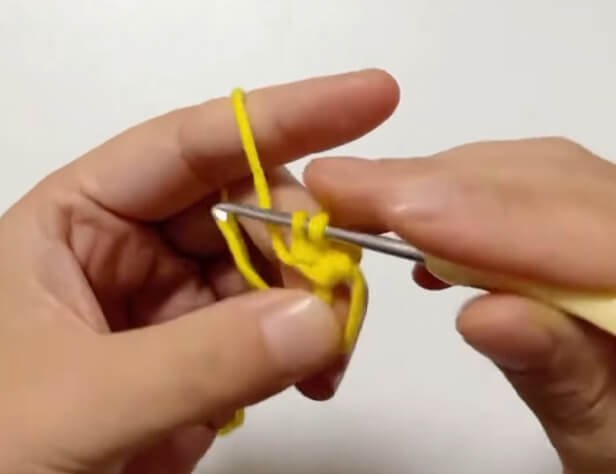
- R1: MR, ch 2 (does not count as a stitch), work 16 dc into the ring. Pull ring tight. Sl st to the first dc to join (16)
- R2: Ch 2, 2 dc in each stitch around. Sl st to the first dc to join (32)
- R3: Sl st into the first stitch, ch 3 (counts as dc), ch 1, dc in the same stitch (first V-stitch made). *Skip 2 sts, work [dc, ch 1, dc] in the next st; repeat from * around. Skip the last remaining st, sl st into the 3rd chain of the starting ch-4 to join (10 V-stitches)
- R4: Sl st into the first ch-1 space of the V-stitch. Ch 3, ch 1, dc in the same ch-1 space. *Work [dc, ch 1, dc] into the next V-stitch ch-1 space; repeat from * around. Sl st into the 3rd chain of the starting ch-4 to join (10 V-stitches)
- R5–R7: Repeat R4 (10 V-stitches per round)
- R8: Sl st into the first ch-1 space. Ch 3, ch 1, dc in the same space. Work [dc, ch 1, dc] into each remaining ch-1 space around. Sl st to join. Fasten off yellow yarn and weave in ends.

Part 2: Leafy Collar & Upper Rim (Green Yarn)
Attach green yarn to any V-stitch ch-1 space from R8:
- R9 (V-Stitch Foundation): Tie green yarn into a V-stitch ch-1 space. Ch 3, ch 1, dc in the same space. Work [dc, ch 1, dc] into each V-stitch ch-1 space around (10 V-stitches). Sl st into the 3rd chain of the starting ch-4 to join.
- R10 (Crown Leaf Shells): Sl st into the first ch-1 space, ch 1, sc in the same space. *Work 5 dc into the next V-stitch ch-1 space, sc in the next V-stitch ch-1 space; repeat from * around. Sl st to the first sc to join (5 leaf scallops). Fasten off and weave in ends neatly.
Part 3: Drawstring & Decorative End Ball
Section A: Drawstring Cord (Green Yarn)
- Foundation: Ch 50 (or desired length for comfortable opening). Fasten off, leaving short tails on both ends.
Section B: Mini Decorative End Ball (Green Yarn)
- R1: MR, 6 sc (6)
- R2: Inc in each st around (12)
- R3–R4: Sc in each st around (12)
- R5: Dec 6 times around (6)
- Assembly note: Place the knotted end of the drawstring cord inside the ball, add a tiny pinch of polyfill stuffing around it, then sl st to join. Fasten off leaving a tail, thread through front loops of the 6 sts, pull tight to close, and hide thread inside the ball.
Part 4: Assembly & Finishing
- Step 1: Locate the upper green V-stitch row (R9) right below the crown leaf scallops.
- Step 2: Weave the 50-chain drawstring cord in and out through the V-stitch openings around the circumference of the bag.
- Step 3: Pass both ends of the drawstring through the two holes of the spring-loaded cord lock buckle (pig-nose toggle).
- Step 4: Tie a secure knot with both cord tails together.
- Step 5: Attach and crochet the mini green ball around the knot as instructed in Part 3 Section B to conceal the ends seamlessly.
- Step 6: Trim any remaining threads, pull the toggle to cinch the pouch closed, and your pineapple earphone bag is complete!
Detailed Pattern Breakdown
1. Base Construction Breakdown (R1–R2):
- Flat Circle Foundation: Starting with a 16 dc Magic Ring provides a sturdy, flat circular base that balances the bottom of the earphone pouch.
- Symmetric Expansion: Doubling every stitch in R2 to 32 stitches opens up the width perfectly to accommodate standard charging cases without causing wavy edges.
2. Pineapple Texture Breakdown (R3–R8):
- V-Stitch Geometry: The combination of
[dc, ch 1, dc]creates open V-shaped windows. Skipping 2 base stitches keeps the canvas flat while building vertical height efficiently. - Stacked Shell Effect: Working subsequent rounds directly into the
ch-1spaces aligns the stitches vertically, creating a distinctive diamond grid that mimics real pineapple skin.
3. Crown Leaf & Drawstring Mechanics Breakdown (R9–R10 & Cord):
- Integrated Drawstring Row: R9 serves a double purpose. It acts as the color transition to green leaves and provides sturdy eyelets for the drawstring to slide freely.
- Scalloped Leaf Crown: Alternating 5 dc shells with sc anchor stitches creates five upright leaf points that flare outwards when the pouch is cinched shut.
- Enclosed Toggle Ball: Decreasing the small ball around the drawstring knot locks the toggle in place and conceals raw yarn ends without messy gluing.
Pattern Question:
Question: Why does my pouch look twisted, and how do I make sure the drawstring glides smoothly without catching on the stitches?
Answer: A slight twist can happen if you slip stitch into the wrong chain space at the end of a round. Always ensure you slip stitch into the 3rd chain of your initial starting chain, then perform an extra slip stitch directly into the ch-1 V-space before starting the next round.
For the drawstring, weave the chain strand strictly through the ch-1 gaps of the V-stitches rather than through the middle of double crochet posts. This keeps the cord sliding effortlessly without pulling on individual yarn fibers!