
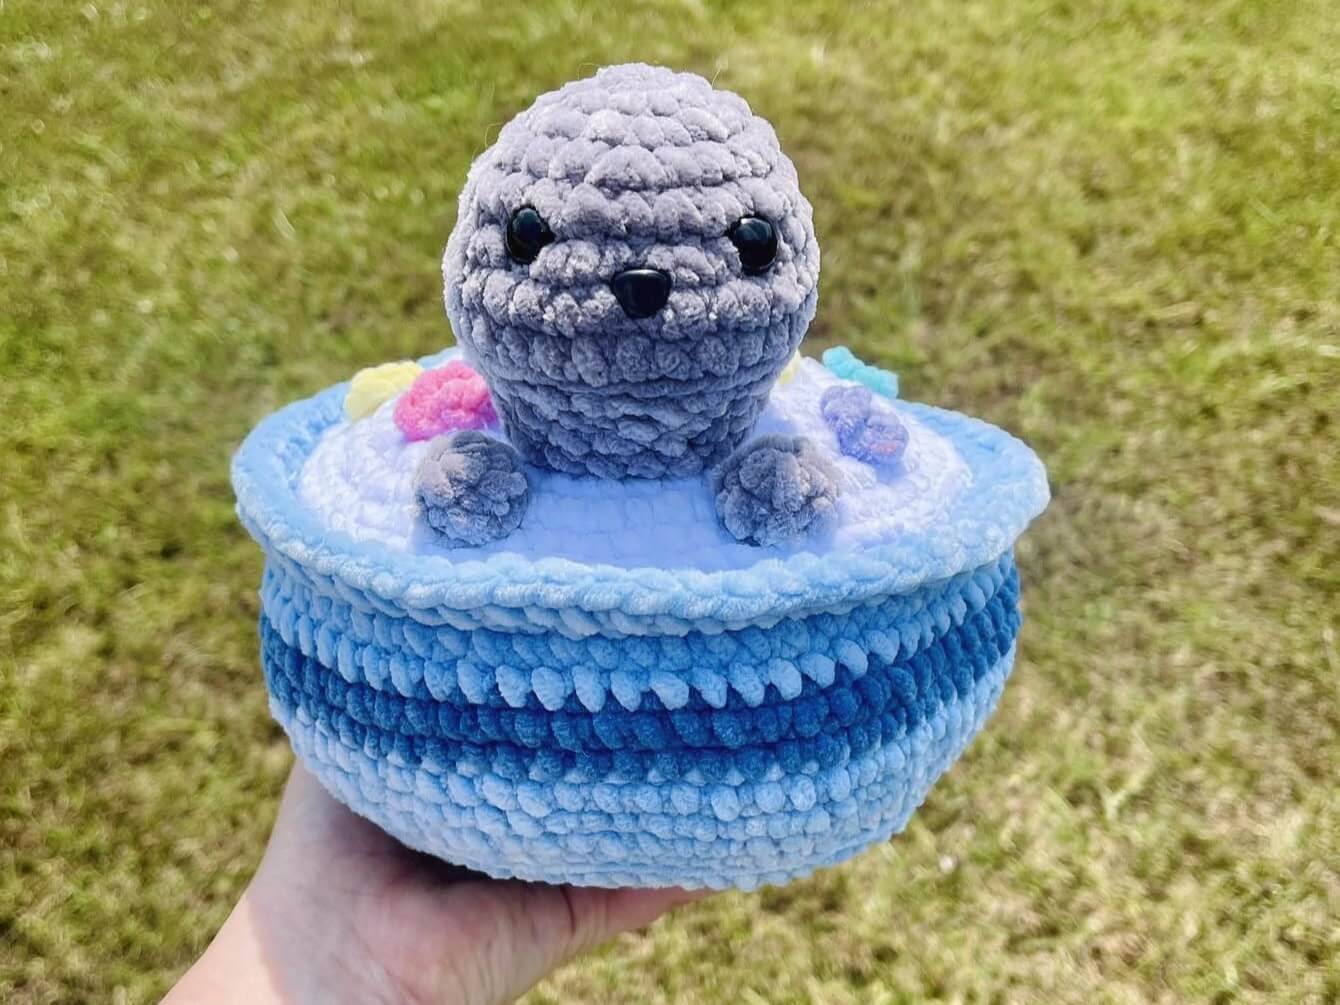
Ever wondered what happens when a playful baby seal stumbles upon a vibrant bowl of morning cereal?
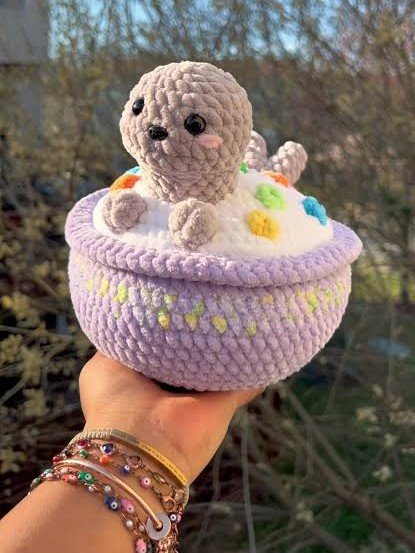
You get the adorable “Sealreal”, a pun-tastic, ultra-cuddleable amigurumi creation that brings a splash of whimsical joy to any room!
This charming project combines plush yarn textures, colorful fruit loops, and an irresistible sea pup taking a sweet dip in a milk filled bowl.
Materials and Preparation
Materials:
- Yarn: Plush plush/chenille yarn in grey, white, blues (dark and light secondary shades), orange, yellow, light green, hot pink, and dark purple.
- Safety Eyes: 10 mm safety eyes.
- Safety Nose: 1 safety nose.
- Stuffing: Fiberfill / Polyfill stuffing.
Tools:
- Crochet Hooks: 4.0 mm, 4.5 mm, and 5.0 mm crochet hooks.
- Yarn Needle: Sewing needle for joining components.
- Scissors: Yarn scissors.
- Stitch Markers: To mark continuous rounds.
Preparation Notes:
- Keep your tension consistent throughout the project to ensure the bowl holds its structured shape and the stuffing remains neatly hidden inside the seal components.
- Note that the bowl base uses a significant amount of yarn, so be sure to have an extra skein of your primary bowl color on hand before starting.
Abbreviations and Notes
Abbreviations:
- MR: Magic ring
- sc: Single crochet
- inc: Single crochet increase (2 sc in the same stitch)
- dec: Single crochet decrease
- flo: Front loop only
- blo: Back loop only
- sl st: Slip stitch
- ch: Chain
- f/o: Fasten off
Pattern Notes:
- Work in continuous spiral rounds unless instructed otherwise.
- Use a stitch marker at the beginning of each round to keep track of stitch counts.
- Original design and pattern credit belongs to crochet_by_kt.
Gauge, Approximate Size, and Pattern Notes
Gauge:
Gauge is not critical for this pattern, but stitching tight enough to prevent fiberfill stuffing from showing through is essential.
Finished Size:
Approximately 6 inches (15.2 cm) in diameter and 6.5 inches (16.5 cm) in total height when crafted with bulky plush yarn.
Special Techniques:
- Joining Tail Fins: Connecting two separate small crocheted pieces in the round without cutting thread on the second fin.
- Loop Threading for Cereal: Pulling both yarn tails through the milk layer and knotting on the reverse side for secure attachment.
Step-by-Step Pattern
Part 1: Cereal Bowl & Milk Layer
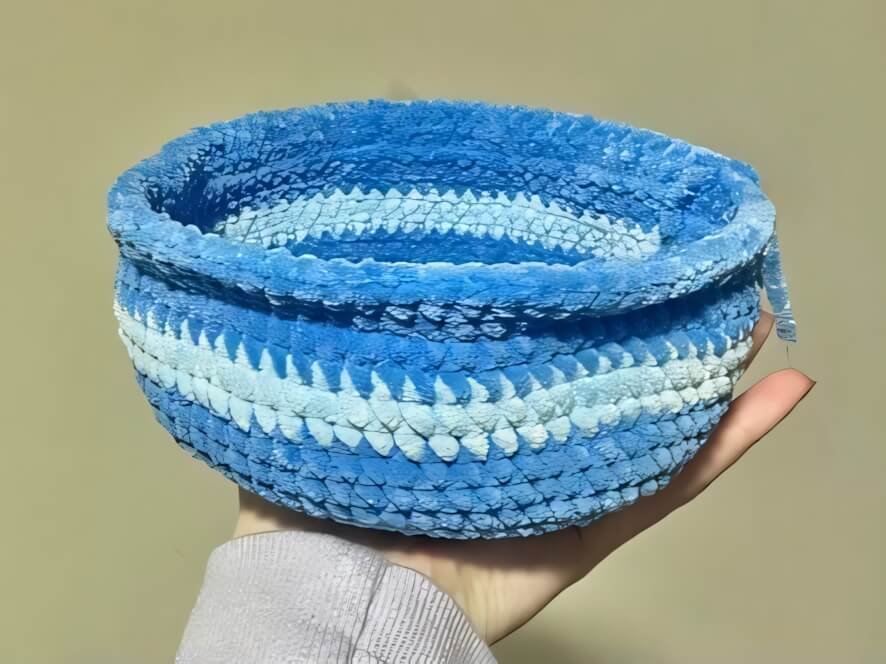
Cereal Bowl
Use a 5.0 mm hook and primary blue yarn:
- R1: 8 sc in MR (8)
- R2: 8 inc (16)
- R3: (sc, inc) x8 (24)
- R4: sc, inc, (2 sc, inc) x7, sc (32)
- R5: (3 sc, inc) x8 (40)
- R6: 2 sc, inc, (4 sc, inc) x7, 2 sc (48)
- R7: (5 sc, inc) x8 (56)
- R8: 3 sc, inc, (6 sc, inc) x7, 3 sc (64)
- R9: (7 sc, inc) x8 (72)
- R10: blo sc around (72)
- R11–13: sc around (72)
- Change to secondary blue color:
- R14–15: sc around (72)
- Change back to primary blue color:
- R16–17: sc around (72)
- R18: flo sc around (72)
- R19: sc around (72)
- Fasten off and weave in the tail.
Milk
Use a 5.0 mm hook and white yarn:
- R1: 8 sc in MR (8)
- R2: 8 inc (16)
- R3: (sc, inc) x8 (24)
- R4: sc, inc, (2 sc, inc) x7, sc (32)
- R5: (3 sc, inc) x8 (40)
- R6: 2 sc, inc, (4 sc, inc) x7, 2 sc (48)
- R7: (5 sc, inc) x8 (56)
- R8: 3 sc, inc, (6 sc, inc) x7, 3 sc (64)
- R9: (7 sc, inc) x8 (72)
- Fasten off, leaving a long tail for sewing.
Part 2: Seal Head & Tail
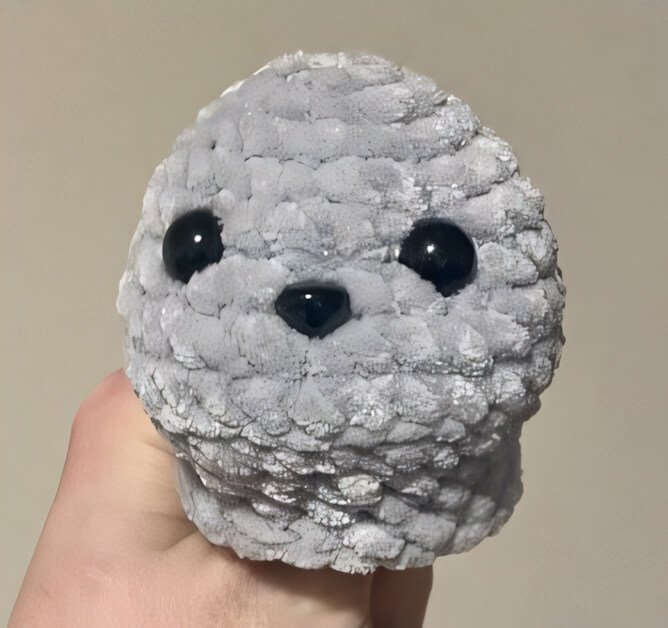
Seal Head
Use a 4.5 mm hook and grey yarn:
- R1: 6 sc in MR (6)
- R2: 6 inc (12)
- R3: (sc, inc) x6 (18)
- R4: sc, inc, (2 sc, inc) x5, sc (24)
- R5: sc around (24)
- R6: 10 sc, flo(sc, inc) x4, 6 sc (28)
- R7–8: sc around (28)
- R9: blo (2 sc, dec) x7 (21)
- R10: 9 sc, (sc, dec) x3, 3 sc (18)
- R11–12: sc around (18)
- Attach 10 mm safety eyes between rounds 5 and 6, about 4 stitches apart.
- Attach safety nose between rounds 6 and 7.
- Fasten off, leaving a long tail for sewing.
Seal Tail
Use a 5.0 mm hook and grey yarn:
- First Tail Fin:
- R1: 4 sc in MR (4)
- R2: sc around (4)
- R3: (sc, inc) x2 (6)
- R4: (2 sc, inc) x2 (8)
- R5: (2 sc, dec) x2 (6)
- Fasten off first tail fin.
- Second Tail Fin:
- Repeat R1–R5 as above.
- DO NOT FASTEN OFF THE SECOND TAIL FIN. Continue crocheting directly off the second tail fin.
- Joining Fins:
- R6: sc into the first tail fin and place stitch marker into that stitch. 5 sc around first fin, sc into second fin, 5 sc around second fin (12).
- R7: 2 sc, dec, 4 sc, dec, 2 sc (10)
- R8: 2 sc, dec, 3 sc, dec, sc (8)
- Fasten off, leaving a long tail for sewing.
Part 3: Small Accessories
Fruit Loops (Make 12 total)
Use a 4.0 mm hook. Make 2 loops in each color: light green, orange, yellow, turquoise, dark purple, and hot pink:
- Leaving a long tail, ch 7.
- sl st into the first ch to form a loop.
- Fasten off, leaving a long tail for sewing.
Seal Paws (Make 2)
Use a 4.5 mm hook and grey yarn:
- R1: 6 sc in MR (6)
- R2: sc around (6)
- Fasten off, leaving a long tail for sewing.
Part 4: Edging, Assembly & Finishing
- Attaching Cereal Loops:
- Thread both tails of a fruit loop through the milk piece.
- Take one of the tails and thread it back through the other side of the fruit loop.
- Push the tail back down through the milk and tie both tails securely together on the reverse side.
- Repeat for all 12 fruit loops scattered across the milk surface.
- Attaching Seal Components to Milk:
- Stuff the seal head with polyfill and sew it onto the milk surface between rounds 3 and 7.
- Stuff the seal tail lightly and sew it onto the opposite side of the head onto round 9 of the milk.
- Attaching Milk to Bowl:
- Position the milk piece onto the back loops of round 18 of the cereal bowl.
- Sew around the circumference, stuffing the bowl firmly with polyfill as you go.
- Final Paws Placement:
- Sew the two seal paws onto the milk layer right between the seal head and the edge of the bowl.
Detailed Pattern Breakdown
1. Cereal Bowl & Milk Base Construction
The foundation of the Sealreal project centers around creating structural circular planes:
- The Bowl Structure: Built from an 8-stitch magic ring that expands evenly by 8 stitches per round until reaching 72 stitches at Round 9. The transition to the walls is achieved via Round 10’s Back Loop Only (
blo) single crochet stitches, creating a clean 90-degree ridge that forces the work upward. Alternating yarn colors at Rounds 14–15 creates decorative stripes. The lip of the bowl uses Front Loop Only (flo) stitches at Round 18 to form a fold-over edge rim. - The Milk Disk: Matches the exact flat diameter of the bowl base by expanding to 72 stitches across 9 rounds. This match allows the milk layer to be sewn seamlessly into the back loops of the bowl’s Round 18.
2. Seal Head & Joined Tail Fins
- Seal Head Contour: Starts with a standard 6-stitch magic ring and increases to 24 stitches. Round 6 utilizes Front Loop Only (
flo) increases across 4 stitches to shape a protruding muzzle area. Decreases along Round 9 via Back Loop Only (blo) pull the neck inward while creating a natural seating angle for mounting onto the flat milk disk. - Tail Fin Joinery: Two separate fin cones are crocheted starting with 4 stitches and widening to 8. Rather than cutting the working yarn on the second fin, Round 6 directly bridges into the first fin, combining both 6-stitch edges into a unified 12-stitch perimeter. Tapering decreases in Rounds 7 and 8 turn two isolated fins into a single continuous tail stalk.
3. Cereal Attachment & Final Assembly
- Zero-Sew Loop Knotting: Instead of standard surface sewing, the 12 fruit loops utilize dual yarn ends pulled through the mesh of the milk disk. Knotting the ends underneath keeps the surface clean and ensures the loops lie flat against the milk layer.
- Final Layering: After all surface details are secured to the milk disk, the milk is stitched into the back loops of the bowl rim while stuffing is added underneath. Placing the paws between the head and the bowl edge gives the seal its adorable appearance of resting on the rim.
Pattern Questions
Question 1: Why is my cereal bowl turning out floppy instead of holding a firm bowl shape?
Answer: If your bowl feels soft or sags, your hook size may be too large or your stitch tension too loose. Using a 5.0 mm hook with dense plush yarn is recommended, but if your stitches feel loose, drop down to a 4.5 mm hook. Additionally, make sure to stuff the bowl firmly with fiberfill underneath the milk disk before closing the final join stitches.
Question 2: How do I join the two tail fins without leaving a hole in the center gap?
Answer: When joining the second tail fin to the first fin on Round 6, work your first sc firmly into the next stitch of the first fin. If a tiny gap remains between the fins at the bridge point, use the long starting tail left from the first fin to weave through the gap and pull it snug before weaving in the end.
Question 3: What is the best way to secure the safety eyes on plush yarn so they don’t slip out?
Answer: Because chenille and plush yarns have a soft, open weave, smaller safety eye backings can sometimes slip through the stitches. You can place a small washer or a circle of felt behind the plush fabric before pushing the plastic washer onto the eye post between Rounds 5 and 6. This gives the safety backing a wider anchor surface against the soft yarn.