

Ever looked at your plain car tissue box and thought, “This really needs to look like a chubby panda eating bamboo”?
Whether you want to upgrade your car interior or just bring some unbearable cuteness to your desk, this Panda Tissue Box holder is here to save the day!
Featuring an easy-pull tissue slot on its belly, adorable stitched details, and a sweet little stalk of bamboo held in its paws, this project is as functional as it is charming.
Materials and Preparation
Materials:
- Yarn:
- Chunky Plush / Velvet / Chenille Yarn in White (Main body & head)
- Chunky Plush / Velvet / Chenille Yarn in Black (Ears, eye patches, arms, and feet)
- 4-ply / 5-ply Milk Cotton Yarn in Light Green and Dark Green (Bamboo stalk & leaf)
- Pink Yarn (Cheeks & paw pad details)
- Zipper: 1 zipper (matching the length of the bottom tissue refill opening)
- Stuffing: Polyfill stuffing (for the bamboo stalk)
- Keychains/Straps: Optional hanging chain/strap for car headrest mounting
Tools:
- Crochet Hook:
- 4.5 mm – 5.5 mm (or recommended size for plush yarn)
- 3.0 mm (for the cotton bamboo stalk)
- Yarn Needle: Tapestry needle for sewing parts and embroidering facial features
- Stitch Markers: Essential for marking the first and last stitches of each oval round
- Scissors: Yarn scissors
Preparation Notes:
- Hold two strands of yarn together if using a thinner yarn to achieve the chunky, plush texture for the body.
- Keep your tension firm when working with plush yarn so no gaps appear in the fabric.
- Make sure to place stitch markers at the start and end of every round to keep track of increases on the oval base.
Abbreviations and Notes
Abbreviations:
- MR: Magic Ring
- ch: Chain stitch
- sc: Single crochet
- inc: Single crochet increase (2 sc in the same stitch)
- dec: Single crochet decrease (sc2tog)
- hdc: Half double crochet
- sl st: Slip stitch
- BLO: Back Loop Only
- FLO: Front Loop Only
Pattern Notes:
- The main body is worked in continuous oval rounds starting from a foundation chain.
- Sl st at the end of rounds and ch 1 at the beginning of new rounds where specified.
- Color changes occur at the last yarn over of the previous stitch.
- The bamboo stalk is crocheted separately using cotton yarn and attached to the body.
- Original design and pattern credit belongs to huhu_crochet.
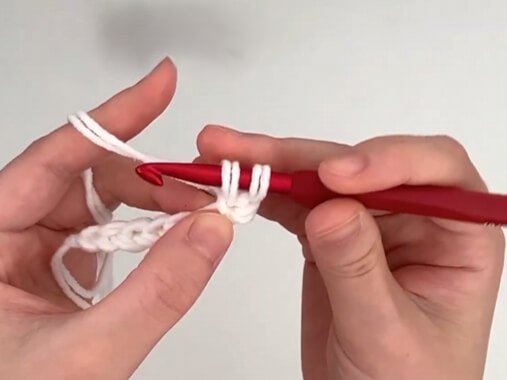
Gauge, Approximate Size, and Pattern Notes
Gauge:
Exact gauge is not critical for this project. Ensure your stitches are tight enough so that the tissue pack stays securely inside without slipping through gaps.
Finished Size:
Approximately 8.5 in x 6 in x 5.5 in (22 cm x 15 cm x 14 cm), designed to fit standard travel/car tissue refill packs.
Special Techniques:
- Oval Base Expansion: Increasing at the curved ends while keeping the middle straight stitches constant to form an oval tissue box base.
- Invisible Decrease (dec): Insert hook into FLO of next two stitches, yarn over, pull through two loops, yarn over, pull through remaining two loops.
- Tissue Opening Slot: Created by working a chain space in one round and skipping the corresponding stitches below, then working into the chain stitches on the next round.
Step-by-Step Pattern
Part 1: Ears & Facial Features
Ears (Make 2)
Work in rounds with Black Yarn:
- R1: MR 5 sc (5)
- R2: ch 1, turn (or close ring), pull yarn tight, leave a long tail for sewing. (5) Fasten off, leaving a long tail.
Feet (Make 2)
Work in rounds with Black Yarn:
- R1: MR 8 sc (8)
- R2: ch 1, 8 inc (16)
- Sl st to join, fasten off, and weave in ends. Embroider pink paw pads onto the black circle using pink yarn.
Arms (Make 2)
Work in rows with Black Yarn:
- Foundation: ch 4
- R1: Starting in 2nd ch from hook, 2 hdc, 4 hdc in the last ch. Turn to work on opposite side of chain: 2 hdc, ch 1. (8) Fasten off, leaving a long tail for sewing.

Part 2: Main Body & Head
Start with White Yarn (or main body color):
- Foundation: ch 8
- R1: Start in 2nd ch from hook, 5 sc, 3 sc in the last ch. Turn to work along the other side of the foundation chain: 5 sc, 2 sc in the last ch. Sl st to 1st sc to join. (16)
- R2: ch 1, inc, 5 sc, 3 inc, 5 sc, 2 inc. Sl st to join. (22)
- R3: ch 1, (1 sc, inc), 5 sc, (1 sc, inc)*3, 5 sc, (1 sc, inc)*2. Sl st to join. (28)
- R4: ch 1, 1 sc, inc, 1 sc, 5 sc, (1 sc, inc, 1 sc)*3, 5 sc, (1 sc, inc, 1 sc)*2. Sl st to join. (34)
- R5: ch 1, 3 sc, inc, 5 sc, (3 sc, inc)*3, 5 sc, (3 sc, inc)*2. Sl st to join. (40)
- R6: ch 1, 40 sc. Sl st to join. (40)
- R7: ch 1, 2 sc, inc, 2 sc, 5 sc, (2 sc, inc, 2 sc)*3, 5 sc, (2 sc, inc, 2 sc)*2. Sl st to join. (46)
- R8–R9: Repeat oval increase logic to reach 52 stitches across the round. (52)
Change to Black Yarn at the end of R9:
- R10–R12: ch 1, 52 sc. Sl st to join. (52)
Change back to White Yarn at the end of R12:
- R13: ch 1, (3 sc, inc, 3 sc), 5 sc, (3 sc, inc, 3 sc)*3, 5 sc, (3 sc, inc, 3 sc)*2. Sl st to join. (58)
- R14 (Tissue Opening Round): ch 1, 33 sc, ch 13, skip 13 sts, 12 sc. Sl st to join. (58)
- R15: ch 1, 33 sc, 13 sc across the ch-13 space, 12 sc. Sl st to join. (58)
- R16–R19: ch 1, 58 sc. Sl st to join. (58)
- R20: ch 1, dec, dec, 15 sc, 4 dec, 1 sc, 4 dec, 15 sc, 4 dec, 1 sc, dec. Sl st to join. (44)
- R21–R22: Follow decrease pattern according to chart to taper bottom edges. (36) Fasten off and leave a long tail for zipper assembly.
Part 3: Bamboo Stalk & Leaves
Bamboo Stalk
Work with 3.0 mm hook and Light Green Cotton Yarn:
- R1: MR 11 hdc (11)
- R2: BLO 11 hdc (11)
- R3–R5: 11 hdc (11)
- R6: BLO 11 hdc (11) (Creates bamboo node ridge)
- R7–R11: 11 hdc (11)
- R12: BLO 11 hdc (11) (Creates second bamboo node ridge)
- R13–R15: 11 hdc (11)
- Stuff with polyfill as you work.
- R16: BLO 6 dec. Sl st to join. (6) Fasten off and cinch closed.
- Node Details: Attach Dark Green yarn to the unworked front loops of R2, R6, and R12; work 11 sc around to create raised ridges.
Bamboo Leaf
Work in rows with Dark Green Yarn:
- Foundation: ch 7
- R1: Starting in 2nd ch from hook, sl st, sl st, 2 hdc, 1 sc, sl st, ch 2. Turn to work on opposite side: sl st, 1 sc, 2 hdc, 2 sl st.Fasten off and sew to the bamboo stalk.
Part 4: Assembly & Finishing
- Facial Features: Embroider black eye patches, closed nose/mouth lines, and pink cheeks onto the upper white head section (R4–R8).
- Ears & Feet: Sew ears securely between R2 and R3 on top of the head. Attach the black paws to the bottom front corners.
- Bamboo & Arms: Attach the bamboo stalk horizontally across the panda’s belly just above the tissue slot. Sew arms over the bamboo stalk to make it look like the panda is hugging it.
- Zipper Attachment: Sew the zipper along the bottom back opening (R22) using a tapestry needle and strong thread.
- Hanging Strap (Optional): Attach a clip or chain to the top/back to hang the tissue box on a car headrest.
Detailed Pattern Breakdown
1. Main Body & Tissue Slot Mechanics
- Base Expansion (R1–R9): The body starts as an oval constructed around an 8-chain foundation. By placing multiple increases at both curved ends while keeping 5 straight sc stitches constant in the middle, the piece creates a flat top-to-side transition.
- Color Blocking: Switching to black yarn for R10–R12 creates the signature panda shoulder band before returning to white for the lower body.
- Tissue Dispenser Slot (R14–R15): Skipping 13 stitches while chaining 13 creates a clean, reinforced slot on the panda’s belly. Working back into these chains on R15 locks the edge so it doesn’t stretch or fray when tissues are pulled out.
2. Bamboo Construction
- 3D Cylinder & Ridges: The bamboo is built using continuous hdc rounds. Working in the Back Loops Only (BLO) at intervals (R2, R6, R12) leaves exposed front loops.
- Raised Accent Rings: Surface crocheting single crochet stitches into the saved FLO loops with a darker green yarn creates 3D bamboo nodes that pop out visually.
3. Ears, Arms, and Feet Placement
- Ears: Kept simple with a half-circle construction (MR 5 sc) so they sit flat against the rounded head without flipping over.
- Arms & Feet: The arms use half double crochet stitches (hdc) to give them extra width to wrap over the bamboo stalk. The feet use full circle expansions with embroidered pink pads.
Pattern Question
Question: How do I ensure the tissue opening stays neat and doesn’t sag or stretch out when tissues are pulled through?
Answer: When working R14, make sure your 13 chain stitches are made with tight tension. On R15, insert your hook under a single loop of each chain stitch rather than wrapping around the whole chain space; this produces a firm, crisp edge.
Additionally, using a stiffer plush yarn or holding two strands of cotton/acrylic yarn together provides the necessary structure to keep the opening flat and functional.