
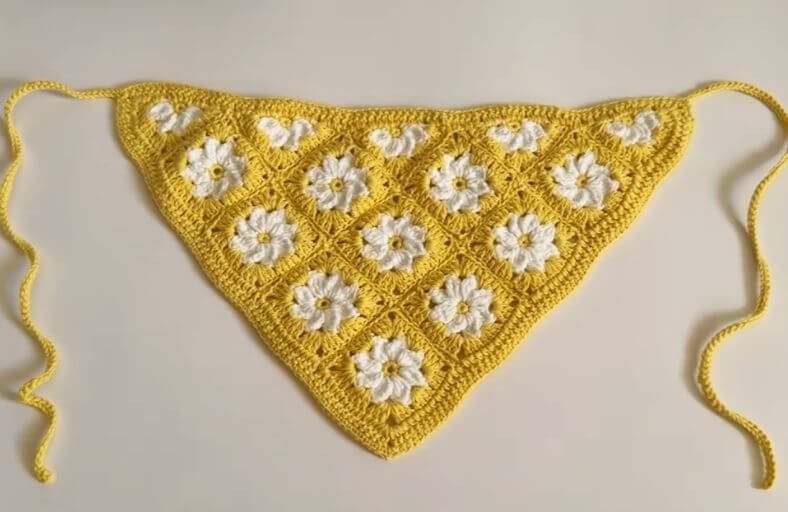
Ready to channel those dreamy cottagecore vibes while saving yourself from a total bad hair day?
This retro daisy granny square bandana is the ultimate hair accessory: stylish, functional, and surprisingly quick to whip up.
By combining charming solid floral squares with neat half-triangle motifs, this project lays out into a perfectly fitted triangular headscarf with sturdy ties.
Materials and Preparation
Materials:
- Yarn: Medium / Worsted weight cotton or acrylic yarn in three colors:
- Color A: Yellow (Center of flower and main joining/border color)
- Color B: White (Petals)
- Color C: Green or Brown (Optional alternative background color for custom versions)
- Tapestry Needle: For seaming motifs together and weaving in ends.
Tools:
- Crochet Hook: 3.5 mm – 4.0 mm (Size E-4 or G-6) hook (adjust according to yarn weight).
- Scissors: Sharp craft scissors.
- Stitch Markers: To help line up motif corners during seaming.
Preparation Notes:
- You will need to make a total of 10 Granny Squares and 5 Half-Triangles before assembling the bandana base.
- Keep your tension consistent across all motifs so they align seamlessly during tapestry seaming.
Abbreviations and Notes
Abbreviations:
- MR: Magic Ring
- ch: Chain
- sc: Single Crochet
- dc: Double Crochet
- tc: Triple / Treble Crochet
- sl st: Slip Stitch
- cluster: 4 Treble Crochet Cluster / 4 Double Treble Together (4 tc finished together in same stitch)
- BLO: Back Loop Only
Pattern Notes:
- The motif centers are worked in rounds, starting from a magic ring.
- Color changes occur at the end of R1 and R2 for every square and triangle motif.
- Seaming is completed from the wrong side using a tapestry needle and whip stitch / back loop mattress stitch.
- The main border and ties are added in two final edging rounds around the assembled base.
- Original design and pattern credit belongs to Casttañaz Crochets.
Gauge, Approximate Size, and Pattern Notes
Gauge:
- Each completed granny square measures approximately 2.2 inches (5.5 cm) per side.
Finished Size:
- Base Width (excluding straps): Approximately 16.5 inches (42 cm).
- Center Height (from top edge to bottom point): Approximately 9.5 inches (24 cm).
- Tie Length: Each tie measures approximately 13.8 inches (35 cm).
Special Techniques:
- 4-Treble Cluster (4-tc cluster): Yarn over twice, insert hook into stitch, yarn over and pull up a loop, (yarn over, draw through 2 loops) twice (2 loops remain on hook). Repeat 3 more times in the same stitch until you have 5 loops on hook. Yarn over and pull through all 5 loops.
- Single-Loop Back Seaming: Joining motifs through the inner loops only to create an invisible seam on the right side.
Step-by-Step Pattern
Part 1: Daisy Granny Square (Make 10)
Start with Yellow yarn:
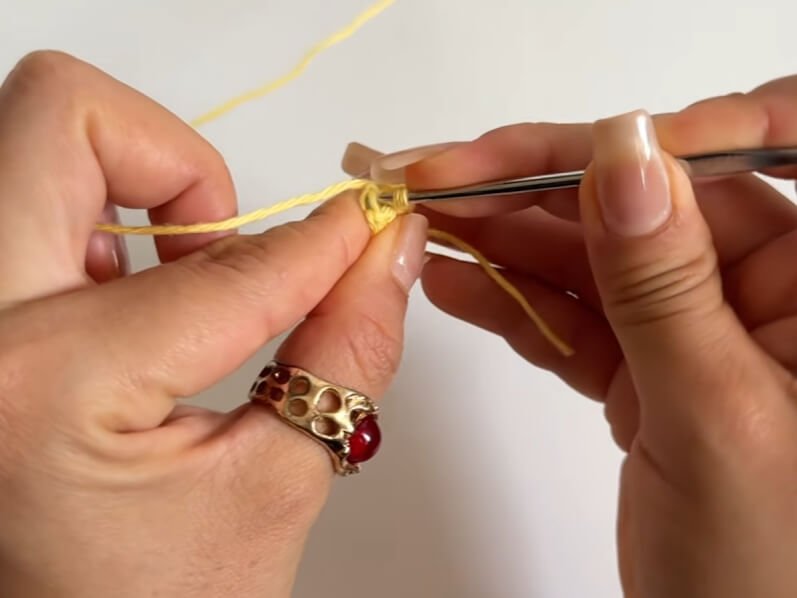
- R1: In MR, ch 1 (does not count as st), 8 sc into ring. Pull tail tightly to close ring. Join with sl st to first sc, changing to White yarn on the last pull-through. Cut Yellow yarn. (8 sc)
Switch to White yarn:
- R2: Ch 4 (counts as first tc of cluster), work 3 tc in same st leaving last loop of each on hook, yarn over and pull through all loops on hook (first 4-tc cluster made). Ch 3, work 4-tc cluster in next st. Repeat from * to * 6 more times. Ch 3, join with sl st to top of first cluster. Cut White yarn. (8 petals / clusters, 8 ch-3 spaces)
Switch to Yellow yarn:
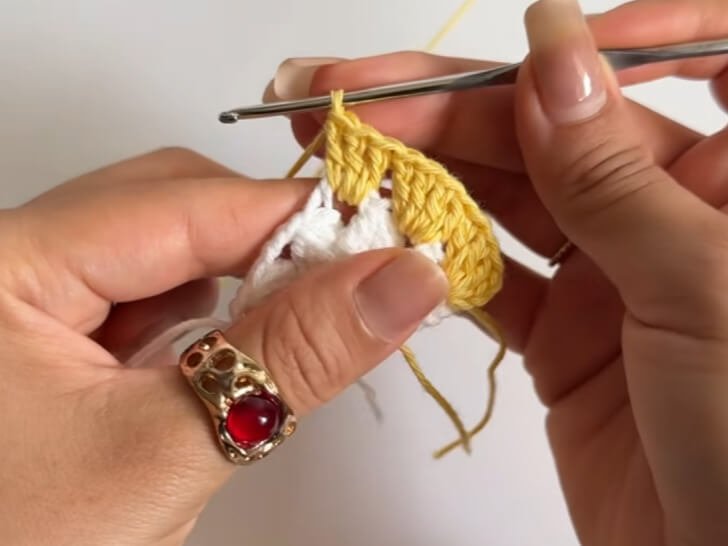
- R3: Attach Yellow yarn in any ch-3 space. Ch 3 (counts as dc), 2 dc in same space, ch 3, 3 dc in same space (Corner 1 made). 4 dc in next ch-3 space; (3 dc, ch 3, 3 dc) in next ch-3 space (Corner made). Repeat from * to * 2 more times, 4 dc in last ch-3 space. Join with sl st to top of starting ch-3. Fasten off and weave in ends. (4 corners, 4 side clusters of 4 dc)
Part 2: Daisy Half-Triangle (Make 5)
Start with Yellow yarn:
- R1: In MR, ch 1, 8 sc into ring. Pull tail tight. Sl st to first sc, changing to White yarn. Cut Yellow yarn. (8 sc)
Switch to White yarn:
- R2: Ch 4, ch 1 for space. Work 4-tc cluster in next st, ch 3. Repeat from * to * 3 more times (4 petals total made). Ch 1, 1 dc in next st. Fasten off White yarn. (4 petals, 3 ch-3 spaces, 2 ch-1 end spaces)
Switch to Yellow yarn:
- R3: Attach Yellow yarn into 4th chain of starting ch-4. Ch 3 (counts as dc), 3 dc in ch-1 space. 4 dc in next space. In center space work corner: (3 dc, ch 3, 3 dc). 4 dc in next space, 3 dc in ch-1 space, 1 dc in top of last ch. Fasten off Yellow yarn.
Part 3: Assembly & Seaming
Layout Arrangement:
- Arrange the 10 squares into a triangular grid:
- Row 1 (Top): 4 squares
- Row 2: 3 squares
- Row 3: 2 squares
- Row 4 (Bottom Point): 1 square
- Place the 5 half-triangles along the top diagonal edges to flatten out the top line of the bandana scarf.
Seaming Instructions:
- Place motifs wrong sides facing outward.
- Thread a tapestry needle with Yellow yarn.
- Insert needle into the middle chain of corner space on both pieces. Tie a secure knot.
- Whip-stitch across the edge by picking up only the inner loops (back loop of front motif and front loop of back motif).
- Continue joining all 10 squares and 5 triangles according to the triangular layout. Fasten off and weave in all yarn ends.
Part 4: Edging, Straps & Finishing
Attach Yellow yarn to top corner of assembled bandana:
- R1 (DC Border): Ch 3 (counts as dc), work 1 dc into every available stitch and chain space around the entire perimeter of the bandana. Work (2 dc, ch 2, 2 dc) in the bottom tip corner space. Sl st to top of starting ch-3 to join.
- R2 (SC Edging & Ties):
- Ch 1, sc in each dc across top edge until reaching the top left corner.
- First Tie: Ch 100. Sl st into 2nd chain from hook and into each chain across back to the corner.
- Sc in corner space, continue sc in each dc along sides down to the bottom point corner.
- In bottom tip ch-2 space, work (1 sc, ch 1, 1 sc) to maintain sharp point.
- Continue sc along second side to top right corner.
- Second Tie: Ch 100. Sl st into 2nd chain from hook and into each chain across back to corner.
- Sc into remaining top edge stitches, sl st to first sc to join. Fasten off yarn.
Detailed Pattern Breakdown
1. Daisy Motif Engineering (Square vs. Triangle)
- Square Geometry: Starts with a circular core of 8 single crochets. The 8 daisy petals emerge in Round 2 via 4-treble cluster stitches separated by chain spaces. Round 3 converts the circle into a square by designating alternating chain spaces as corners (3 dc, ch 3, 3 dc) and sides (4 dc).
- Triangle Geometry: Utilizes the exact same floral center technique but halts the petal expansion at 4 petals to create a 180-degree flat edge. The final round applies corner expansion at the apex while keeping the baseline straight with standard double crochets.
2. Triangular Grid Construction & Seaming Dynamics
- Layout Logic: By cascading motifs in a descending order (4-3-2-1), a stepped right-triangle base is established. The 5 half-triangles fill the stepped perimeter notches along the top diagonal line, yielding a clean, straight edge across the forehead.
- Back Loop Seaming: Joining motifs through inner loops prevents bulky ridge lines, keeping the underside smooth against hair while creating a flat join on the exterior.
3. Integrated Edging and Ties
- Perimeter Stabilization: A foundational round of double crochet unifies all motif edges, locking the seams in place and preventing stretch.
- Seamless Tie Construction: The final single crochet round flows directly into 100 foundation chains at each top corner, sl-stitching back down to produce durable, non-stretch straps without needing to cut or reattach yarn.
Pattern Question:
Question: Why are my half-triangles turning out wavy, and how do I prevent the top edge of the bandana from curling when worn?
Answer: Waviness in half-triangles usually happens when tension loosens on the edge double crochet stitches or when extra chains are added in Round 3.
Ensure your end dc stitches match the height of your starting chain-3. To prevent the top edge from curling, block all 10 squares and 5 triangles to exact size using steam or wet blocking before seaming them together. During the final edging round, maintain firm tension on the single crochet stitches along the flat forehead edge.