
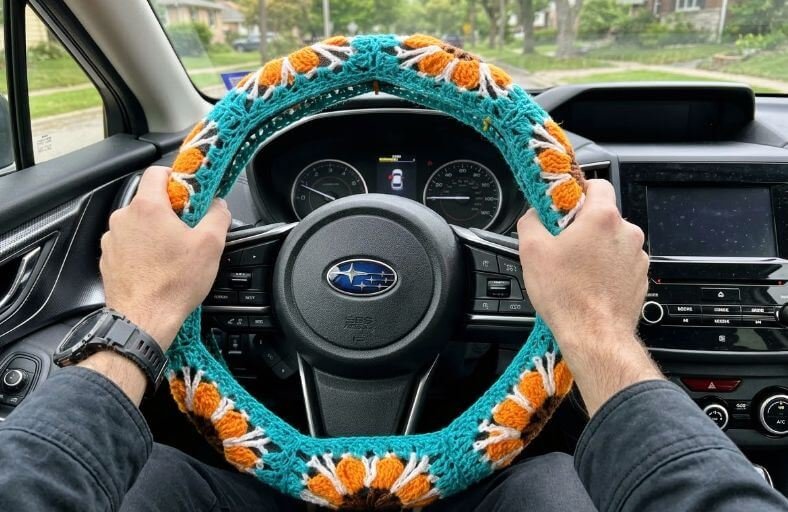
Ever looked at your plain, boring steering wheel and thought it deserved a bright, bohemian makeover? Bringing your handmade passion into your daily drive is easier than you think!
This gorgeous floral steering wheel cover combines classic granny-square assembly techniques with vibrant sunburst flower motifs.
By joining these colorful motifs and working soft edging around the borders, you will create a cozy, non-slip grip that turns every road trip into a cheerful retreat.
Materials and Preparation
Materials:
- Yarn: Medium weight yarn (4 colors recommended):
- Brown (Center of the flower)
- Orange (Petals)
- Cream/Off-White (Background framing)
- Teal/Turquoise (Outer granny square border & join)
- Stuffing: N/A (No stuffing required for this flat motif project)
Tools:
- Crochet Hook: Size 4.0 mm (US G/6) crochet hook.
- Yarn Needle: Tapestry needle for weaving in ends and securing the cover to the wheel spokes.
- Stitch Markers: Locking stitch markers for keeping track of rounds and alignment.
- Scissors: Sharp craft scissors.
Preparation Notes:
- Measure your steering wheel diameter before starting. Most standard wheels require 7 to 8 floral square motifs joined end-to-end to wrap completely around the circumference.
- Ensure consistent tension when crocheting your stitches so that the joined motifs fit snugly without sagging.
Abbreviations and Notes
Abbreviations:
- MR: Magic Ring
- ch: Chain
- sl st: Slip Stitch
- sc: Single Crochet
- hdc: Half Double Crochet
- dc: Double Crochet
- tr: Treble Crochet (Triple Crochet)
- cluster: 2 Double Crochet Cluster (2 dc worked together in the same space)
- inc: Increase (2 sc in the same stitch)
- dec: Decrease / sc2tog (2 sc worked together)
Pattern Notes:
- The motif centers and petals are worked in continuous rounds using Join-As-You-Go or seam-joining methods.
- Motif 1 is completed entirely in all 4 colors to serve as the master motif.
- Motifs 2 through 7 (or 8) are joined along one side while working Round 4 (Teal color).
- The finished strip is joined into a continuous ring before adding top and bottom edging rounds.
- Original pattern by Karen Valladares.
Gauge, Approximate Size, and Pattern Notes
Gauge:
1 floral motif square measures approximately 4.5 in x 4.5 in (11.5 cm x 11.5 cm) when using a 4.0 mm hook.
Finished Size:
- Inner Diameter: Approx. 14 in to 15 in (35.5 cm to 38 cm).
- Outer Circumference: Fits standard car steering wheels (approx. 44 in to 47 in / 112 cm to 119 cm around).
Special Techniques:
- 2-dc Cluster (Flower Center): Yarn over, insert hook in space, yarn over, pull up a loop, yarn over, pull through 2 loops (2 loops on hook). Yarn over, insert hook into same space, yarn over, pull up a loop, yarn over, pull through 2 loops (3 loops on hook). Yarn over, pull through all 3 loops.
- Join-As-You-Go (JAYG): Replace the ch-2 corner space with (ch 1, sl st into adjacent motif corner space, ch 1) and substitute sl st into corresponding spaces of the completed motif to join seamlessly.
Step-by-Step Pattern
Part 1: Full Flower Motif (Motif 1)
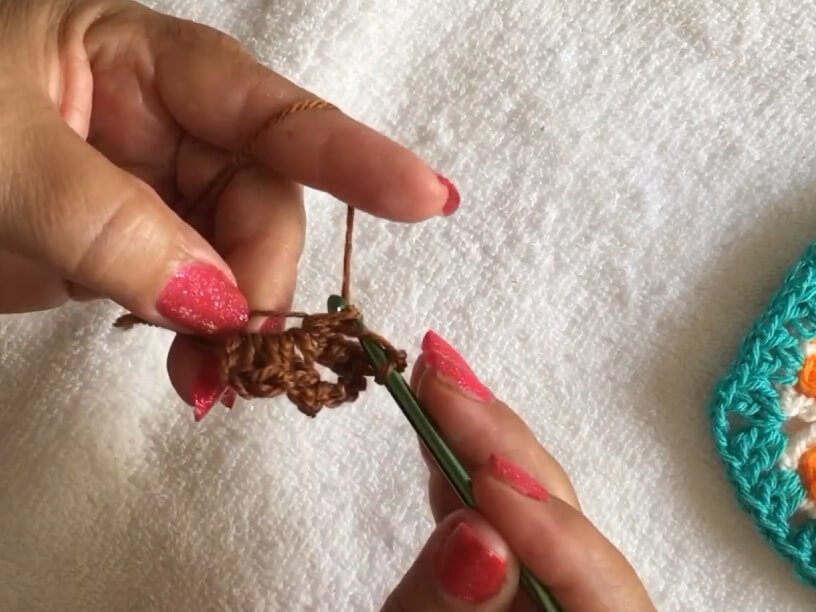
Start with Brown Yarn:
- R1: In a MR, ch 3 (counts as 1 dc), 1 dc, ch 3, (2-dc cluster, ch 3)*7. Sl st to top of starting ch-3 to join. Fasten off. (8 clusters, 8 ch-3 spaces)
Switch to Orange Yarn:
- R2: Join in any ch-3 space. (Ch 4, 3 tr, ch 4, sl st) into the same ch-3 space. Sl st into next ch-3 space, (ch 4, 3 tr, ch 4, sl st) into same space. Repeat from * to * 7 more times. Sl st to first st to join. Fasten off. (8 flower petals)
Switch to Cream/Off-White Yarn:
- R3: Join yarn in the space between any two petals. Ch 1, sl st between petals, ch 6, sl st into the center/top of next petal, ch 3, 1 tr into top of petal, ch 3, sl st into same petal top, ch 6. Repeat around to form 4 square framing loops. Sl st to join. Fasten off. (4 main corner framing loops)
Switch to Teal/Turquoise Yarn:
- R4: Join in any corner ch-space. Ch 3 (counts as dc), 1 dc, ch 2, 2 dc into same space (first corner created). *(2 dc in next space)*3, (2 dc, ch 2, 2 dc) in corner space. Repeat around to complete the square frame. Sl st to top of ch-3 to join. Fasten off. (4 corners, 12 side dc groups)
Part 2: Subsequent Motifs & Joining (Motifs 2 to 7)
Work R1 to R3 exactly as detailed in Part 1 for each new motif.
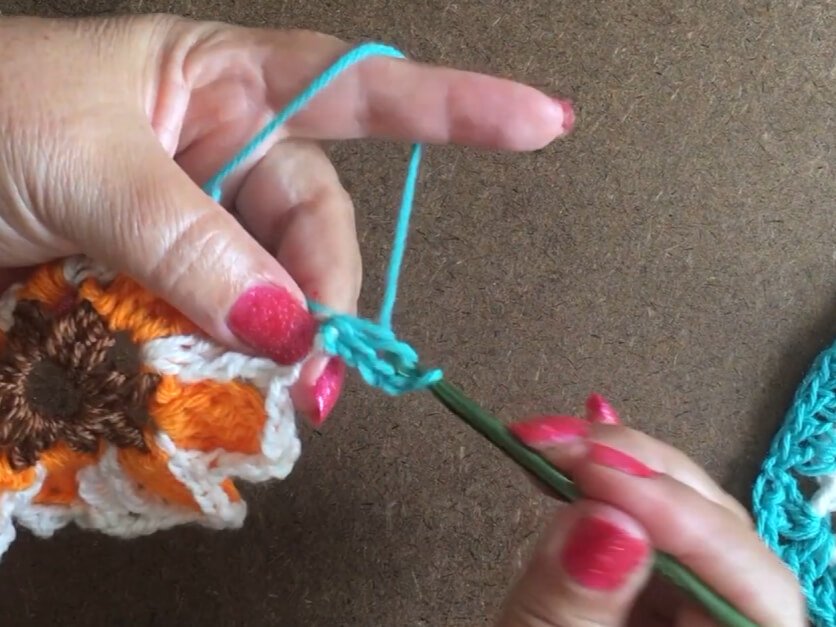
R4 (Joining Round using Teal Yarn):
- Work the first corner of Round 4 as normal: (2 dc, ch 2, 2 dc).
- Work side 2-dc groups up to the next corner.
- At the join corner: Work 2 dc into corner space, ch 1, sl st into corresponding corner space of Motif 1, ch 1, 2 dc into same corner space.
- Along the joining side: Replace standard side spaces by working sl st into corresponding spaces of Motif 1 between each 2-dc group.
- At the second join corner: Work 2 dc into corner space, ch 1, sl st into adjacent corner of Motif 1, ch 1, 2 dc into same space.
- Complete remaining unjoined sides of Round 4 normally. Sl st to join and fasten off.
- Repeat this process to join all 7 (or 8) motifs into a single continuous strip.
Part 3: Ring Assembly & Edging
Ring Closure:
- Bring the two open outer ends of Motif 1 and Motif 7 together, ensuring the right side of the work faces outward.
- With Teal yarn and a yarn needle, join the final open edge using sl st through the back loops only (or JAYG method) to form a seamless circular band.
Edging (Top & Bottom Borders):
Work on both inner and outer circular edges of the band:
- R1: Join Teal yarn in any stitch along the outer edge. Ch 1, work 1 sc into every stitch and space around the entire circular edge. Sl st to initial sc to join.
- R2: Ch 1, work 1 sc into each sc around to pull the edge slightly inward for a snug fit. Sl st to join, fasten off, and weave in ends.
- Repeat R1 & R2 on the opposite circular edge of the cover.
Part 4: Mounting onto Steering Wheel
- Stretch the completed floral cover evenly over your vehicle’s steering wheel.
- Align the floral square motifs neatly across the front facing section of the wheel rim.
- Thread a long piece of Teal yarn onto your tapestry needle.
- Secure the cover behind each steering wheel spoke by taking several firm anchoring stitches through both inner edges of the cover.
- Fasten off securely and hide all loose ends inside the crochet work.
Detailed Pattern Breakdown
1. Flower Center & Petal Construction:
- The core of each motif starts with an 8-cluster circle in rich brown yarn to establish a sturdy round foundation.
- The bright orange petals utilize tall treble crochet stitches flanked by ch-4 pillars, giving each petal a defined 3D shape while keeping the piece flexible.
2. Squaring the Circle & Color Transition:
- Transforming a round flower into a square motif requires varying stitch heights. Cream yarn is used to bridge the spaces between petals with chain loops and treble stitches.
- The final teal round wraps the flower into a crisp geometric square using 2-dc groups and ch-2 corners, making seamless joining straightforward.
3. Edging & Secure Vehicle Installation:
- Two rounds of sc edging along both sides of the band pull the fabric in slightly, allowing it to hug the curve of the wheel rim.
- Anchoring stitches around the main wheel spokes ensure the cover stays firmly positioned during driving.
Pattern Question:
Question: How do I ensure the steering wheel cover doesn’t slip while I am driving?
Answer: Slipping is prevented by two key factors: sizing and secure fastening. Make sure your finished band is slightly smaller than the outer circumference of your steering wheel so it has to stretch onto the rim.
Additionally, when mounting the cover, use a yarn needle and matching yarn to firmly stitch the inner edges together around each steering wheel spoke. This locks the cover in place so it stays securely positioned while you drive.