
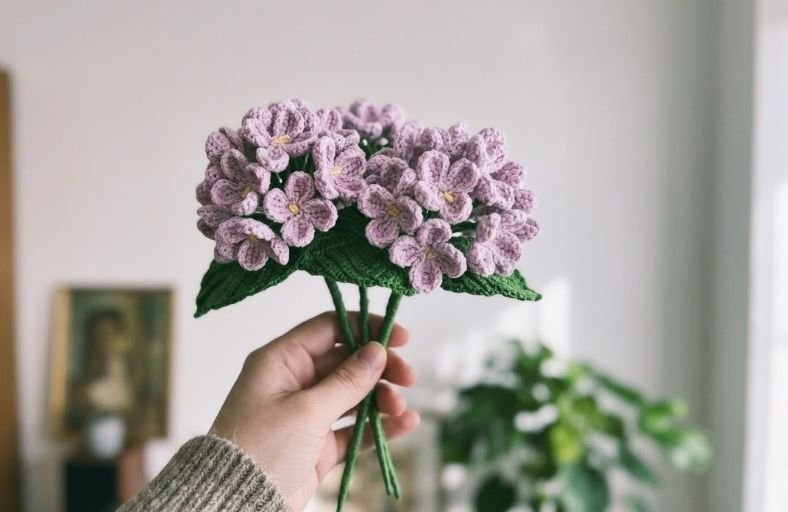
Looking for a floral project that never wilts and brings a burst of dreamy pastel elegance into your home?
Hydrangeas might seem like intricate, high maintenance blooms in the garden, but crafting them with yarn is pure joy.
By pairing classic stitches with the smooth, woven texture of Afghan crochet techniques, you can transform simple cotton yarn into lush, realistic flower clusters.
Grab your hook, cue up your favorite playlist, and let us bring these gorgeous blossoms to life, step by step!
Materials and Preparation
Materials:
- Yarn: 4-ply cotton yarn (Susan 4: Color #94 for light purple petals, Color #78 for green leaves, plus a small amount of yellow yarn for the flower pistils).
- Wire: 0.4 mm floral wire for individual flower stems (approx. 20 cm per flower) and 30 cm wire for the leaves.
- Main Stem: Thick floral stem for final assembly.
- Adhesive: Craft glue for securing the yellow pistil threads.
Tools:
- Crochet Hook: 2.5 mm crochet hook (US Size 4 equivalent). A hook with a slightly pointed tip works best for easily picking up vertical bars during Afghan crochet stitches.
- Yarn Needle: For weaving in ends.
- Stitch Markers: essential for marking loop strands during Tunisian/Afghan rounds.
- Scissors: For trimming yarn and wire ends.
Preparation Notes:
- You will need to make 12 to 13 individual small flowers to form one full, plump hydrangea head.
- Afghan/Tunisian stitches tend to hold tension tightly. Keep your loop pickups relaxed so it remains easy to slide the hook through the back bars.
Abbreviations and Notes
Abbreviations:
- MR: Magic Ring
- ch: Chain
- sc: Single Crochet
- hdc: Half Double Crochet
- hdc inc: Half Double Crochet Increase (2 hdc in the same stitch)
- sl st: Slip Stitch
- BLO: Back Loop Only
- unfinished sc: Unfinished Single Crochet (Insert hook, yarn over, pull up a loop, and leave it on hook)
- pull over: Yarn over and pull through two loops at a time to complete an Afghan row
Pattern Notes:
- Each small flower consists of 4 individual petals worked directly onto a 4-sc Magic Ring base.
- The petals utilize Tunisian/Afghan style row progression where loops are gathered on the hook and worked off in pairs.
- The leaves incorporate structural floral wire worked directly into the foundation chains and edging for full poseability.
Gauge, Approximate Size, and Pattern Notes
Gauge:
Gauge is not critical for this project, but consistent tight tension ensures sturdy petals and crisp leaf ridging.
Finished Size:
- Single Flower: Approx. 1.2 in to 1.5 in (3 cm to 4 cm) in diameter.
- Full Hydrangea Cluster: Approx. 5.5 in to 6.3 in (14 cm to 16 cm) wide when 12–13 stems are assembled together.
Special Techniques:
- Afghan / Tunisian Loop Pickup: Picking up loops through the vertical bars and rear bumps of chain stitches to build dense, realistic petal texture.
- Wired Edge Crochet: Encasing floral wire under single crochet stitches along the perimeter of the leaves to make them fully shapeable.
Step-by-Step Pattern
Part 1: Individual Hydrangea Flower (Make 12–13)
Base Ring:
- R1: MR, ch 1 (does not count as stitch), 4 sc into ring. Pull tightly to close. Sl st in first sc (4 sc base).
Petal 1 (Worked on 1st stitch of base):
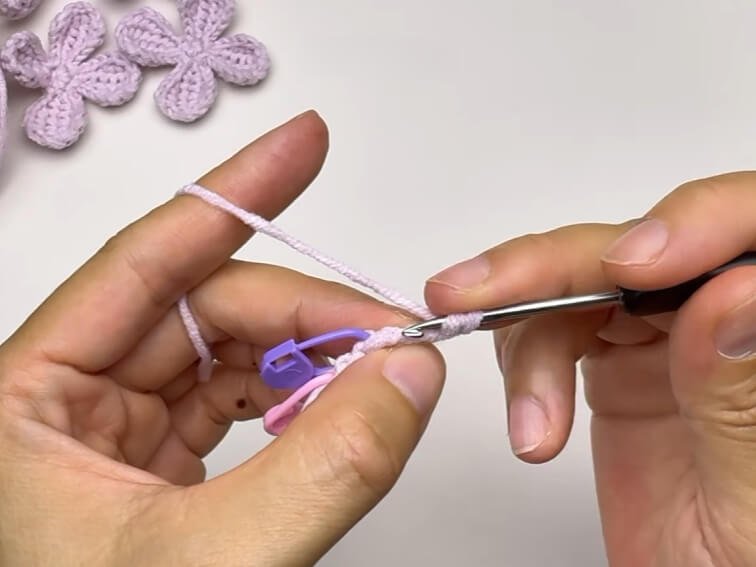
- Place a stitch marker on your yarn strand, ch 5.
- Row 1: Insert hook into rear bump of second ch from hook, pick up 3 unfinished sc. Place a marker on working strand, pull over (yarn over, pull through 2 loops) until 1 loop remains on hook.
- Row 2: Ch 1. Pick up unfinished sc from 1st vertical bar, 2nd vertical bar, 3rd vertical bar, 4th bar (from marked strand), 5th vertical bar, and 6th bar (from marked space) (6 loops on hook). Place marker on strand, pull over 2 loops at a time.
- Row 3: Pick up 6 unfinished sc from vertical bars and marked space (6 unfinished sc). Insert hook into the same base sc stitch, sl st. Pull over loops 2 at a time.
- Row 4: Skip 1st vertical bar, pick up 3 unfinished sc from 2nd, 3rd, and 4th vertical bars. Pull over.
- Row 5: Skip 1st vertical bar, 1 sl st into 2nd vertical bar, 1 sl st in back strand, 1 sl st in 3rd bar, 1 sl st in back strand. Sl st back into the same base sc stitch to finish Petal 1.
Petals 2–4:
- Sl st into the next base stitch and repeat the petal sequence for remaining 3 base stitches (4 petals in total). Fasten off and weave in ends.
Part 2: Hydrangea Leaf (Make 3)
Foundation & Stem Spine:
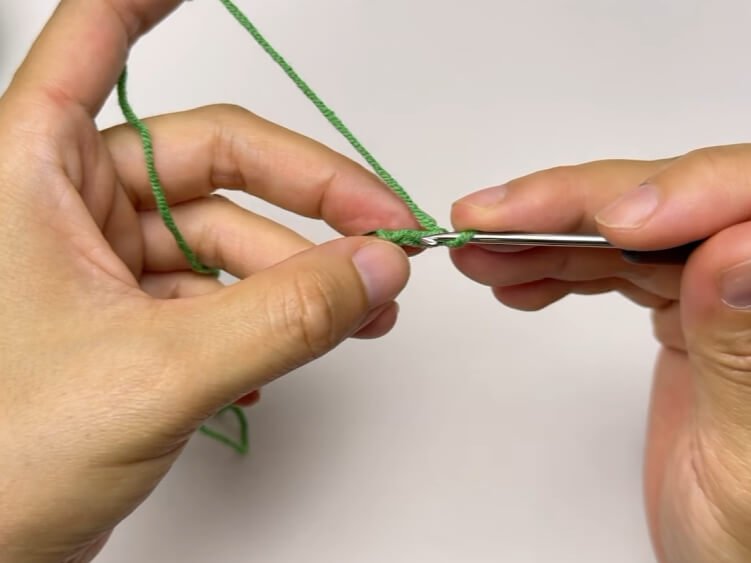
- With green yarn, ch 21 (do not count slip knot). Lay 30 cm floral wire along the chain.
- Ch 3, then 2 sl st starting from 2nd ch from hook.
Leaf Body:
- Row 1: 2 sc over wire, 5 hdc over wire, 3 sc over wire.
- Row 2: Turn work, skip 1st st, 7 sc, 1 sl st, ch 2, turn.
- Row 3: Skip 1st st, 1 sc, 2 hdc, 1 hdc inc, 3 hdc. To return to center chain: 2 hdc into side bars, 3 sc along main chain over wire.
- Row 4: Turn, skip 1st st, 9 sc, 1 sl st, ch 2, turn.
- Row 5: Skip 1st st, 1 sc, 2 hdc, 1 hdc inc, 5 hdc. Connect to side: 2 hdc into side bars, 3 sc along main chain over wire.
- Row 6: Turn, skip 1st st, 11 sc, 1 sl st, ch 2, turn.
- Row 7: Skip 1st st, 1 sc, 2 hdc, 1 hdc inc, 7 hdc. Connect to side: 2 hdc into side bars, 2 sc along main chain.
- Row 8: Turn, skip 1st st, 11 sc, 1 sl st, ch 1, turn.
- Row 9: Skip 1st st, 1 sc, 2 hdc, 1 hdc inc, 7 hdc. Connect to side: 2 hdc into side bars, 2 sc along main chain.
- Row 10: Turn, skip 1st st, 11 sc, 1 sl st, ch 1, turn.
- Row 11: Skip 1st st, 2 sc, 1 hdc, 1 hdc inc, 4 hdc, 3 sc. Connect to side: 2 sc into side bars, 1 sc into last base chain.
Symmetrical Second Side:
- Sl st into first base space, ch 1, 1 sc in same space.
- Work 19 sc in total along the opposite side of central foundation chain.
- Repeat steps corresponding to Rows 4–11 to mirror the serrated leaf edge symmetrically. Fasten off leaving yarn tail to wrap wire stem.
Part 3: Pistil & Individual Flower Assembly
- Cut a 20 cm piece of 0.4 mm floral wire for each flower.
- Apply a small dab of craft glue to the center of the wire, wrap yellow yarn around it to form a tiny pistil node.
- Thread the wire down through the center Magic Ring of a flower head.
- Wrap green yarn around the bottom stem wire securely down to the end.
Part 4: Final Stem Assembly
- Gather all 12–13 wrapped flower stems together.
- Starting from the central flower, arrange surrounding flowers evenly outward to form a smooth, rounded dome shape.
- Bind the flower stems together tightly using green yarn.
- Insert the thick main floral stem into the middle of the bundle.
- Place the 3 crocheted leaves below the flower head, evenly spaced around the stem.
- Wrap green yarn firmly around the entire stem assembly all the way to the bottom to conceal all wire ends and chot off securely.
Detailed Pattern Breakdown
1. Flower Petal Structural Mechanics
The hydrangea petals use an Afghan/Tunisian hybrid structure worked on a tiny 4 sc ring:
- Foundational Ring: Starting with a 4 sc Magic Ring isolates each of the 4 petals onto its own anchor stitch.
- Afghan Wedge Expansion: Starting with ch 5 and picking up loops through rear bumps establishes a solid row width. Subsequent rows use vertical bars to expand and taper the shape without creating loose gaps.
- Center Stitch Anchor: Working slip stitches directly into the base ring during intermediate rows grounds the petal’s 3D cupped shape so it holds its lifelike curve naturally.
2. Leaf Geometry & Serrated Edges
The leaf relies on incremental stepped rows to mimic natural hydrangea foliage:
- Central Wire Foundation: Enclosing 0.4 mm wire within the center chain allows the leaf spine to flex without distortion.
- Short-Row Stepping: Rows do not traverse the full length every pass. Skipping the initial stitch and working sl st followed by ch 2 or ch 1 creates distinct jagged points along the leaf margin.
- Two-Pass Symmetry: Completing one side fully before anchoring at the base and mirroring the short-row sequence along the opposing chain edge produces a balanced, sturdy leaf frame.
3. Stem Rigidity & Cluster Ergonomics
To achieve a full, natural bloom without droopiness:
- 0.4 mm Wire Gauge: Thin wire keeps individual blossom stems lightweight so the combined cluster stays upright.
- Layered Dome Assembly: Staggering flower stem positions while wrapping ensures an even, rounded head rather than a flat disc.
- Integrated Main Wire: Anchoring a heavy central floral stem inside the bundled individual wires provides necessary structural support for vase arrangements.
Pattern Question:
Question: Why do my Afghan petal rows look loose or uneven, and how can I make picking up loops easier?
Answer: Uneven loops in Tunisian/Afghan crochet usually stem from pulling the working yarn too loosely when switching between rows, or using a standard inline hook with a blunt head.
For best results, use a hook with a slightly pointed tip to smoothly glide under the vertical bars and back chain bumps. Additionally, remember to keep your slip stitches neat and use stitch markers to keep track of loop pickup points so your petals remain uniform in size.
Question: How do I ensure my hydrangea cluster forms a perfectly round dome without gaps between flowers?
Answer: Start your assembly from one central flower head and arrange the remaining 11 to 12 flowers around it in concentric layers.
Pull each blossom stem gently so the petal edges just overlap, then bind the bundle tightly with green yarn as you work downward. Adding the main floral stem right in the center prevents the cluster from leaning to one side.
Question: Can I use a thicker wire for the individual flower stems if I do not have 0.4 mm wire?
Answer: It is best to stick with thin 0.4 mm wire for individual blossoms. Because you are bundling 12 to 13 stems together, using a thicker wire like 1.0 mm will make the main stem excessively bulky and difficult to wrap neatly with yarn. Thin wire provides plenty of support while keeping the overall assembly lightweight and manageable.