
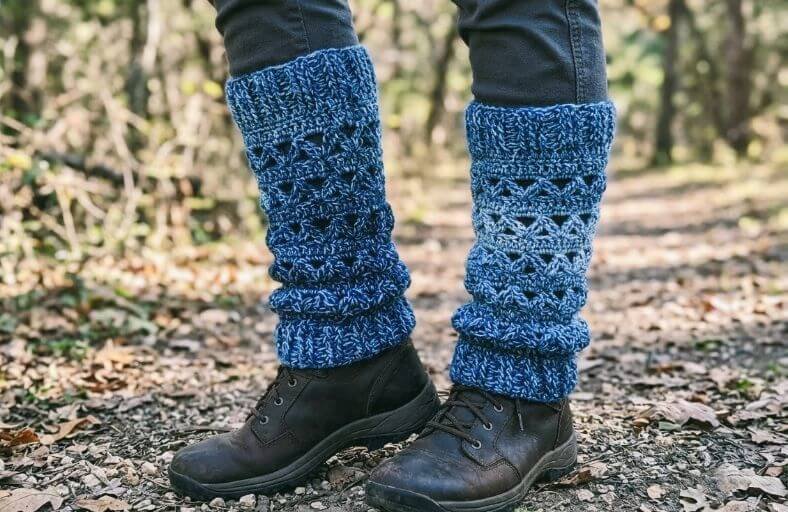
Ever caught yourself staring at a finished handmade piece and secretly wishing someone would ask, “Where did you get that?” so you could proudly declare, “I made it!”?
If you are craving that instant boost of craft pride alongside cozy warmth, these Super Easy Zig Zag Stitch Crochet Leg Warmers are about to become your favorite project.
Featuring a gorgeous texture formed by airy V-shaped chevron peaks and rich ribbed borders, this design strikes the perfect balance between relaxed boho style and chic winter functionality.
Materials and Preparation
Materials:
- Yarn: Lion Brand Mandala Ombre (100% Acrylic, Medium #4 worsted weight yarn, approx. 344 yds / 315 m per 5.3 oz / 150 g skein). 1 skein is sufficient for a full pair.
- Stuffing: N/A (Wearable garment project).
Tools:
- Crochet Hook: Size J-10 / 6.0 mm crochet hook (or size needed to obtain gauge).
- Yarn Needle: Tapestry / yarn needle for weaving in loose yarn ends.
- Stitch Marker: Optional, for keeping track of initial rounds.
- Scissors: Craft scissors.
Preparation Notes:
- Familiarize yourself with basic stitches such as single crochet (
sc), double crochet (dc), and treble/triple crochet (tr). - You will also use Post Stitches (Front Post Double Crochet
fpdcand Back Post Double Crochetbpdc) for standard stretchy ribbing. - Take note that the top ribbing pattern uses a 3
fpdcto 1bpdcrepeat, whereas the bottom cuff uses a 2fpdcto 1bpdcrepeat. This subtle shift caters to calf shaping while allowing easy identification of top vs. bottom!
Abbreviations and Notes
Abbreviations:
- ch: Chain stitch
- sl st: Slip stitch
- sc: Single crochet
- dc: Double crochet
- tr: Treble crochet (Triple crochet)
- inc: Single crochet increase (2 sc in the same stitch)
- fpdc: Front post double crochet
- bpdc: Back post double crochet
- tr4tog: Treble crochet 4 together (Special cluster stitch used in the zig-zag motif)
- ch-space: Chain space
- st(s): Stitch(es)
- rnd(s): Round(s)
Pattern Notes:
- Chain 2 at start of rounds: The
ch 2at the beginning of double crochet rounds does not count as a stitch. It serves as a turning/raising chain to eliminate visible gaps when joining. - Chain 4 at start of zig-zag rounds: The
ch 4counts as the first incomplete treble stitch of your initial cluster. - Joining: Join each round with a slip stitch (
sl st) into the top of the first actual stitch (not into the turning chain), unless specified otherwise. - Symmetry Note: Self-striping gradient yarns like Lion Brand Mandala Ombre will naturally shift shades differently for each leg warmer, yielding a stylish, handcrafted, sister-not-twin pair!
Gauge, Approximate Size, and Pattern Notes
Gauge:
- 14 sts and 7 rows = 4 inches (10 cm) in standard
dcstitch using a 6.0 mm hook. - Note: Maintain an even, relaxed tension so the ankle and calf bands retain plenty of elasticity.
Finished Size:
- Length: Approx. 14–15 inches (35.5–38 cm).
- Ankle Cuff Width: Approx. 4.5 inches (11.5 cm) flat / 9 inches (23 cm) circumference un-stretched.
- Calf Cuff Width: Approx. 5.5 inches (14 cm) flat / 11 inches (28 cm) circumference un-stretched (stretches comfortably up to 15–16 inches / 38–40.5 cm).
Special Techniques:
- Post Stitch Ribbing: Insert hook from front to back around the post of the stitch for
fpdc, or back to front forbpdc, creating raised vertical ridges. - Incomplete Treble (Incomplete tr): Yarn over twice, insert hook into designated st, yarn over and pull up a loop, [yarn over, draw through 2 loops] twice, leaving the final loop on your hook.
- Zig Zag Cluster (tr4tog with ch-3 peak): Created by linking 2 incomplete trebles in an anchor stitch, skipping 3 stitches, and working 2 incomplete trebles into the next anchor stitch before pulling through all loops to form a unified chevron point.
Step-by-Step Pattern
(Make 2 identical leg warmers)
Part 1: Bottom Ankle Ribbing & Expansion
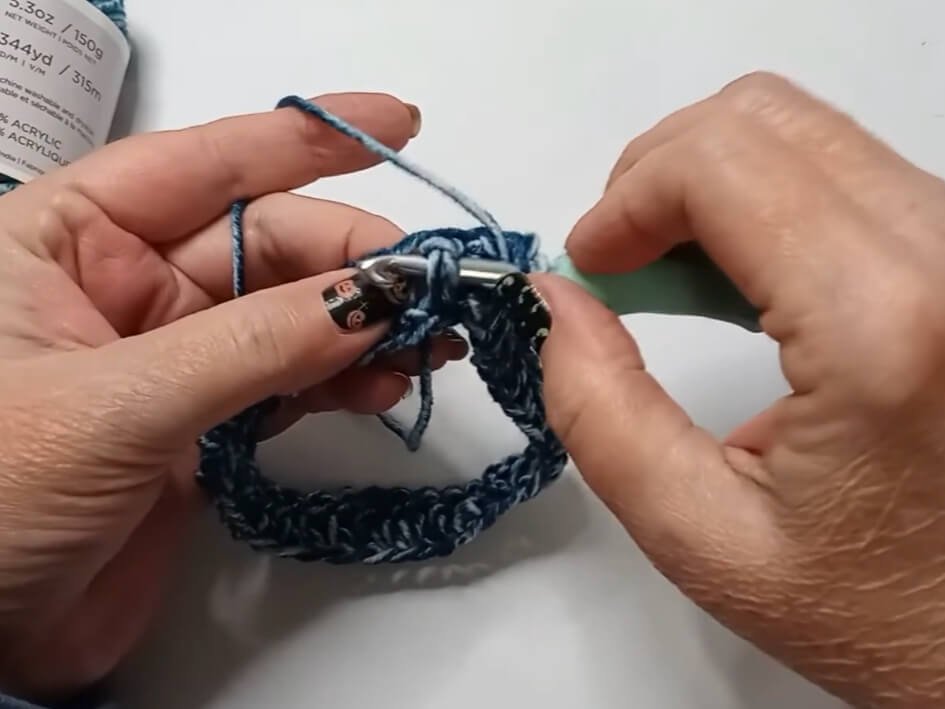
- Foundation: Ch 36. Taking care not to twist the chain, join to the first ch with a sl st to form a ring.
- Rnd 1: Ch 2 (does not count as st), 1 dc in each ch around. Join with sl st to first dc. (36 sts)
- Rnd 2: Ch 2, *2 fpdc, 1 bpdc; repeat from * around. Join with sl st to top of first fpdc. (36 sts)
- Rnd 3–5: Ch 2, *2 fpdc, 1 bpdc; repeat from * around. Join with sl st to top of first fpdc. (36 sts total for Rnds 2–5, 4 rounds of ribbing complete)
Calf Expansion Round:
- Rnd 6: Ch 1, sc in first 3 sts, inc in next st, [sc in next 4 sts, inc in next st], [sc in next 3 sts, inc in next st], [sc in next 4 sts, inc in next st], [sc in next 3 sts, inc in next st], [sc in next 4 sts, inc in next st], [sc in next 3 sts, inc in next st], [sc in next 4 sts, inc in next st]. Join with sl st to first sc. (Increased to 44 sts)
Part 2: Main Body Transition & Zig Zag Stitch Repeat
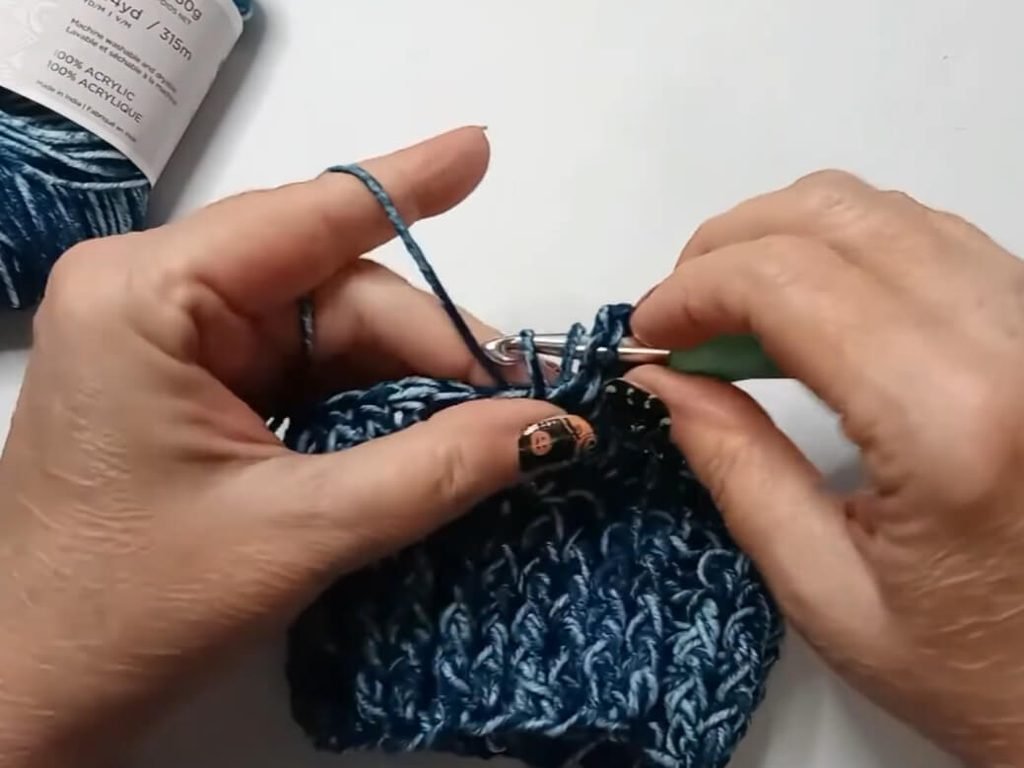
- Rnd 7 (Base DC Round): Ch 2, 1 dc in each st around. Join with sl st to first dc. (44 sts)
The 3-Round Pattern Repeat Sequence:
- Rnd 8 (Zig Zag Cluster Rnd):
- Ch 4, work 1 incomplete tr in same stitch as join (2 loops on hook).
- Skip 3 sts, work 2 incomplete tr in next st (4 loops on hook). Yarn over, pull through all 4 loops on hook to complete first half-peak.
- *Ch 3. Work 2 incomplete tr in same st as last cluster (3 loops on hook). Skip 3 sts, work 2 incomplete tr in next st (5 loops on hook). Yarn over, pull through all 5 loops on hook to complete peak; repeat from * around until final peak anchor is reached.
- For final peak: Ch 3, work 2 incomplete tr in same st (3 loops on hook), skip last 3 sts, work 2 incomplete tr into the base of starting ch-4 (5 loops on hook). Yarn over, pull through all 5 loops. Ch 3, sl st to top of first cluster.
- Rnd 9 (Sc Mesh Fill Rnd): Sl st into first ch-3 space. Ch 1, work 4 sc in each ch-3 space around. Join with sl st to first sc. (44 sts)
- Rnd 10 (Solid DC Rnd): Ch 2, 1 dc in each sc around. Join with sl st to first dc. (44 sts)
- Rnds 11–22: Repeat [Rnd 8, Rnd 9, and Rnd 10] 4 more times until you have a total of 6 Zig Zag rounds completed.
Part 3: Top Cuff Transition & Ribbing
- Rnd 23 (Sc Mesh Fill Rnd): Sl st into first ch-3 space of final zig-zag round. Ch 1, work 4 sc in each ch-3 space around. Join with sl st to first sc. (44 sts)
- Rnd 24 (Solid DC Rnd): Ch 2, 1 dc in each st around. Join with sl st to first dc. (44 sts)
- Rnd 25 (Separator Rnd): Ch 1, 1 sc in each st around. Join with sl st to first sc. (44 sts)
- Rnd 26 (Rib Base Rnd): Ch 2, 1 dc in each st around. Join with sl st to first dc. (44 sts)
Part 4: Top Ribbing & Assembly
- Rnd 27: Ch 2, *3 fpdc, 1 bpdc; repeat from * around. Join with sl st to top of first fpdc. (44 sts)
- Rnd 28–31: Ch 2, *3 fpdc, 1 bpdc; repeat from * around. Join with sl st to top of first fpdc. (44 sts total for Rnds 27–31, 5 rounds of top ribbing complete)
Finishing:
- Fasten off yarn, leaving a short tail.
- Using your yarn needle, weave in all loose ends securely on the inside of the work.
- Repeat all steps to create your second matching leg warmer.
Detailed Pattern Breakdown
1. Foundation & Lower Ankle Ribbing Mechanics:
- Base Ring Setup: Starting with
ch 36joined into a circle provides a snug fit around the lower ankle. - Ribbing Architecture: Rnds 2 through 5 utilize a
2 fpdc, 1 bpdcsequence. The double front post stitches create prominent raised vertical ridges that pop visually, while the single back post stitch acts as a hidden hinge, allowing the fabric to pull inward horizontally for a supportive, non-slip grip.
2. Anatomical Expansion & Geometric Mesh Structure:
- Calf Shaping Logic: Because human calves broaden significantly above the ankle, Rnd 6 introduces 8 strategic single crochet increases (expanding from 36 to 44 sts). Alternating between 3 sc / 4 sc intervals between increases ensures smooth, even expansion around the leg without warping the circle into an awkward octagon.
- Zig Zag Geometry (Tr4tog Clusters): Rnd 8 introduces the openwork motif. Each chevron “valley” spans across 3 skipped base stitches, anchored by 2 incomplete trebles on either side. Pulling 5 loops together on the hook binds the two sides into a sharp V-peak. The subsequent
ch 3bridges the gap to set up the apex of the next wave. - Structural Stabilization: Rnd 9 resets the foundation by filling every
ch-3peak with exactly 4 single crochets. This restores structural density and locks the total stitch count back at a clean 44 stitches before entering the next solid double crochet row.
3. Top Band Design & Distinction:
- Visual Separation Line: Rnd 25 uses a solitary single crochet round to form a distinct horizontal ridge separating the openwork body from the upper cuff.
- Asymmetric Ribbing (3 fpdc : 1 bpdc): The top cuff transitions to a
3 fpdc, 1 bpdcrhythm across the 44-stitch circumference. This wider ribbing pattern provides broader surface contact against the upper calf to prevent slouching, while simultaneously giving you a quick visual indicator to immediately tell top from bottom when slipping them on!
Pattern Question:
Question 1: Can I adjust the size of these leg warmers if I have wider calves or want to make a child-sized pair?
Answer: Absolutely! To alter the width, adjust your initial foundation chain in multiples of 3 for the bottom ribbing sequence. When transitioning to the calf expansion round, ensure your total stitch count increases to a multiple of 4, as the Zig Zag stitch repeat requires 4 stitches per chevron pattern.
Question 2: Why are my zig-zag peaks bending or pulling too tight?
Answer: Treble stitches are quite tall, so if your tension is naturally tight, the cluster peaks may pucker. Focus on lifting your hook slightly higher when drawing up the loops during the incomplete treble stitches (tr4tog), and avoid pulling the ch-3 peak bridges too tightly. Switching to a half-size larger hook for the zig-zag rounds can also resolve puckering seamlessly.
Question 3: Do I need to buy two separate skeins of yarn to match the color gradients on both leg warmers?
Answer: Not necessarily! A single 150 g skein of Lion Brand Mandala Ombre contains plenty of yardage (344 yards) to complete both leg warmers. However, self-striping yarns transition colors continuously. If you prefer exact color symmetry between left and right legs, pull yarn from matching color points in the skein (or work from two separate skeins started at the identical shade layer).