
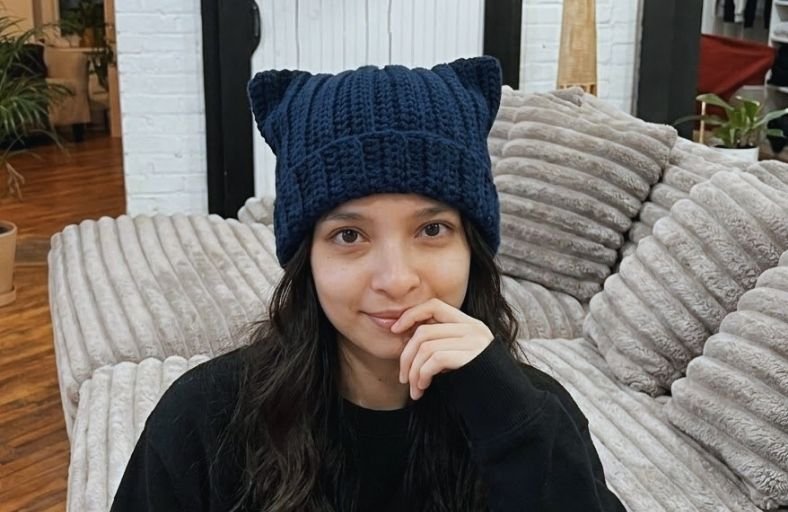
Ever wanted to channel your inner feline charm without spending hours navigating complex stitch patterns?
If you can chain and double crochet, you are already ninety percent of the way to crafting the absolute cutest cat ear beanie on the internet!
The secret to this magical hat is its clever geometric construction: by crocheting a simple ribbed rectangle and sewing the sides, the top corners naturally pop up into perky cat ears when you place it on your head.
Let’s grab your favorite yarn and turn a plain rectangle into your new favorite cozy accessory!
Materials and Preparation
Materials:
- Yarn: Cotton yarn or Acrylic yarn (DK or worsted weight). You can hold two strands together for extra warmth and structure, or use a single strand if using a thicker yarn (such as 4-ply or chunky yarn).
- Extra Yarn: Keep a long tail for sewing the seams during assembly.
Tools:
- Crochet Hook: 4.0 mm crochet hook (or size needed to meet your desired yarn thickness).
- Yarn Needle (Tapestry Needle): For seaming the sides together and weaving in loose ends.
- Scissors: Standard craft scissors.
- Stitch Markers or Measuring Tape: Optional, to help measure around your head and keep track of your rows.
Preparation Notes:
- Yarn Holding: If using thinner yarn, holding two strands together creates a sturdy texture that helps the cat ears stand upright without flopping.
- Sizing Customization: Because head sizes vary, the key to a perfect fit is wrapping your initial chain around your head before moving on. Make sure it feels comfortable and snug.
Abbreviations and Notes
Abbreviations:
- ch: Chain
- dc: Double Crochet
- BLO: Back Loop Only (working only into the back loop of the stitch)
- sl st: Slip Stitch
- st(s): Stitch(es)
Pattern Notes:
- The beanie is worked flat in back-and-forth rows to create a textured, ribbed rectangular fabric.
- Turning chains (
ch 2at the beginning of rows) do not count as a stitch. - Working exclusively in the Back Loop Only (BLO) creates a stretchy, ribbed texture that mimics knitted ribbing and gives the beanie its characteristic bounce.
- Original design and pattern credit belongs to Plakshi Jain.
Gauge, Approximate Size, and Pattern Notes
Gauge:
Gauge is not strictly critical for this project since the dimensions are customized directly to your head measurement. However, aim for a firm, springy tension so the ribbing holds its shape well.
Finished Size:
- Width (Flat Rectangular Fold): Approximately 9.5 to 10.5 inches (24 to 27 cm) when folded in half, designed to fit standard adult head circumferences of 21 to 23 inches (53 to 58 cm).
- Height: Approximately 8 to 9 inches (20 to 23 cm) before folding the brim.
Special Techniques:
- BLO Ribbing (Back Loop Only): Inserting your hook only under the back loop of each double crochet stitch creates a ridged, elastic texture.
- Square-to-Ear Transformation: No complex shaping, increases, or decreases are needed to form the ears. When the top edge of the folded rectangle rests flat against your head, the rigid corners naturally push upward into pointy cat ears!
Step-by-Step Pattern
Part 1: Foundation and Main Body Ribbing
Worked in flat back-and-forth rows:
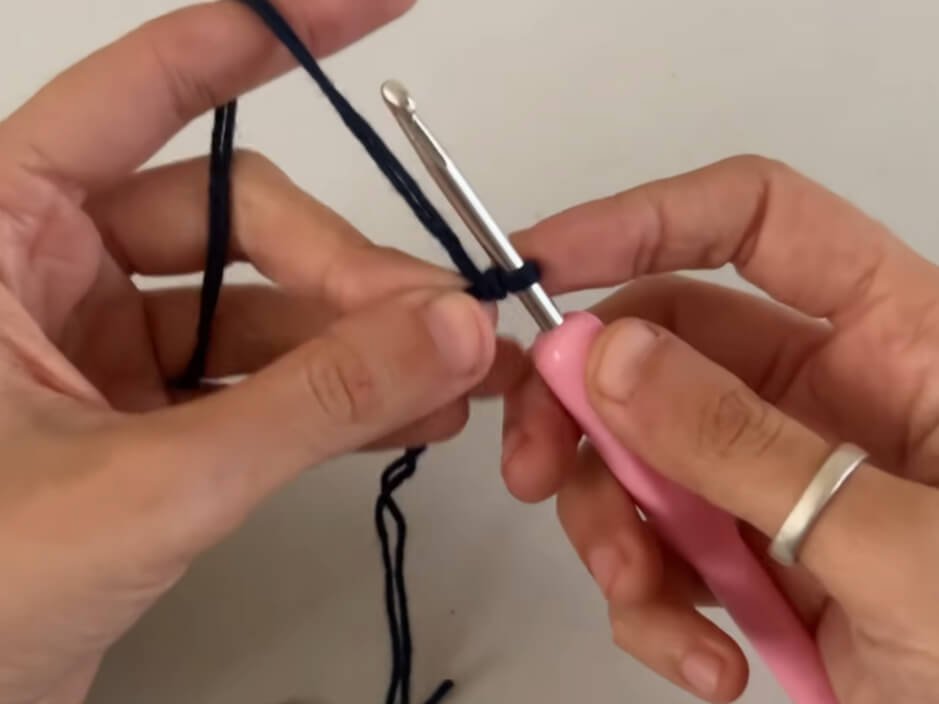
- Foundation Chain: Start with a slip knot (leave a 6 to 8 inch tail). Chain 79 (or any number of chains that comfortably wraps around your head circumference). Once satisfied with the length, add 2 extra chains (turning chains). Total foundation chain = 81.
- Row 1: Skip the first 2 chains from the hook. Work 1 dc in the 3rd chain from hook and in each chain across to the end. (79 sts)
- Row 2: Ch 2, turn your work. Work 1 dc in BLO of the very first stitch and in each stitch across to the end. (79 sts)
- Row 3: Ch 2, turn your work. Work 1 dc in BLO in every stitch across. (79 sts)
- Row 4 – Row 18: Repeat Row 3 continuously until your rectangular panel is wide enough. When folded in half widthwise, both ends should wrap around and meet comfortably across your head. (Note: You can adjust the total number of rows depending on your yarn weight and head size).
Fasten off yarn, leaving a long tail (approx. 20–24 inches) for seaming.
Part 2: Body Assembly & Seaming
Transforming the rectangular panel into a beanie:
- Fold Panel: Lay your ribbed rectangle flat and fold it in half so that the shorter sides align together.
- Seam Side 1: Thread your tapestry needle with the long yarn tail. Sew along the first side edge from top to bottom using a mattress stitch or whip stitch through both loops to secure the seam tightly. Tie a secure knot at the end and weave in the loose thread.
- Seam Side 2: Attach a new strand of yarn to the top corner of the second open side edge. Sew all the way down to the bottom edge. Knot securely and weave in the remaining tail.
- Keep Top Open/Closed: The top horizontal edge is formed naturally by the fold, leaving the bottom opening for your head!
Part 3: Finishing & Ear Shaping
- Brim Fold: Turn the beanie right side out. Fold up the bottom edge by about 1.5 to 2 inches (4 to 5 cm) to create a cute, cozy cuff.
- Shaping Cat Ears: Put the beanie on your head. Adjust the top straight edge so it sits flat against your crown. Pinch the top left and right corners slightly with your fingers to accent the points, and watch the cat ears instantly spring into shape!
Detailed Pattern Breakdown
1. Foundation Chain & Width Customization
- Logic & Structure: The length of your initial foundation chain determines the circumference of your beanie (the fit around your head). Starting with 79 chains provides an ideal, stretchy fit for most standard adult sizes. Adding 2 turning chains allows the first double crochet row to reach the correct height without puckering the edge.
2. BLO Double Crochet Ribbing Technique
- Logic & Structure: By working every single row in the Back Loop Only (BLO) with double crochet (
dc), you create deep vertical ridges. This structural ribbed pattern behaves like an accordion: it stretches horizontally to fit comfortably while retaining enough vertical tension to keep the hat snug and warm.
3. Rectangular Geometry for 3D Cat Ears
- Logic & Structure: Unlike traditional beanies that require crown decreases (
dec) to gather into a dome shape, this beanie relies on a simple box/rectangular geometry. When a flat 2D cylinder with a straight top edge is placed on a rounded 3D shape (your head), the excess fabric at the top corners gets pushed outward, naturally creating two triangular cat ears without any complex shaping!
Pattern Questions
Q1: My yarn is quite thin (DK weight). How can I make sure my cat ears stay perky and don’t flop over?
A: If you are using thinner yarn, holding two strands together while crocheting with your 4.0 mm hook will double the density of the fabric!
This creates a firmer structure that allows the top corners to stand upright on their own. Alternatively, you can use a smaller hook size to keep your stitches extra dense and tight.
Q2: How do I adjust this pattern for a child or a larger adult head size?
A: Customizing is super easy! Simply chain until the length wraps around the wearer’s head comfortably without stretching it too much, then add 2 extra chains for the turning chain. Continue working your BLO rows until the panel, when folded in half, comfortably covers the head from front to back.
Q3: Can I use single crochet or half double crochet instead of double crochet for this pattern?
A: Yes, absolutely! You can substitute double crochet (dc) with half double crochet (hdc) or single crochet (sc) worked in BLO. Keep in mind that using shorter stitches like sc will make the fabric slightly denser and require more rows to reach the desired size, but it will create an even firmer structure for the cat ears!