

Are cold winter toes threatening to ruin your holiday cheer? Say goodbye to freezing feet with these incredibly plush, ultra-cozy crochet slipper boots!
Featuring a rich, ribbed texture created using post stitches, this project allows you to fold the cuff down for a chic bootie style or pull it up high to keep your ankles extra warm.
Whether you are whipping up a pair as a thoughtful handmade Christmas gift or making a festive treatment for yourself, this step-by-step guide will help you craft the squishiest footwear ever.
Materials and Preparation
Materials:
- Yarn: Red Heart Super Saver (or any Worsted Weight / Medium #4 yarn) in bright Christmas Red.
- Stuffing: Not required for this project.
Tools:
- Crochet Hook: 5.0 mm (US H/8) crochet hook.
- Yarn Needle: Tapestry needle for sewing the heel closed and weaving in yarn ends.
- Stitch Markers: To mark your rows or rounds if needed.
- Scissors: Standard yarn scissors.
Preparation Notes:
- You should be familiar with basic crochet stitches along with post stitches such as Front Post Double Crochet (
fpdc) and Back Post Double Crochet (bpdc). - The post stitches used in this pattern are fully reversible, ensuring that the cuff looks equally neat whether folded down or worn up high.
- If you have wider feet or ankles, simple adjustments can be made as you go to customize the size.
Abbreviations and Notes
Abbreviations:
- MR: Magic Ring (or Magic Circle)
- ch: Chain
- sl st: Slip Stitch
- sc: Single Crochet
- dc: Double Crochet
- fpdc: Front Post Double Crochet
- bpdc: Back Post Double Crochet
- Stacked dc: Stacked Double Crochet (2 single crochets stacked on top of each other to replace ch-3 at the beginning of rows)
- st(s): Stitch(es)
Pattern Notes:
- Chain 1: The
ch 1at the beginning of rounds or rows does not count as a stitch throughout the pattern. - Invisible Join Trick: When working in rounds with
fpdc, wrap your hook around both thech 1and the post of the stitch below to conceal the joining seam completely. - Stacked Double Crochet: Used at the beginning of flat rows to keep the edges clean and straight.
- Original design and pattern credit belongs to Littlejohn’s Yarn.
Gauge, Approximate Size, and Pattern Notes
Gauge:
Gauge is flexible depending on yarn tension, but post stitches naturally yield a dense, stretchy fabric. Check fit against your foot around Round 14–17.
Finished Size:
- Small: US Women’s Shoe Size 6–7 (approx. 9.0 inches / 23.0 cm)
- Medium: US Women’s Shoe Size 8–9 (approx. 9.75 inches / 24.8 cm)
- Large: US Women’s Shoe Size 10–11 (approx. 10.5 inches / 26.7 cm)
Special Techniques:
- Front Post Double Crochet (fpdc): Yarn over, insert hook from front to back to front around the post of the designated stitch, push the post forward, yarn over and pull up a loop, complete double crochet.
- Back Post Double Crochet (bpdc): Yarn over, insert hook from back to front to back around the post of the designated stitch, push the post backward, yarn over and pull up a loop, complete double crochet.
- Seamless Join Technique: Inserting your hook behind both the initial
ch 1and the post of the first stitch hides the vertical seam while maintaining a continuous texture.
Step-by-Step Pattern
Part 1: Toe & Foot (Worked in Continuous Rounds)
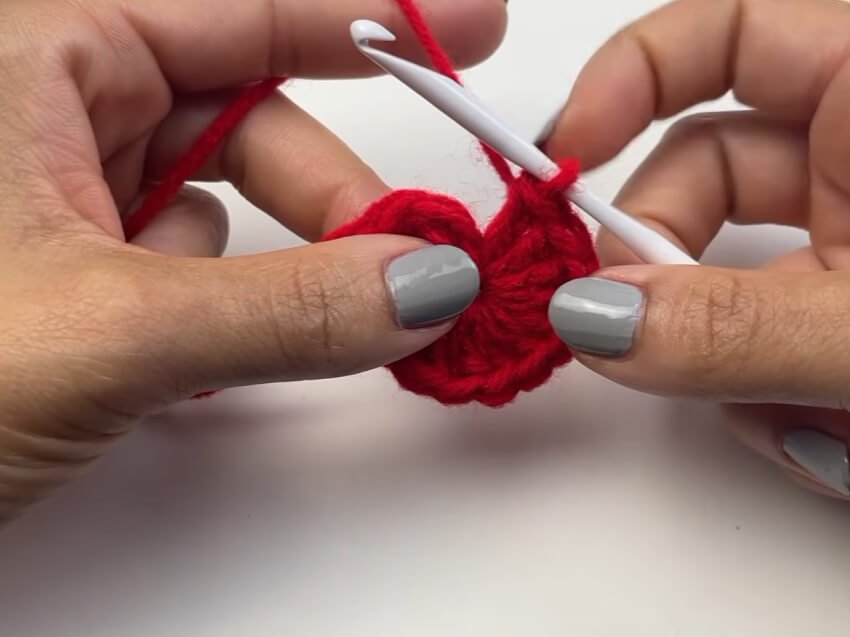
- R1: Form a MR, ch 1 (does not count as a st), work 14 dc into the ring. Pull center ring tight. Sl st into the first dc to join (14 sts). (Note: For wide feet, add 1 extra dc here to make 15 sts).
- R2: Ch 1, work 2 fpdc into each st around (wrapping around both the initial ch 1 and the post for the very first st to hide the seam) (28 sts). Sl st to join.
- R3: Ch 1, 1 fpdc in each st around (hiding the ch 1 in the first st) (28 sts). Sl st to join.
- R4–R14 (Small) / R15 (Medium) / R17 (Large): Repeat R3. (At this point, the tube should reach near the front of your ankle).

Part 2: Heel Expansion (Worked in Rows)
- Row 1: Ch 1, 1 fpdc in the next 21 sts. Leave remaining 7 sts unworked. Turn work (21 sts).
- Row 2: Do not ch 1. Work 1 Stacked dc into the first st, 1 bpdc in each st across until 1 st remains, 1 dc in the last st. Turn work (21 sts).
- Row 3: Do not ch 1. Work 1 Stacked dc into the first st, 1 fpdc in each st across until 1 st remains, 1 dc in the last st. Turn work (21 sts).
- Row 4: Repeat Row 2 (21 bpdc/dc sts).
- Row 5: Repeat Row 3 (21 fpdc/dc sts).
- Row 6: Repeat Row 2 (21 bpdc/dc sts).
- Row 7: Repeat Row 3 (21 fpdc/dc sts). (Add extra rows here if a longer heel fit is required).
Part 3: Ankle & Cuff (Worked in Rounds)
Detail 1: Heel Assembly & Ankle Base
- Fasten off yarn leaving a tail, turn slipper inside out, and whip-stitch the back heel edges together to close the heel. Turn right side out.
- Reattach yarn at the center back seam of the heel.
- Ankle Round 1: Ch 1, place dc evenly along the sides of the heel rows (approx. 2 dc into the side of each row space). When reaching the instep corner gap, yarn over, insert hook into side space and pick up half of the previous post stitch to close the gap, complete dc. Work 1 fpdc across each of the front unworked sts. Repeat gap-closing dc trick on the opposite corner, then work remaining dc evenly along the other side of the heel back. Sl st to join into the first dc.
Detail 2: Ribbed Leg Cuff
- Round 2: Ch 1, work 1 fpdc into each st around (wrapping around the ch 1 and post stitch on the first st to hide the join). Sl st to join.
- Round 3–15: Repeat Round 2 for 14 total cuff rounds (or until the cuff reaches your desired height).
Part 4: Edging, Assembly & Finishing
- Fasten off and weave in all loose yarn ends securely using a tapestry needle.
- Fold the top ribbed cuff downward to create a classic bootie look, or leave it extended straight up for extra ankle warmth.
Detailed Pattern Breakdown
1. Toe and Foot Construction Breakdown:
- The slipper begins with a Magic Ring using standard double crochet stitches to form a smooth, rounded cap for the toes.
- Round 2 instantly transitions into post stitch geometry by working 2
fpdcinto every stitch. This doubles the stitch count from 14 to 28 while establishing the thick, raised vertical ridges. - By enclosing both the
ch 1turning chain and the post of the first stitch together inside the initialfpdc, the vertical seam is hidden seamlessly inside the texture.
2. Heel Pocket & Edge Alignment Breakdown:
- After working the foot tube, the project switches from continuous rounds to flat rows across 21 stitches, leaving an opening for the top of the foot.
- Instead of using turning chains (which often leave loose gaps), each row begins with a
Stacked dc(twoscworked vertically on top of one another) and ends with a standarddc. This keeps the side edges crisp and sturdy. - Alternating
bpdcon wrong-side rows andfpdcon right-side rows maintains the uniform ribbed appearance across the sides of the foot.
3. Ankle Bridge & Cuff Architecture Breakdown:
- Once the rear heel seam is whip-stitched, double crochets are worked along the raw row edges to establish the ankle opening.
- To prevent corner holes where the flat heel meets the front instep, a partial post pick-up technique is used to pull the corner stitches together snugly.
- Returning to working in the round with
fpdcbuilds an elastic, reversible cuff that retains its ribbed pattern whether folded over or worn upright.
Pattern Question:
Question: How do I prevent gaps at the corners where the heel meets the instep, and how can I adjust the sizing for wider feet or larger ankles?
Answer: To eliminate unsightly corner gaps, pick up half of the post stitch from the row below when making your transition double crochet stitch at the corner junction.
To accommodate a wider foot, add 1 extra dc into your initial Magic Ring (giving you 15 sts instead of 14). If your ankle is wider, simply decrease 1 less stitch or omit a post stitch along the top opening to allow extra stretch around the ankle area.