

Ever noticed how car cupholders seem to accumulate mysterious sticky rings and dust out of thin air?
Give your car console a stylish makeover with these squishy, textured Crochet Round Puff Car Coasters!
Not only are they ultra-absorbent and soft, but they also bring a cheerful pop of handmade charm to every commute.
Materials and Preparation
Materials:
- Yarn: Cotton or cotton blend yarn in vibrant shades (such as orange, bright yellow, or pure white).
- Darning Needle: A tapestry/darning needle to weave in ends seamlessly.
Tools:
- Crochet Hook: 2.5 mm hook.
- Scissors: Craft scissors for trimming ends.
- Stitch Marker: Optional, but useful for marking the start of each round.
Preparation Notes:
- Consistency in loop pulling height is essential for uniform puff stitches. Pull your loops up to equal height on each wrap to keep the surface level and plush.
- Work with an even tension so that your circular coaster lays flat without cupping or ruffling.
Abbreviations and Notes
Abbreviations:
- MR: Magic Ring
- ch: Chain
- sc: Single Crochet
- hdc: Half Double Crochet
- sl st / ss: Slip Stitch
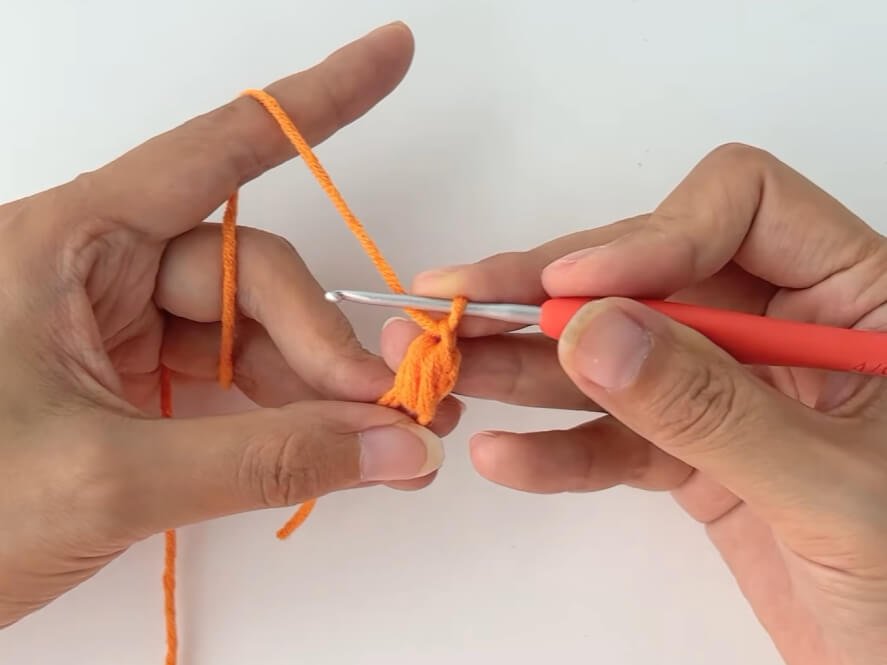
- Puff / 3 hdc Cluster Puff Stitch: Puff stitch made by working a cluster of 3 half double crochets into the same stitch
Pattern Notes:
- Round 1 through Round 4 are worked in continuous circular increases using 3-hdc puff stitches.
- Each main puff round begins with a ch 2 and finishes with a slip stitch into the top of the initial stitch, followed by an additional slip stitch into the next space to position your hook correctly for the upcoming round.
- Round 5 introduces a crab stitch / reverse single crochet edging that creates a polished decorative border around the perimeter.
Gauge, Approximate Size, and Pattern Notes
Gauge:
Gauge is flexible for this project, but aiming for tight, plush stitches ensures maximum absorption and structure.
Finished Size:
Approximately 2.75 inches to 3 inches (7 cm to 7.5 cm) in diameter, designed to fit standard car cup holders neatly.
Special Techniques:
- 3-hdc Cluster Puff Stitch: Yarn over, insert hook into designated stitch, yarn over and pull up a loop (3 loops on hook). Repeat twice more in the same stitch until you have 7 loops on your hook. Yarn over and pull through all 7 loops, then chain 1 to secure the puff.
- Reverse Direction Border (Crab Stitch): Working in reverse direction around the final round to yield a textured, braided edge finish.
Step-by-Step Pattern
Part 1: Coaster Center Core
Start with a magic ring using your chosen yarn color:
- R1: MR, ch 2, (3 hdc Cluster Puff Stitch) * 8 times, 1 sl st to join, then 1 sl st in the next st [8 puff stitches]
- R2: ch 2, (2 puff stitches in next st) * 8 times, 1 sl st to join, then 1 sl st in the next st [16 puff stitches]
Part 2: Coaster Outer Expansion
Expanding the circle flat with balanced increases:
- R3: ch 2, (1 puff stitch, 2 puff stitches in next st) * 8 times, 1 sl st to join, then 1 sl st in the next st [24 puff stitches]
- R4: ch 2, (2 puff stitches, 2 puff stitches in next st) * 8 times, 1 sl st to join, 1 ch [32 puff stitches]
Part 3: Textured Edging & Finishing
Edging:
- R5: Reverse direction and work 64 sc around the edge, 1 sl st to join [64 sts]
Finishing:
- Fasten off, cut the yarn tail, and use a darning needle to neatly weave in all remaining ends.
Detailed Pattern Breakdown
1. Central Puff Ring (R1–R2):
- Structure: Beginning inside a magic ring with 8 puff stitches provides a dense, gap-free foundation.
- Expansion: Doubling the count in Round 2 (2 puff stitches in every stitch) lays down a perfectly flat circular base while building plush 3D texture.
2. Diameter Shaping (R3–R4):
- Increases: Using standard geometric circular math, Round 3 follows a
(1 puff, 1 inc)sequence to reach 24 puff stitches. Round 4 uses a(2 puff, 1 inc)pattern to scale up to 32 puff stitches. - Texture: The soft ridges created by the clustered hdc loops form a cushioned pad ideal for resting cold drinks or hot coffee cups.
3. Decorative Reverse Edging (R5):
- Technique: Reversing direction for the final border locks the round in place and generates a neat, braided rim.
- Functionality: This raised rim helps catch condensation drips and gives the coaster an extra layer of stability inside deep cup holders.
Pattern Question:
Question: Why is my coaster curling up into a bowl shape instead of lying flat?
Answer: Cupping usually happens if the puff stitches are pulled too tightly or if an increase is missed during Rounds 2 to 4.
Make sure you pull all loops up to the full height of a half double crochet when forming each puff stitch, and double-check your stitch count at the end of every round (8, 16, 24, then 32 puff stitches).
If your tension is naturally tight, switching to a slightly larger hook (such as 3.0 mm) will instantly fix the issue!